

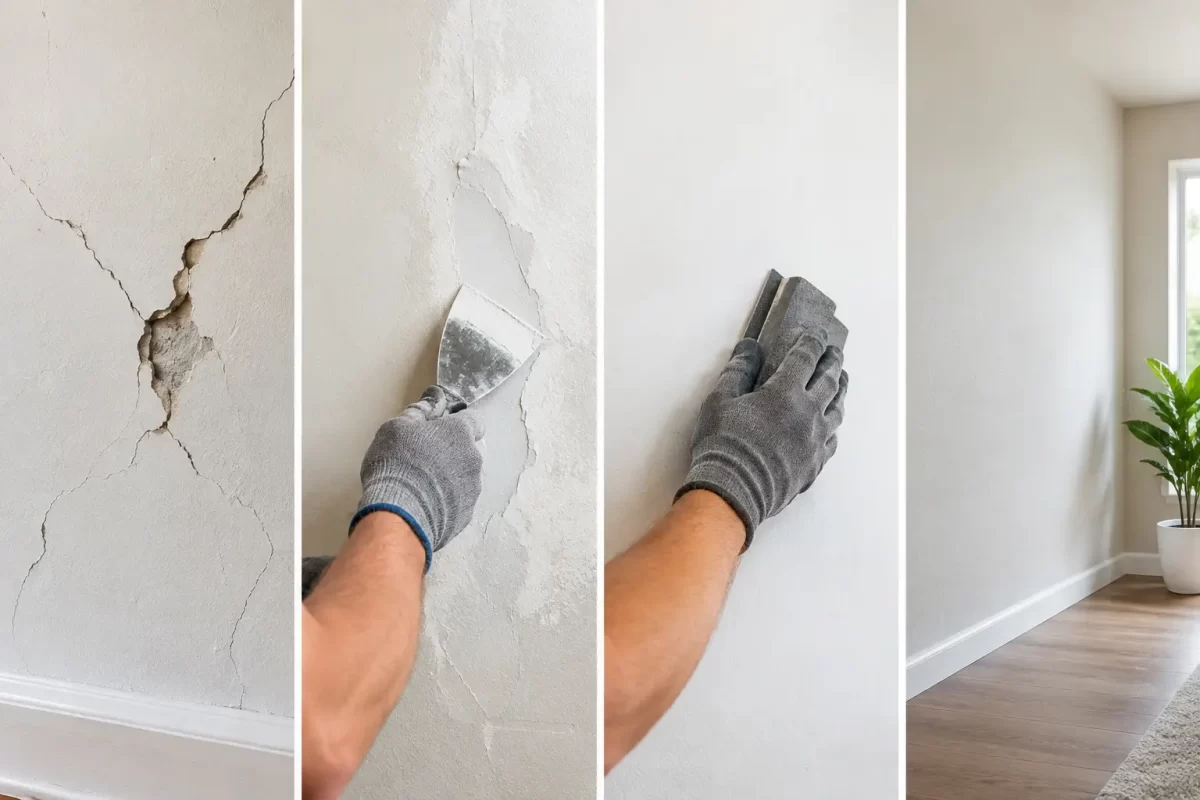
A wall can look like it needs nothing more than a fresh coat of paint, yet the paint often hides the real problem. This damaged wall restoration example shows why proper preparation matters: the difference between a repair that looks good for a few months and a finish that stays neat, smooth and durable.
A homeowner had a damaged internal living-room wall following minor water ingress around an external window. The immediate signs were familiar – bubbling paint, a brownish stain, a small section of softened plaster and several hairline cracks extending from the window reveal. The room was otherwise well maintained, so the repair needed to blend into the existing finish without creating an obvious patch.
Start with the cause, not the paint
Painting over water staining or loose plaster does not restore a wall. It only covers the evidence temporarily. Before any surface work began, the source of moisture needed to be resolved. In this case, the external window seal had been repaired and the wall was allowed adequate time to dry.
This step is essential. If moisture remains behind the surface, new paint can blister, stains can bleed back through, and freshly repaired plaster may fail. A qualified painter or plasterer can identify visible symptoms, but active leaks, plumbing issues or significant mould may require the appropriate specialist before restoration starts.
Not every damaged wall has a moisture issue. Settlement cracks, impact damage, failed old patching and worn paint each call for a slightly different approach. The right repair depends on what caused the damage, how much of the wall has been affected, and whether the wall is plasterboard, solid plaster, masonry or another surface.
Damaged wall restoration example: assessing the surface
Once the wall was dry, the damaged area was assessed by touch as well as sight. Paint that had lifted away from the wall was scraped back until the remaining edges were firmly bonded. The soft, compromised plaster beneath was removed rather than filled over.
This is where shortcuts often show up later. Filling over loose material may make the wall appear level on the day, but the weak layer underneath can move or detach. The repair should always be built on a sound, clean surface.
The hairline cracks were also checked. Fine, stable cracks can usually be opened slightly and repaired as part of the plastering process. Wider cracks, recurring movement or cracks around doors and windows may need further investigation. A good tradesman will be clear about the difference rather than treating every crack as a simple cosmetic issue.
Preparing a sound base for plaster repair
After loose paint and failed plaster were removed, the edges of the repair were feathered to avoid a hard ridge around the patch. Dust and residue were cleaned away so the new materials could adhere properly.
Any exposed plasterboard or porous substrate was sealed where required. This helps control suction and gives the repair compound an even base. Without this step, one area of the patch can dry differently from another, making it harder to achieve a consistent surface.
For the cracks, a suitable joint treatment was applied. Where movement or a larger opening warranted it, reinforcing tape was embedded to provide extra stability. This does not solve structural movement, but it gives a properly prepared, stable wall a much better chance of remaining smooth after finishing.
The damaged section was then rebuilt with plastering compound in controlled layers. Deep repairs should not be rushed into one heavy application. Several thinner coats allow the material to dry and cure correctly, reducing shrinkage and helping the finished surface sit flush with the surrounding wall.
Getting the wall flat, not just filled
A wall repair can be technically complete and still look poor under natural light. Windows, downlights and lamps cast shadows across the surface, making raised edges, shallow hollows and rough sanding marks easy to spot.
After each plaster coat dried, it was sanded and checked from different angles. Additional skim coats were used to feather the repair beyond the original damaged area. The goal was not simply to fill the hole or crack. It was to restore the plane of the wall so the eye could move across it without catching a change in texture or level.
This part takes patience. A small patch may need a wider finishing area than expected, especially on a long feature wall or a wall painted in a low-sheen finish. Matte and low-sheen paints are forgiving in some ways, but light travelling across them can still reveal uneven preparation.
Careful dust control also matters in occupied homes. Floors, furnishings and nearby areas should be protected before sanding begins, with the work area left tidy at the end of each stage. Restoration work should improve a home without creating an unnecessary clean-up job for the owner.
Priming to stop stains and patchiness
With the plaster repair smooth and dry, the wall was primed before painting. Primer is not an optional extra on a repaired surface. New plaster is more porous than an existing painted wall and can absorb paint differently, leading to dull patches known as flashing.
Because the original damage included water staining, a suitable stain-blocking primer was used over the affected area. This creates a barrier between the stain and the topcoat. The exact product and preparation method depend on the type of stain, the condition of the old coating and whether the surface has been fully dried.
Applying the right primer also improves adhesion and helps the final coats dry to a more even sheen. It is a small stage in the overall job, but one that has a major effect on how professional the finished wall looks.
Repainting for an even finish
For this restoration, the best result came from repainting the full wall rather than only the repaired section. Even when the original colour is known, older paint can fade or change slightly over time. A touch-up can be visible because of colour variation, sheen differences or the direction of roller application.
The surrounding surfaces were masked and protected, then the wall received two even finish coats. Maintaining a wet edge and using the right roller nap helped achieve a consistent texture across the wall. Once dry, the repaired area was no longer noticeable from normal viewing positions.
There are occasions when a small touch-up is appropriate, particularly if the paint is recent and the exact product is available. However, painting corner to corner is usually the safer option when presentation matters. In living rooms, entry areas, offices and rental properties, a complete wall repaint often provides better value than repeating spot repairs later.
What this restoration achieved
The completed wall had no visible staining, bubbling or rough patch edges. More importantly, the repair addressed the failed surface materials instead of hiding them. The room was ready for use with a clean, uniform finish that matched the standard of the rest of the home.
For Gold Coast and Tweed properties, moisture and humidity can add another layer of consideration, particularly around windows, wet areas and external walls. Allowing adequate drying time and using suitable preparation products is worth it. Fast work is not always good work when water damage has been involved.
When to call a professional
Small scuffs and picture-hook holes can often be handled with basic patching. It is wise to arrange professional advice when paint is peeling extensively, plaster feels soft, stains keep returning, cracks are growing, or the wall needs to blend into a high-visibility area.
Jag Painting Solutions can assess damaged internal surfaces, complete plaster repairs and repaint the area with care for your home or business. A clear quote should explain the required preparation as well as the painting, so you know what is being repaired and why.
If a wall is showing early signs of damage, deal with it before the affected area grows. A careful inspection and the right restoration process can protect the finish, reduce future repair work and make the room feel properly looked after again.


