Categories
Uncategorized

What Painting Contractor Reviews Should Tell You

A freshly painted room can look excellent on the day the painters leave. The real test is whether the finish is still clean, even and durable months later, and whether the process felt well managed from the first quote. That is why painting contractor reviews deserve more than a quick glance at a star rating.

For homeowners, renovators and business owners, reviews can reveal how a contractor works inside occupied homes, handles preparation, communicates around changes and stands behind the finished job. Read properly, they help you choose a painter with the skill and care your property deserves.

Why painting contractor reviews matter

Painting is a visible trade, but much of the quality sits beneath the final coat. Proper preparation, plaster repairs, protection of floors and furniture, and clean edges all affect the result. A review that only says “great job” is positive, but it does not tell you much about the work involved.

The most useful feedback describes the customer’s experience from beginning to end. Look for comments about arriving when promised, providing clear advice, keeping the site tidy and completing the agreed scope. These details are especially valuable when work is taking place around a family home, a renovation schedule or a trading business.

Reviews should not replace a written quote or a direct conversation. They are a useful starting point that helps you ask better questions before committing to a project.

Look for detail, not just a high rating

A five-star rating is encouraging, but the written comments usually carry more weight. Detailed reviews are harder to fake and more helpful because they explain what the contractor did well.

For example, a reviewer may mention careful preparation of weathered exterior timber, neat plastering before interior painting, assistance choosing a colour scheme, or protection of furniture and floors. These are signs that the client noticed the process as well as the finished appearance.

Pay attention when several customers independently mention the same strengths. If multiple reviews refer to clear communication, a tidy work area and a high-quality finish, that pattern is more meaningful than one glowing comment. The same applies to concerns. Repeated feedback about missed calls, unexpected delays or rushed work should prompt further questions.

Check whether the review matches your project

A painter who is well regarded for a small apartment repaint may also be capable of a large commercial project, but the review alone does not prove it. Look for feedback from clients with jobs similar to yours in size, condition and complexity.

If you are repainting a Queenslander or coastal home, exterior preparation and product selection matter. Reviews that mention attention to peeling paint, surface repairs and weather exposure are more relevant than general praise. For an interior renovation, comments about plaster repairs, dust control, sharp cutting-in and coordination with other trades can be more useful.

Commercial clients should look for references to planning, access requirements, working around staff or customers, and keeping disruption to a minimum. Every project has different pressures, so the best contractor is not simply the one with the most reviews. It is the one whose experience aligns with the work you need completed.

Separate workmanship from good manners

A friendly team is a genuine benefit, particularly when people are working in your home for several days. Still, friendliness alone is not the same as quality workmanship. Strong painting contractor reviews tend to mention both.

Workmanship comments often refer to thorough preparation, smooth finishes, neat lines, repaired imperfections and lasting results. Service comments may cover punctuality, courtesy, communication and respect for the property. You want both categories to be consistently positive.

Be cautious if reviews focus only on a contractor being “nice” or “cheap”, without any mention of the quality of the work. A low quote can be attractive, but it may not include the surface preparation, repair work or number of coats needed for a durable result. Value comes from a clear scope and a finish that holds up, not from the lowest initial figure.

Consider timing and consistency

Recent reviews are generally more relevant than comments from many years ago. Teams change, business processes evolve and the type of work a contractor takes on can shift over time. A healthy mix of recent reviews over several months or years is usually more reassuring than a sudden burst of comments in a short period.

That said, no business receives perfect feedback forever. One less favourable review does not automatically mean you should rule a contractor out. Read what happened, consider whether the issue was within the contractor’s control, and see whether there is a reasonable response. A practical, respectful reply can show accountability.

It also helps to compare the overall tone of reviews. Consistent comments from repeat clients and renovators can be a strong signal that the contractor delivers reliable work, not just a one-off good experience.

Notice how concerns are handled

Painting projects can uncover surprises. Old paint may fail during preparation, plaster damage may be worse than expected, or a requested colour may look different once applied to a large wall. Good contractors address these issues early and explain the options before extra work proceeds.

Reviews can show whether a painter communicates clearly when conditions change. Look for mentions of updated advice, transparent pricing or a willingness to return and address a genuine concern. Problems are not always avoidable, but poor communication usually is.

A contractor’s response to public feedback should be calm and professional. Defensive or dismissive replies may indicate how an issue could be handled if something goes wrong on your project. Respectful responses, on the other hand, suggest that customer satisfaction is taken seriously.

Use reviews to guide your quote discussion

Once you have shortlisted a contractor, use what you have read to shape the conversation. Ask how they prepare the surfaces in your property, what is included in the quote and how they protect floors, furniture, gardens or business equipment. If you need plastering or repairs before painting, make sure these items are clearly identified rather than assumed.

It is also worth discussing colour early. Colours can appear very different depending on natural light, existing finishes and the size of the area. A contractor who offers practical colour guidance can help prevent an expensive choice that feels wrong once it is on the wall.

Before accepting a quote, confirm the expected timeframe, access arrangements, paint products, payment schedule and process for variations. A professional quote does not need to be complicated, but it should give you confidence about what will happen and what the finished result includes.

What if a painting contractor has few reviews?

A smaller number of reviews is not necessarily a warning sign. A newer business, a contractor who gains most work through referrals, or a team focused on larger projects may simply have less online feedback. In that case, place more emphasis on the quality of the available reviews, the clarity of the quote and the contractor’s willingness to discuss previous work.

You can also ask for examples of comparable projects and relevant business details, including insurance and licences where required for the work. A reliable tradesperson should be comfortable answering straightforward questions about their process, experience and scope of service.

Make the final choice with the whole picture in mind

The right painter should make you feel confident before the first drop sheet is placed. Reviews can indicate whether clients felt listened to, whether their homes or workplaces were treated with care, and whether the finish met expectations. Your own interaction matters just as much.

Choose the contractor who communicates clearly, understands the condition and goals of your property, and provides a detailed quote that reflects the work required. For Gold Coast and Tweed property owners, Jag Painting Solutions takes that same practical approach, combining careful preparation, quality painting and respectful service.

A free quote is a useful next step when you have narrowed down your options. It gives you the chance to discuss your surfaces, colours and timing directly, then decide based on clear information rather than a star rating alone.

Categories
Uncategorized

Seal n Peel: When Temporary Surface Protection Works

A freshly painted room can be spoiled by one avoidable detail: overspray on glass, paint marks on aluminium frames, or a scratched surface caused by rushed clean-up. Seal n Peel is one option used to protect selected surfaces while nearby painting, rendering or renovation work is completed. Used correctly, it can save time and help preserve a clean, professional finish. Used in the wrong setting, it can create another job altogether.

For homeowners and property managers, the key question is not simply whether a peelable coating can be applied. It is whether it is the right protection method for the surface, the project timeframe and the condition of the area being worked on.

What is Seal n Peel used for?

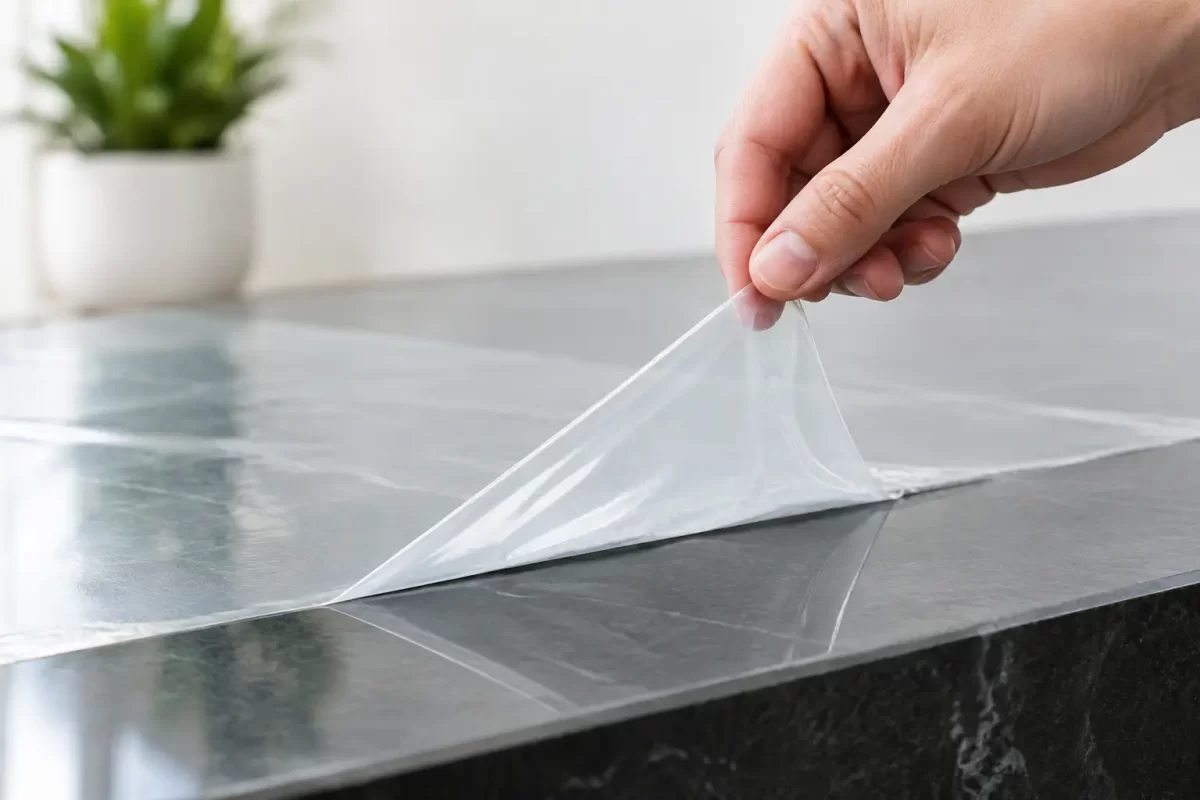
Seal n Peel generally refers to a temporary liquid surface-protection coating that dries into a removable film. It is commonly considered for smooth, non-porous surfaces that need shielding from paint splashes, dust, light overspray and day-to-day site mess during works.

Glass is a common example. On projects with large windows, glass doors or fixed panels, applying a removable protective film may be more practical than taping and papering every section, particularly where there is extensive spraying nearby. It may also be useful on certain finished metal, glazed tile or hard surfaces, provided the specific product is compatible with the material.

The important word is temporary. This type of coating is not a substitute for a permanent clear finish, a sealer, or a repair solution for damaged glazing and joinery. Its job is to protect a surface through a defined stage of work, then be removed cleanly at the right time.

When peelable protection makes sense

Temporary protection is most useful where careful masking would be slow, difficult or likely to shift during a larger painting job. It can help on commercial fit-outs, renovation sites and exterior projects where windows sit close to areas being sprayed.

It can also be a sensible choice where a surface needs protection for more than a few hours. Masking tape can lift, leave residue or lose its edge when exposed to heat, moisture and dust. A properly applied peelable film covers the full surface rather than relying on tape lines alone.

That said, it is not automatically the best approach for every property. Small windows, delicate surfaces and jobs involving only minor brush-and-roll work can often be protected more efficiently with quality tape, drop sheets and careful cutting-in. Good preparation is about choosing the method that gives the safest result, not using a product simply because it appears quicker.

Surface condition comes first

Before any temporary coating is applied, the surface needs to be clean, dry and sound. Dirt, salt residue, silicone, grease, adhesive marks and construction dust can affect how evenly a product lays down and how reliably it peels away.

This matters on the Gold Coast, where coastal air and humidity can add another layer of consideration. Glass and external frames may look clean while carrying salt film or airborne grime. Thorough cleaning and drying are not optional preparation steps. They are what help prevent patchy adhesion and difficult removal later.

Older windows also deserve extra care. Existing scratches, oxidised frames, deteriorated seals and cracked glass should be identified before work begins. A protective coating will not cause every pre-existing issue, but documenting surface condition upfront avoids confusion when the project is complete.

Applying Seal n Peel properly

Peelable protection performs best when application is planned around the full job, including removal. The manufacturer’s directions should always guide surface suitability, coverage rates, drying conditions and maximum time the film can remain in place.

A consistent coat is critical. If the coating is applied too thinly, it may tear into small pieces during removal rather than lifting as a manageable film. If it is applied unevenly, thin edges can be difficult to find and remove. A professional team will also keep the product off areas where it is not intended to sit, including seals, moving hardware, porous finishes and vulnerable edges.

Weather conditions matter, particularly outdoors. Heat can cause products to dry faster than expected, while humidity or rain can affect curing and site access. On exterior work, the painting schedule needs to account for the protection method rather than treating it as an afterthought.

There is also a practical access issue. If windows are being protected before spraying, painters still need a clear sequence for frames, reveals, walls and any areas that require brushwork. Protection should support an orderly job, not make finishing details harder to reach.

Do not leave it on too long

One of the most common mistakes with temporary coatings is assuming they can remain in place indefinitely. They cannot. Sun exposure, heat, dust build-up and time can change how a film behaves.

Removing the coating within the recommended timeframe is usually the safest approach. If a project is delayed, the team should assess the condition of the film rather than leaving it until the end of an extended renovation. Early attention is far easier than scraping at aged residue from a finished surface.

Removal should be deliberate, not rushed. The film is normally lifted from a suitable edge and peeled steadily. Any small remnants should be dealt with using an approved method for that surface. Blades, abrasive pads and harsh solvents can scratch glass, mark powder-coated aluminium or damage surrounding finishes if used carelessly.

Seal n Peel versus traditional masking

Neither approach wins every time. Traditional masking provides precise control around edges and is often the most efficient option for smaller areas, detailed trim and short jobs. It is familiar, economical and easy to remove when high-quality tape is used properly.

Seal n Peel-style protection can be beneficial on broad, smooth areas where full coverage is needed and spraying forms a significant part of the work. It may reduce the risk of paint specks reaching the glass and can simplify clean-up after larger applications.

The trade-off is preparation and timing. Peelable coatings require suitable conditions, enough product thickness and reliable removal planning. Masking requires more labour upfront and can be vulnerable to lifting, but it may be the lower-risk choice on sensitive or irregular surfaces.

For this reason, experienced painters assess the site before deciding. The right method depends on the surface material, the type of paint application, access, weather, the project duration and the quality standard expected at handover.

Protecting finishes is part of quality painting

A professional painting result is not only about the colour on the walls. It is also about the areas that remain untouched. Clean glass, tidy frames, protected floors and well-managed work zones make a real difference to how a renovation or commercial refresh feels when it is finished.

At Jag Painting Solutions, surface preparation and protection are considered alongside the paint system itself. Whether a job needs careful masking, drop-sheet protection or a temporary peelable film, the aim is the same: complete the work with respect for the property and leave the finished areas looking as they should.

If you are planning interior, exterior or commercial painting, raise any concerns about windows, joinery, tiles or other finished surfaces during the quoting stage. A clear protection plan before work begins gives everyone confidence and helps avoid unnecessary clean-up once the final coat is dry.

Categories
Uncategorized

Do Painters Move Furniture Before They Start?

A freshly painted room should not come at the cost of scratched floors, damaged furniture or a stressful day spent shifting heavy items. Homeowners often ask whether painters move furniture, and the honest answer is: usually, yes – within sensible limits and with clear expectations agreed before work begins.

A professional painting team understands that rooms need to be accessible before preparation and painting can start. That commonly means moving lighter furniture away from walls, grouping pieces in the centre of the room, and covering everything carefully. Large, fragile or high-value items can require a different plan. Clear communication before the job protects your belongings, keeps the work moving and helps deliver the clean finish you are paying for.

Do painters move furniture as part of the job?

Most professional painters will move ordinary, manageable furniture as part of preparing a room. Think dining chairs, small tables, lightweight lounges, bedside tables and freestanding shelving units. The goal is not to rearrange your home permanently. It is to create enough room to prepare surfaces properly, cut in neatly around ceilings and trims, and paint walls without brushing past furniture.

Once items are moved, they should be covered with clean drop sheets or plastic protection. Floors also need protecting, particularly timber, tile, carpet and recently installed finishes. Good preparation takes time, but it is where a tidy, professional job begins.

The exact arrangement depends on the room. In a smaller bedroom, furniture may be moved to the centre and covered. In a large living area, it may be more practical to move pieces into an adjoining room or garage if there is suitable space. Your painter should discuss this during the quote or before the first day on site, rather than making assumptions when the work is due to begin.

What painters can reasonably move

There is a practical limit to what should be moved by a painting crew. Heavy wardrobes, large wall units, pianos, safes, pool tables and built-in furniture are not standard items to shift during a painting project. They can be difficult to move safely, may require specialist equipment, and can damage floors or walls if handled incorrectly.

The same applies to furniture that is unusually delicate, antique, expensive or structurally unstable. A painter can protect these items in place where practical, but you may prefer to arrange removal yourself. If moving a heavy item is necessary to paint behind it, this should be raised before the work is booked so the scope, access and any extra help can be considered.

For commercial premises, the question can be more involved. Desks, filing cabinets, display units, stock and IT equipment may need to remain operational or be relocated in stages. A staged painting plan can reduce disruption, particularly for offices, shops and tenanted properties.

Items you should usually move yourself

Personal and fragile belongings are best removed before the painters arrive. This includes photos, artwork, lamps, ornaments, plants, electronics, loose shelving contents and valuables. Clearing these items gives the team a safer workspace and means there is less risk of accidental damage.

It is also wise to empty drawers, cabinets and bookcases that need to be shifted. Furniture is much easier and safer to move when it is not carrying extra weight. If you have sentimental or irreplaceable belongings, place them in a separate room that is not being painted or store them securely off site.

Why access matters to the finish

Moving furniture is not simply about making space. Proper access allows painters to inspect the wall condition, repair cracks and dents, sand patches smoothly, mask adjoining surfaces and apply an even coat from top to bottom. Trying to paint around a sofa pushed against a wall is a shortcut that can leave missed sections, uneven edges and marks on furnishings.

The same principle applies to exterior work. Pots, outdoor settings, barbecues and children’s play equipment may need to be moved away from walls, decks or fences. Painters need room for ladders, drop sheets and safe movement around the property. It is particularly important where exterior preparation involves washing, scraping or sanding.

A careful team will not treat your home like an empty worksite. They will plan how to protect the areas around the job, keep walkways as clear as possible and avoid unnecessary disruption. However, access remains a shared responsibility. The more prepared the space is, the more efficiently the painters can concentrate on surface preparation and quality application.

How to prepare before the painters arrive

A short preparation check can make the first day much smoother. Remove small items from the room, clear the tops of furniture, take down curtains if requested, and make sure there is a clear path from the entry to the work area. If pets are at home, arrange a safe, quiet area away from open doors, paint tins and equipment.

Let your painter know about any access issues in advance. Narrow staircases, apartment lifts, limited parking, difficult driveways and rooms with very heavy furniture can all affect the plan. On the Gold Coast and in Tweed, wet weather can also influence exterior work, so keeping outdoor furniture accessible and movable helps the team respond to suitable painting conditions.

Before work starts, ask where furniture will be placed, what coverings will be used and whether anything needs to be removed by you. These are reasonable questions. A dependable contractor will be clear about what is included, what needs special care and how the area will be left at the end of each day.

When furniture can stay in the room

Not every item has to leave. In many cases, large furniture can remain in the centre of the room under secure coverings while walls and ceilings are painted. This is often the best option when there is limited storage space or when moving an item would create more risk than protecting it in place.

There are trade-offs. Keeping furniture in the room can make the job slower, especially if every wall needs extensive repairs or if ceilings and cornices are being painted. It may also limit access behind larger pieces. Your painter may recommend moving selected items out of the room so there is no compromise on preparation or coverage.

For occupied homes, a room-by-room approach is often the least disruptive. You can continue using other parts of the house while the work progresses, rather than emptying the whole property at once. This approach needs good scheduling and a crew that keeps the site orderly.

Protection, clean-up and peace of mind

Furniture protection should be part of a broader site-care process. Drop sheets should be laid before preparation begins, furniture should be covered before painting starts, and tools and materials should be kept organised. At the end of the day, the work area should be left safe and reasonably tidy, particularly in a family home or active business.

Paint odour, drying times and access restrictions also deserve consideration. Water-based interior paints are commonly lower odour, but rooms may still need ventilation and time before furniture is returned to its usual position. Your painter can advise when surfaces are dry to touch and when they have cured enough for normal use.

At Jag Painting Solutions, the aim is to make the painting process feel straightforward, from discussing room access at the quote stage through to protecting your space and completing the final clean-up. If you are unsure whether a particular item can be moved or painted around, raise it early. A quick conversation before the job starts is the best way to protect your furniture and give your painters the space to produce a finish you will be pleased to live with.

Categories
Uncategorized

Best Rental Property Finishes That Last Longer

A rental does not need expensive finishes to look well cared for. It needs the best rental property finishes for the way people actually live: durable surfaces, sensible colours and details that can be cleaned, repaired and refreshed without turning every vacancy into a renovation project.

For Gold Coast and Tweed property owners, humidity, salt air in coastal areas and everyday tenant wear all need to be part of the decision. The right finish protects your asset, presents well at inspections and gives good tenants a home they are happy to look after.

Start with durability, not trends

A rental property should feel current, but it does not need to follow every interior trend. Highly specific colours, delicate surfaces and complicated feature treatments can date quickly or cost more to repair. A better approach is to create a clean, neutral base, then choose finishes that handle regular use.

Think about each room separately. A quiet bedroom needs a washable wall coating and practical flooring. A kitchen needs surfaces that cope with moisture, food splashes and frequent cleaning. Entry areas, hallways and living rooms need the greatest resistance to scuffs, marks and furniture movement.

The cheapest option is not always the most cost-effective. Lower-grade paint may require more frequent touch-ups, while poor plaster preparation can show through even after a fresh coat of paint. Spending appropriately on surface preparation and durable coatings usually reduces maintenance between tenancies.

Best rental property finishes for walls and ceilings

Paint has one of the biggest impacts on how a rental feels. Fresh, professionally applied paint makes rooms appear cleaner, brighter and more spacious. More importantly, the correct coating system helps walls stand up to everyday use.

Choose low-sheen washable paint for living areas

For walls in living rooms, hallways, bedrooms and entry spaces, a quality low-sheen washable finish is often the practical choice. It has a soft appearance that suits most properties but is easier to wipe down than a flat finish. It also hides minor imperfections better than glossier paints, which can highlight every bump and uneven patch in a wall.

Flat paints can look smart on a newly prepared wall, but they are more likely to show marks and can be difficult to clean without leaving visible patches. At the other end, high-gloss wall finishes tend to be too reflective for most homes and draw attention to surface flaws.

A good painter will assess the condition of the existing walls before recommending a finish. Cracks, dents, old repairs and uneven plaster should be addressed first. Painting over poor preparation only gives a short-lived result.

Use a clean, flexible neutral palette

Warm whites, soft greys, light greige tones and muted sandy neutrals give tenants room to make the property feel like home. They also work with a wider range of furniture and styling, which helps a rental photograph well for advertising.

Pure bright white can feel stark, particularly in rooms with limited natural light. Very dark colours may look impressive in the right setting, but they show scuffs and make touch-ups more noticeable. If you want character, consider using a restrained accent colour in a low-impact area rather than committing an entire living space to a bold shade.

Colour should also suit the property’s fixed finishes. Check the undertone against tiles, benchtops, flooring and cabinetry before painting. A colour that looks right on a small swatch can appear completely different across four walls in Gold Coast sunlight.

Keep ceilings simple and fresh

Ceilings generally perform best in a flat ceiling white. This finish reduces glare and disguises minor variations in the surface. Where there are water stains, mould marks or nicotine staining, the cause needs to be fixed and the surface properly sealed before repainting.

In bathrooms, laundries and kitchens, adequate ventilation matters as much as the paint itself. If moisture is continually trapped in a room, even a quality coating will struggle to stay looking its best.

Protect high-wear areas with the right trim finish

Doors, door frames, skirting boards and architraves receive plenty of knocks from bags, pets, furniture and vacuum cleaners. A hard-wearing semi-gloss or gloss enamel-style finish is generally a sensible option for these areas because it is more washable and resistant to scuffing than standard wall paint.

Semi-gloss offers a practical middle ground. It gives trim a tidy, durable finish without the very reflective look of full gloss. White trim remains a dependable choice, especially in smaller or older rentals, as it keeps the space light and makes future colour changes simpler.

Do not overlook internal doors. Repainting worn doors and frames can lift the whole property at a relatively modest cost. If a door has chips, sticking issues or damaged hardware, deal with those problems before painting. A neat finish cannot compensate for a door that does not function properly.

Floors, wet areas and practical surface choices

Painting is only part of the picture. The best rental property finishes work together, with each surface chosen for its likely wear.

Hard flooring is popular in rentals because it is easier to clean and generally handles spills better than carpet. Hybrid flooring, quality vinyl planks and tiles can all work well, depending on the property and budget. Choose a mid-tone timber look or neutral tile that does not show every speck of dust, sand or pet hair.

Carpet can still suit bedrooms, particularly where comfort or noise reduction is important. Select a durable, stain-resistant option in a medium neutral tone rather than pale cream. Very dark carpet can show lint and dust, while very light carpet can make each mark look worse than it is.

In kitchens, bathrooms and laundries, prioritise moisture resistance and easy cleaning. Keep grout colours practical, maintain silicone seals and repair water damage promptly. Paint around these areas should be suited to humid conditions, but no paint system can resolve an ongoing leak or inadequate ventilation.

Exterior finishes deserve a maintenance plan

Street appeal can influence both enquiry levels and the calibre of applicants. A neat exterior communicates that the property is managed properly, which can encourage tenants to treat it with the same respect.

Exterior paint needs to cope with UV exposure, rain, heat and, in many coastal locations, salt in the air. Preparation is critical. Flaking paint, chalky surfaces, rust, timber damage and cracking need attention before new coatings are applied. Applying fresh paint over an unstable surface may look good briefly, then fail early.

Neutral exterior schemes are usually the safest long-term option. Whites, off-whites, soft charcoals, muted greens and natural timber tones can suit many Australian homes, but the final choice should work with the roof, driveway, fencing and neighbouring streetscape. If the property has a body corporate or heritage requirements, check these before selecting colours.

A planned exterior repaint is easier to budget for than waiting until coatings have badly deteriorated. Regular washing, prompt repairs and repainting at the right time will protect timber, metal and masonry beneath the finish.

Spend where tenants notice and where repairs cost most

Not every surface needs the premium option. It makes sense to invest in areas that take the most wear or are expensive to rectify later: thorough plaster repairs, quality wall paint, durable trim coatings, waterproofing and exterior preparation.

You can usually save by avoiding overly decorative details that do not improve day-to-day durability. Elaborate feature walls, fragile fixtures and unusual colour schemes may appeal to a small group of renters, but they can narrow the property’s appeal and make future maintenance harder.

Before work begins, make a simple schedule of colours and finishes for every room. Record paint names, sheen levels and product details. This makes touch-ups and future repainting far more straightforward, especially if a different contractor completes the work later.

Get the preparation right before choosing paint

The finish is only as good as the surface underneath it. Professional preparation may include cleaning, sanding, filling cracks and dents, repairing damaged plaster, sealing stains, treating mould and priming bare or repaired areas. These steps take time, but they are where a durable result is made.

For owners preparing a rental between tenants, timing matters. Allow enough time for repairs, painting, curing and a proper final clean before photography or inspections. Rushing the process can lead to missed details, marked walls and unnecessary rework.

If you are unsure which paints, colours or surface repairs will give your property the best return, an experienced finishing team can provide practical guidance based on the condition of the home. Jag Painting Solutions helps property owners achieve tidy, hard-wearing results with careful preparation and respectful service.

A rental should look inviting on day one and remain manageable long after the keys are handed over. Choose finishes that are easy to maintain, have the surfaces prepared properly and keep a record of what has been used. That is how a well-presented property stays that way.

Categories
Uncategorized

How Long Does Paint Cure? A Practical Guide

A wall can feel dry within a few hours, but that does not mean the paint has finished hardening. If you are wondering how long paint cures before you can move furniture back, wash a wall or reopen a commercial space, the answer depends on the paint system, the surface and the conditions on site.

For most interior water-based paints, gentle use is usually possible after a few days, while full curing commonly takes two to four weeks. Exterior paints and oil-based coatings can take longer. Giving paint the time it needs protects the finish you have paid for and helps avoid marks, peeling and early wear.

Dry paint and cured paint are not the same

Paint dries when enough moisture or solvent has evaporated for the surface to no longer feel wet or tacky. Depending on the product, this may happen in one to four hours. It may also be ready for another coat within two to six hours.

Curing is the longer process. During this period, the binders in the paint film continue to harden and form a durable finish that can resist scuffs, moisture, cleaning and everyday contact. A freshly painted wall may look complete, yet it can still mark easily if a chair scrapes it or a picture frame is pressed against it.

This distinction matters most in busy homes, rental properties and commercial premises. A surface that is dry to touch is not necessarily ready for heavy traffic, frequent cleaning or furniture being pushed back into place.

How long paint cures in common situations

The label on the tin is always the best starting point, as manufacturers formulate products differently. Still, the following timeframes are useful for planning a painting project.

Interior water-based wall paint

Modern acrylic wall paints are popular because they dry quickly, have lower odour and perform well in most rooms. They are often touch-dry in one to two hours and ready for recoating after two to four hours. Light use is generally fine after 24 to 48 hours, but allow around two to four weeks before treating the walls as fully washable or scrubbable.

For bedrooms and living areas, waiting a few days before returning furniture is sensible. Keep larger items slightly away from the walls at first so air can circulate and the fresh finish is not dented or rubbed.

Paint in kitchens, bathrooms and laundries

Moisture-prone rooms deserve more patience. While the paint might dry on schedule, steam and condensation can slow curing and affect the finish. Run exhaust fans, open windows where practical and avoid long, steamy showers for at least several days after painting a bathroom.

Do not wash newly painted kitchen or laundry walls straight away. If splashes occur, blot them gently with a clean damp cloth rather than scrubbing. A quality washable paint is designed to handle cleaning once cured, not while it is still developing its hardness.

Interior trim, doors and cabinetry

Doors, skirting boards, window frames and cabinetry take more punishment than walls. They need extra care during the curing period, particularly when using enamel or hard-wearing trim paint.

Water-based enamel may be dry within a few hours but can take two to four weeks to fully harden. Oil-based enamel often requires longer. Avoid closing doors tightly, reinstalling hardware too soon, or placing objects on freshly painted shelves until the coating has had time to cure. Paint sticking where a door meets its jamb is a common sign that it was put back into service too quickly.

Exterior paint

Exterior paint must cope with sun, rain, wind and temperature changes, so curing conditions matter greatly. Many exterior acrylics reach a good level of durability in about two to four weeks, although cool weather, high humidity and rain can extend that period.

On the Gold Coast, warmth can help paint dry, but humid days and overnight moisture can slow the cure. Painting at the right time of day, following the product’s temperature range and allowing suitable weather windows are part of achieving a lasting exterior finish. A surface should also be properly prepared and dry before the first coat goes on.

Oil-based paints and specialty coatings

Oil-based paints, epoxy coatings and some floor paints follow their own rules. They may feel dry after several hours or a day, yet need days or weeks before they can handle normal use. Garage floors, stair treads, decks and commercial surfaces often have specific return-to-service times for foot traffic, vehicles or cleaning products.

These products should never be judged by touch alone. Check the technical information for the exact product and follow the stated curing period, especially where safety, slip resistance or heavy wear is involved.

What changes curing time?

Curing is not controlled by the clock alone. The same paint can perform differently from one week to the next because site conditions have changed.

Temperature is a major factor. Paint generally cures best within the manufacturer’s recommended range. Cold conditions slow the process, while excessive heat can cause paint to dry too fast at the surface and make application harder. Humidity also matters, particularly with water-based paints. When the air is holding a lot of moisture, evaporation slows down.

Ventilation helps interior paint cure more evenly. Open windows when weather allows, use fans to keep air moving and run air conditioning or dehumidification carefully if the room is damp. Do not blast a freshly painted surface with direct heat, as this can create uneven drying.

Coat thickness is another factor. Applying paint too heavily can extend drying and curing times, while insufficient drying time between coats can trap moisture and reduce performance. This is why professional preparation, correct application rates and appropriate recoat times are so important.

The surface itself also plays a role. Fresh plaster, repaired areas, timber, metal and previously painted walls may all need different primers and preparation. Paint cannot cure properly over a surface that is dusty, greasy, damp or unstable.

How to protect paint while it cures

A little care in the first few weeks can make a noticeable difference to the final result. Treat painted walls as delicate for at least seven days, and avoid hard cleaning until the manufacturer’s full cure time has passed.

Keep furniture, artwork and storage boxes clear of walls where possible. Use care when moving prams, dining chairs and appliances through freshly painted rooms. If a wall needs cleaning before it has fully cured, use minimal water and a soft cloth, then pat it dry rather than rubbing.

For exterior work, avoid leaning ladders, hoses, garden tools or outdoor furniture against fresh paint. If rain is expected shortly after application, the coating may be affected even if it appears dry. Professional painters plan around the forecast, but weather can still require flexibility.

Signs paint may not be curing properly

Fresh paint can have a mild smell for several days, particularly in enclosed rooms. That alone is not necessarily a problem. More concerning signs include persistent tackiness, paint that marks with very light pressure after the expected cure time, bubbling, peeling, cracking or an uneven sheen.

These issues may be caused by unsuitable weather, moisture in the substrate, poor surface preparation, incompatible products or coats applied too heavily. In some cases, simply waiting longer resolves the issue. In others, the affected area may need to be assessed and repaired rather than covered over again.

Plan the room around the cure time

The practical answer to how long paint cures is to plan for more than the drying time printed on the label. Schedule painting before major furniture deliveries, allow bathrooms and kitchens some breathing room, and avoid booking a full commercial reopening around a next-day paint job unless the selected coating is designed for it.

A well-prepared, professionally applied finish should look good on day one and stand up to daily life long after the smell has gone. Giving it a little time to cure is one of the simplest ways to protect that result.

Categories
Uncategorized

Can Exterior Paint Prevent Mould on Your Home?

A freshly painted exterior can make a property look cared for again, but can exterior paint prevent mould for the long term? It can certainly help – provided the surface is properly cleaned, repaired and kept dry. Paint is one part of mould prevention, not a cure for an underlying moisture problem.

On the Gold Coast and in Tweed, warm temperatures, summer rain, humidity and shaded walls create ideal conditions for mould and algae. If it is left to build up, it can stain paintwork, affect the appearance of a home or commercial building, and shorten the life of the coating underneath. The right preparation and paint system give your exterior a much better chance of staying clean and protected.

Can exterior paint prevent mould growth?

Quality exterior paint can slow mould growth by creating a durable, washable barrier on the surface. Many premium exterior coatings also contain additives designed to resist mould, mildew and algae. This is particularly useful on south-facing walls, areas beneath eaves, fences close to vegetation, and parts of a building that receive little direct sun.

However, mould does not appear simply because a wall needs paint. It needs moisture, a surface to settle on and often a source of organic material such as dust, pollen, leaf matter or cobwebs. When those conditions remain, even a mould-resistant paint can eventually develop spotting.

That is why applying a new coat straight over visible mould is rarely a lasting fix. The staining may show through, and active spores or moisture trapped below the coating can lead to peeling, blistering or recurring growth. A professional finish starts with identifying why the area stays damp.

Where exterior mould usually starts

Mould and algae are most common where water sits, drains poorly or does not dry quickly. The source may be as simple as an overgrown garden holding moisture against a wall, but it can also point to a maintenance issue that needs attention before painting.

Look closely around leaking gutters and downpipes, damaged roof tiles, blocked drainage points, cracked render, failed sealant around windows, and timber that is touching soil or mulch. Air-conditioning overflow and irrigation spray can also keep a section of wall wet without it being obvious at first.

Poor ventilation can contribute around enclosed patios, carports and service areas. For commercial properties, shaded rear accessways and walls near bins or landscaping often need more regular cleaning than prominent street-facing elevations.

Paint cannot stop water entering through a crack, failed flashing or leaking pipe. Addressing those faults first protects the new coating and avoids spending money on a finish that will fail prematurely.

Preparation matters more than the paint tin

The best mould-resistant exterior paint will not perform as intended on a dirty, chalky or damp substrate. Preparation is where a quality painting job earns its value.

First, the affected surface needs to be cleaned with an appropriate mould treatment and rinsed according to the product directions. High-pressure washing may be suitable for some masonry and exterior surfaces, but it must be done carefully. Too much pressure can force water behind cladding, damage soft timber, strip loose mortar or leave a surface saturated before painting.

Once clean, the wall needs enough drying time. In humid weather, that may take longer than property owners expect. Painting over a wall that still holds moisture can lead to adhesion problems, bubbling and patchy sheen.

The next step is repairing the surface. This may involve filling cracks, replacing failed sealant, sanding loose or flaking paint, treating rust on metalwork, or repairing damaged timber and render. Bare areas should receive the correct primer before top coats are applied. Primer is not an optional extra when a surface is porous, stained, weathered or partly bare – it helps create an even, stable base for the exterior coating.

Choosing paint for humid coastal conditions

For Gold Coast properties, exterior paint needs to do more than look good on day one. It should stand up to strong UV exposure, rain, humidity and salt air in coastal locations. A reputable premium exterior acrylic coating is often a practical choice for painted masonry, render, fibre cement and timber, although the right system depends on the existing substrate and its condition.

When comparing products, look for exterior suitability, mould and mildew resistance, UV durability and compatibility with the surface. A breathable coating can also be important on certain masonry or rendered walls, as it allows water vapour to escape while helping resist rain penetration.

Colour plays a small but real role. Very dark colours absorb more heat and can place greater stress on some exterior surfaces. They may be suitable when specified correctly, but they are not always the best choice for weathered cladding or walls exposed to intense afternoon sun. A colour consultation can help balance the look you want with the practical demands of the building.

Keep in mind that no paint manufacturer can guarantee a mould-free wall where dampness is ongoing. Claims of mould resistance refer to the coating itself under suitable conditions, not a promise that moisture-related growth will never return.

How to keep painted exteriors cleaner for longer

After repainting, regular maintenance makes a noticeable difference. Exterior walls do not need constant attention, but a seasonal check can prevent a small issue becoming a larger repair.

Keep gardens trimmed back so air can circulate around walls, and avoid allowing climbing plants to grow directly across painted surfaces. Clear leaves from gutters and drainage channels, check that downpipes direct water away from the building, and fix drips promptly. Where irrigation is hitting a wall, adjust the sprinkler pattern.

A gentle washdown of sheltered walls, eaves and shaded areas can remove the dust and organic build-up that mould feeds on. Use an appropriate exterior cleaner and avoid harsh scrubbing that damages the paint film. If mould returns in one specific patch, investigate the reason rather than repeatedly painting over it.

For strata, commercial and rental properties, scheduled exterior cleaning and inspections can be a sensible part of ongoing maintenance. It protects presentation while helping managers catch failed seals, blocked gutters and drainage issues early.

When mould needs more than painting

Some signs suggest the issue is beyond normal exterior maintenance. These include paint peeling in large sheets, persistent damp patches after dry weather, soft or rotting timber, white salty deposits on masonry, or mould that quickly returns after cleaning. Water staining inside the property, musty odours or visible mould on internal walls should also be investigated separately.

In these situations, the priority is finding and correcting the moisture source. Depending on the cause, that may involve roofing, plumbing, drainage, waterproofing, window repairs or building maintenance before any painting begins. A good painter will be upfront when a surface is not ready to coat, rather than applying paint that masks the problem for a short time.

A better finish starts with an honest assessment

Exterior repainting is a worthwhile way to refresh and protect a property, especially when the work includes careful cleaning, sound repairs, quality primers and suitable top coats. For homes and businesses in humid coastal conditions, cutting corners on preparation is usually where mould problems return first.

Jag Painting Solutions approaches exterior work with the surface condition in mind, not just the final colour. If you are seeing mould staining, chalky paint or peeling areas, arranging a professional assessment before repainting can help you make a confident, practical decision about the work your property actually needs.

Categories
Uncategorized

10 Clear Signs House Needs Repainting Soon

A fresh coat of paint does more than make a property look cared for. It protects the surfaces underneath from moisture, sun, wear and everyday marks. Knowing the signs your house needs repainting helps you act before a small maintenance issue becomes a larger repair job.

On the Gold Coast and in Tweed, exterior paint works hard. Strong UV exposure, humidity, salt air in coastal areas and heavy rain can all shorten the life of a coating. Inside, busy family areas, rental properties and renovated spaces can show their age just as quickly. The right time to repaint depends on the condition of the surface, not simply how many years have passed.

10 signs your house needs repainting

1. Paint is peeling, flaking or blistering

Peeling paint is one of the clearest signs that a surface needs attention. It may be caused by moisture getting behind the coating, inadequate preparation during a previous paint job, or paint that has reached the end of its life.

Blistering can look like small bubbles beneath the paint film. While it is tempting to scrape and touch up only the affected patch, the cause needs to be identified first. If moisture or failed preparation is involved, a proper repair may require removing loose material, treating the surface and applying a suitable primer before repainting.

2. Exterior paint looks chalky or faded

Run your hand over an exterior wall, fascia or fence. If a powdery residue comes away on your fingers, the paint may be chalking. This happens as weather and UV break down the paint surface over time.

Fading is also common on exposed elevations, particularly darker colours and areas that receive strong afternoon sun. Chalking and fading are not always urgent structural problems, but they show the coating is losing its protective performance. Repainting before the substrate is exposed is usually the more cost-effective option.

3. Cracks are appearing in paint or plaster

Fine cracking can be a normal part of ageing paint, but it should not be ignored. Hairline cracks may signal that the coating has become brittle, while wider cracks in walls or ceilings can point to movement, plaster damage or a repair that needs more than paint.

A quality finish relies on sound preparation. That may include patching, sanding, filling and priming before the final coats go on. Painting directly over cracks can make them less visible for a short time, but they often return if the underlying issue has not been addressed.

4. Mould or mildew keeps returning

Bathrooms, laundries, kitchens and shaded exterior walls are common problem areas. If dark spotting or mildew comes back soon after cleaning, it may be time to assess both the paint system and the moisture conditions in the area.

Paint alone will not solve poor ventilation, leaks or drainage issues. However, once the cause is managed, thorough cleaning and the right preparation can create a much more durable finish. In wet areas, choosing coatings designed for humidity and regular cleaning makes a genuine difference.

5. Walls are difficult to clean

Older interior paint can become porous or lose its washability. You may notice fingerprints, scuff marks and cooking splatter remain visible even after gentle cleaning. In some cases, wiping the wall can remove colour or leave a shiny patch where the finish has worn away.

This is particularly noticeable in hallways, stairwells, children’s rooms and around light switches. A repaint gives these high-traffic areas a cleaner appearance and allows you to choose a practical finish that better suits how the room is used.

6. Timber surfaces are exposed or deteriorating

Timber window frames, doors, decks, eaves and weatherboards need regular inspection. If paint is splitting, bare timber is visible, or the surface feels rough and dry, moisture and sun may already be affecting the material underneath.

Timber repairs can become expensive when deterioration is left too long. Early repainting, with careful preparation and suitable primers, helps seal and protect the surface. The same principle applies to metal gates, railings and fences where rust spots should be treated before they spread.

7. The caulking around windows and trims has failed

Flexible gaps around window frames, skirting boards, cornices and external joins are usually sealed with caulk. When it shrinks, splits or separates, it can make an otherwise tidy paint job look tired. Outside, failed caulking can also create a path for water to enter joints.

Repainting is a good opportunity to inspect these details properly. Replacing failed caulk and repairing small gaps before painting improves both the look and the weather resistance of the finished work.

8. Stains are showing through ceilings or walls

Water stains, nicotine discolouration, smoke marks and old patch repairs can bleed through standard paint. A fresh coat applied without the right stain-blocking primer may look fine at first, then allow the mark to reappear.

Ceiling stains deserve particular care. Before repainting, make sure any roof, plumbing or condensation issue has been resolved. Once the area is dry and stable, proper sealing and repainting can restore a clean, even finish.

9. Your paint colours no longer suit the property

Not every repaint is driven by damage. A home can be structurally sound but still feel dated, dark or disconnected after new flooring, cabinetry, landscaping or an extension. Colour has a major effect on how large, bright and welcoming a room feels.

This is where professional colour guidance is useful. The best choice depends on natural light, fixed finishes, the style of the home and how the space is used. A colour that looks good on a small sample can appear completely different across a sunlit external wall or a large living area.

10. You are preparing to sell, lease or complete a renovation

Presentation matters when buyers, tenants and customers first see a property. Fresh paint can make a renovated room feel complete, improve the perceived condition of an older home and create a more professional impression in commercial spaces.

The scope should match the goal. Sometimes a full repaint is worthwhile; other times, focusing on entry areas, living spaces, exterior trims or visibly marked walls delivers the best value. A detailed assessment helps avoid spending on areas that do not need immediate work while making sure the finished result looks consistent.

When should you repaint a house?

There is no fixed schedule that suits every property. Exterior paint may need attention sooner on coastal homes, north- or west-facing walls, timber features and areas with little protection from the weather. Interior paint often lasts longer, although kitchens, bathrooms and high-traffic zones can need refreshing well before bedrooms or formal living rooms.

As a general guide, inspect your exterior at least once a year and take a close look after severe weather. Check paint around roofs, gutters, windows, doors and lower walls where splashback or garden moisture can cause damage. Inside, pay attention to changes rather than waiting for the room to look obviously worn.

Why preparation matters as much as the paint

A long-lasting paint job is built before the top coat is applied. Surfaces need to be cleaned, loose paint removed, cracks repaired and suitable primers used where required. Glossy areas may need sanding, stains may need sealing, and different materials such as plaster, timber and metal each need the correct treatment.

This preparation is where workmanship shows. It affects how smooth the finish looks, how evenly colour sits on the wall and how well the coating holds up over time. Choosing the cheapest quote can be a false economy if it leaves out repairs, protection of surrounding areas or the preparation needed for lasting results.

If your property is showing several of these signs, a professional inspection can provide clarity on what needs repair now and what can wait. Jag Painting Solutions can help Gold Coast and Tweed property owners plan a careful repaint that protects the surface, suits the space and respects the home throughout the process.

Categories
Uncategorized

Is Colour Consultation Worth It for Your Home?

A paint colour can look perfect on a tiny sample card, then feel too cold, too bright or unexpectedly green once it covers an entire wall. That is why many property owners ask, is colour consultation worth it before committing to a full repaint. For the right project, professional guidance can save more than uncertainty – it can prevent the cost, mess and frustration of repainting a result that never felt right.

Is colour consultation worth it for most projects?

Often, yes. A colour consultation is particularly worthwhile when you are repainting several rooms, renovating, preparing a property for sale, updating an exterior or making choices that need to work with fixed elements such as flooring, tiles, stone benchtops or cabinetry.

Paint is one of the most visible finishes in a home or business, and it has a major influence on how clean, spacious, warm or well maintained a property feels. Choosing a colour is not simply a matter of finding a shade you like online. It needs to suit the available light, surrounding materials, room use and the finish of the paint itself.

The value is not only in receiving a colour name. It is in making a clear decision with a plan for how colours will work across the whole property. That gives your painter a proper brief and helps avoid last-minute changes once preparation and painting are underway.

A consultation will not be necessary for every job. If you are refreshing one small room in the same colour, or you already have a tested scheme you are happy with, the extra service may not add much. But where there are several decisions to make, it can be a sensible part of the project budget.

What a professional colour consultation considers

Good colour advice starts with the property itself, not a trend board. A professional will look at the room or building at different times of day, discuss how the space is used and consider the elements that are staying.

Natural light changes every colour

Gold Coast homes can receive strong natural light, especially in open-plan spaces and rooms with large windows. Bright light can wash out soft colours, while a south-facing room may make a grey or white appear cooler than expected. Artificial lighting matters as well. Warm globes, cool LEDs and feature lighting can all change the way a colour reads after dark.

Testing a painted sample in the intended room is far more reliable than choosing from a small paper swatch. It allows you to see the undertone – the subtle warmth, coolness, green, blue, pink or yellow sitting beneath the main colour. These undertones are usually what make a colour feel right or wrong next to an existing finish.

Fixed finishes need to be part of the decision

Floors, splashbacks, roofing, brickwork, curtains and stone surfaces are expensive to replace. Paint should work with them rather than compete with them. A white wall colour that looks crisp beside one tile may look creamy or dull beside another.

For exterior painting, the same thinking applies to roof colour, driveways, fencing, landscaping and neighbouring streetscape. The goal is not to make every surface match exactly. It is to create a balanced scheme with enough contrast to give the property definition.

Sheen affects the final appearance

Colour and sheen go together. A higher-sheen finish reflects more light, making the colour appear stronger and drawing attention to the surface beneath it. Low-sheen wall paint is often a practical choice for living areas, while more durable finishes may suit doors, trim, kitchens or high-traffic commercial spaces.

This is also where workmanship matters. The more reflective the finish, the more visible surface imperfections can become. If walls need plaster repairs, patching or smoothing, those issues should be addressed before the final paint system is applied.

When colour advice offers the best value

A consultation tends to pay for itself when one choice affects many areas. Renovators often benefit because new finishes are being introduced at once and decisions need to work together. Homeowners selling a property can use colour guidance to create a clean, broad-appeal presentation without making the home feel bland.

It is equally useful for an exterior repaint. Exterior colours are viewed from a greater distance and under harsher conditions, so an unsuitable shade can stand out for all the wrong reasons. A considered palette can improve street appeal while still being practical for the home’s style and surroundings.

For business owners, colour choices should support how customers experience the space. A reception area, retail premises, office or strata common area needs to look professional and hold up to regular use. Brand colours may need to be included, but used carefully so the result remains comfortable and polished rather than overpowering.

The financial comparison is straightforward. The cost of a consultation is usually small beside the labour and materials involved in repainting multiple rooms or an entire exterior. If it prevents one full repaint, reduces colour changes during the job or helps you choose a scheme you will be happy to live with for years, it has done its job.

When it may not be necessary

There are times when a consultation is not essential. A simple like-for-like repaint, a rental touch-up, or a single room where you have already tested and approved the colour may be straightforward enough to manage without one.

It can also be unnecessary if your priority is only the lowest possible upfront price. Professional advice takes time and should be treated as part of a quality project, not an add-on with no purpose. The better question is whether confidence in the final result matters enough to you to invest in getting the selection right.

Keep in mind that colour advice cannot fix a poor-quality paint job. It should sit alongside thorough preparation, suitable products and skilled application. Clean lines, properly prepared surfaces and consistent coverage are what allow a well-chosen colour to look its best.

Questions to ask before you book

Before arranging a consultation, think about what you want the space to achieve. Do you want a calmer bedroom, a brighter living area, a more modern exterior or a commercial space that feels more professional? Bringing a clear goal makes the discussion more useful.

You should also be ready to identify what is staying. Photos of furniture, flooring, tiles and exterior materials can help, particularly if they are not on site yet. Mention any colours you strongly dislike as well as colours you are drawn to. This is valuable information, but it should be balanced against the light and existing finishes in the property.

Ask whether the consultation includes a full colour schedule, suggested sheen levels and advice on where each colour should be used. For larger projects, clarity around walls, ceilings, trims, doors and exterior details avoids confusion once painting begins.

It is also reasonable to ask how sample colours will be tested. Viewing larger painted samples in place, morning and afternoon, is one of the simplest ways to make a more confident call.

Make the decision part of the painting plan

The best time to organise colour guidance is before the painting quote is finalised and before prep work starts. This gives you time to test samples without pressure and ensures the scope reflects the colours, finishes and surface work required.

At Jag Painting Solutions, colour consultation can be planned alongside interior, exterior, commercial painting and plastering work, so the advice and the application are working towards the same result. It also gives homeowners and business owners one clear point of contact throughout the job.

A colour consultation is worth it when the choice feels high stakes, the project has several moving parts or you simply do not want to second-guess a decision you will see every day. Take a little time to view samples properly, consider the surfaces that are staying and choose a painting team that treats the final finish with the care it deserves.

Categories
Uncategorized

Decorative Plaster: Is It Right for Your Walls?

A freshly painted room can look clean and complete, but some spaces call for more depth than paint alone can provide. Decorative plaster gives walls a hand-finished character, creating movement, softness or polished drama depending on the chosen finish. Done well, it becomes a feature in its own right. Done poorly, it can highlight every imperfection in the wall beneath it.

For homeowners, renovators and commercial property owners, the decision is not simply about choosing a texture. It is about matching the finish to the space, preparing the surface properly and engaging tradesmen who understand the product they are applying. That groundwork is what separates a refined finish from one that feels rough, patchy or difficult to maintain.

What decorative plaster can add to a room

Decorative plaster is a broad term for specialist wall finishes applied to create texture, tonal variation or a smooth mineral look. Unlike standard interior paint, which is designed to deliver an even colour across a surface, plaster finishes have natural variation. Light catches them differently through the day, which gives the wall more visual interest without relying on a bold colour or busy wallpaper.

The finish can be subtle. A lightly textured plaster in a warm neutral tone may make a living room feel calmer and more considered, while still working with timber, stone and soft furnishings. At the other end of the scale, a highly polished Venetian-style finish can bring depth and a gentle sheen to an entry, powder room or reception area.

This makes decorative plaster particularly useful where a property needs one strong design element rather than several competing features. It can work beautifully on a fireplace wall, behind a bed, in a hallway, at a reception desk or across a carefully planned open-plan living area. The right finish feels intentional, not overdone.

Choosing the right decorative plaster finish

There is no single best finish for every home or business. The right choice depends on the condition of the walls, the amount of natural light, the intended use of the room and the level of maintenance the owner is comfortable with.

Soft texture for relaxed living spaces

Fine-grain and lightly textured finishes suit contemporary homes where the goal is warmth rather than shine. They work well with muted colours and natural materials, and can soften the hard lines of new builds or renovated spaces. These finishes are generally more forgiving than high-polish options, but the underlying wall still needs to be straight and sound.

A restrained texture is often the smarter choice for larger walls. In a spacious living area, it provides interest from close up while remaining calm when viewed across the room. Very heavy texture can make a large wall feel busy, particularly where there are already patterned tiles, detailed joinery or strong flooring choices.

Polished finishes for feature areas

Polished plaster creates a denser, smoother appearance with layered movement beneath the surface. It can range from a low-sheen mineral look to a finish with noticeable lustre. This style is often selected for feature walls, entries and commercial interiors where the goal is a premium first impression.

It demands careful application. Every layer, trowel mark and edge must be controlled, because a polished surface reflects light and can reveal inconsistencies. It is also worth considering how the room is used. A polished feature wall behind a dining table may be practical, while the same finish in a high-contact corridor may show scuffs more readily.

Concrete-look and industrial finishes

Concrete-look plaster can deliver a modern, architectural effect without installing heavy concrete panels. It is popular in renovations that combine black fittings, timber joinery and simple colour palettes. The key is getting the tone right. A cool grey can feel sharp in a dim room, while warmer grey or taupe-based finishes often sit more comfortably in Gold Coast homes with plenty of natural light.

Samples matter here. Plaster finishes can look quite different on a small board compared with a full wall, especially near large windows or under warm artificial lighting. Viewing a sample at different times of day helps avoid an expensive surprise once the work is complete.

Preparation matters more than most people expect

Decorative plaster does not hide poor walls. In many cases, it makes flaws more noticeable. Before application, the surface may need patching, levelling, sanding, sealing and priming. Existing cracks should be assessed rather than simply covered, particularly if they indicate movement or moisture issues.

This is one reason decorative finishes should not be treated as a quick weekend coating job. The process is built in layers, and drying times, surface absorption and product compatibility all affect the result. Skipping a preparation stage can lead to uneven colour, poor adhesion, visible joins or premature damage.

For older homes, previously painted walls can present another challenge. Glossy coatings, flaky paint, water staining and poorly repaired plasterboard joints all need attention first. A skilled plastering and painting team will inspect the surface and explain what needs to be corrected before recommending a finish. Clear advice at this stage protects both the appearance of the work and the budget.

Where decorative plaster works best

Feature walls are the natural starting point, particularly for property owners who want to introduce texture without committing to every room. A bedroom wall behind the bed, a living room fireplace surround or a formal entry can all carry a decorative finish well.

Bathrooms and kitchens can also be suitable, but product choice is critical. Areas exposed to regular splashing, steam or cleaning products may need a compatible protective coating. Decorative plaster is not automatically waterproof, and not every finish is appropriate for shower walls or wet zones. This is a situation where the design idea needs to be checked against practical performance.

Commercial spaces benefit when the finish supports the business rather than distracting from it. A restrained plaster wall can give a salon, office, showroom, hospitality venue or reception area a more established feel. In high-traffic spaces, durability and cleanability should guide the specification as much as appearance.

Colour and lighting shape the final result

With decorative plaster, colour is rarely flat. Even a single shade can show lighter and darker areas because of the hand-applied layers and changing light. That variation is part of the appeal, but it needs to suit the room.

Warm whites, soft greys, sand tones, clay colours and gentle mushroom shades are reliable choices for many interiors. They offer texture without making the wall dominate the entire room. Darker charcoal, olive or deep blue-grey finishes can be striking, though they usually work best where there is good lighting and enough visual space around the wall.

Lighting deserves as much attention as colour. Downlights close to a textured wall can emphasise its movement, while wall washing can show a polished finish at its best. Conversely, harsh side lighting may reveal surface irregularities that would otherwise go unnoticed. Planning the finish alongside lighting, furniture and window coverings produces a more balanced result.

Care, repairs and realistic expectations

A quality plaster finish is durable, but it is not maintenance-free. Most interior surfaces benefit from gentle dusting and careful spot cleaning with products approved for that particular finish. Abrasive cleaners, rough scrubbing pads and unnecessary moisture can damage the surface or alter its sheen.

Repairs are possible, but they can be more complex than touching up a painted wall. Because plaster has hand-applied variation, a small patch may not blend perfectly into an older finish. Keeping notes on the product, colour and protective coatings used can make future maintenance easier.

It is also sensible to plan for normal wear. A feature wall in a quiet formal room will stay pristine longer than one beside a busy family dining area or commercial walkway. Choosing the finish around how the space is actually used is more valuable than choosing it from a photo alone.

For a result that feels right for the property, start with the wall condition and the way the room is lived in. Jag Painting Solutions can help Gold Coast and Tweed property owners weigh up finish options, preparation requirements and colour choices before work begins. A considered sample and a proper surface assessment can turn a good design idea into a finish you will still enjoy looking at years from now.

Categories
Uncategorized

Render Repair Versus Repainting: What Comes First?

A new coat of exterior paint can lift the whole appearance of a property, but it cannot fix a failing surface underneath. When weighing up render repair versus repainting, the right first step depends on the condition of the render itself. Paint protects and refreshes the finish. Render repair restores the surface that paint needs to bond to.

For Gold Coast homes and commercial properties, this distinction matters. Sun, wind-driven rain, humidity and salt air can all place pressure on rendered walls. Addressing cracks, hollow areas or moisture issues before painting gives the new finish a far better chance of looking clean and lasting well.

Render Repair Versus Repainting: The Main Difference

Repainting is primarily a finishing job. It involves preparing a sound painted surface, applying suitable primers where required, and coating the wall with quality exterior paint. It improves colour, presentation and weather protection, but it is not designed to bridge significant movement, rebuild missing render or stop water entering through cracks.

Render repair is surface restoration. It may include removing loose or drummy render, opening and repairing cracks, patching damaged sections, levelling imperfections and allowing repairs to cure before the painting system is applied. Done properly, the repaired section should blend with the surrounding wall rather than stand out once painted.

The order is straightforward: if the render is unsound, repair it first. If the render is stable and the issue is limited to faded, chalky or peeling paint, repainting may be all that is needed.

Signs Your Property Needs Render Repair First

Not every mark in a rendered wall means major work is required. Fine surface lines can sometimes be limited to old paint coatings, while more pronounced cracks may point to movement, water exposure or a loss of adhesion. The important part is understanding what is happening below the paint.

Cracks that return or run through the render

Hairline cracks may be repairable as part of normal preparation, particularly where they are shallow and localised. Wider cracks, diagonal cracking around openings, or cracks that continue to grow deserve closer inspection. Simply painting over them can make the wall look better briefly, but the crack is likely to show again as the surface moves.

A professional assessment can help determine whether the crack is confined to the render or whether there is a broader issue requiring attention before cosmetic repairs begin.

Hollow, loose or crumbling patches

Render that sounds hollow when lightly tapped may have detached from the substrate. Areas that are bubbling, flaking, soft to touch or breaking away should not be hidden under paint. Loose material needs to be removed back to a firm edge, then rebuilt with a compatible repair material.

Painting over unsound render often leads to premature peeling because the new coating is only as reliable as the surface beneath it.

Water staining, dampness or mould growth

Staining near windows, parapets, balconies, rooflines or external plumbing can signal a moisture problem. Repainting without finding the source may trap the issue behind a fresh finish, and stains or mould can return quickly.

The cause may be cracked render, failed sealant, leaking flashings, blocked drainage or water entering around fixtures. Repairs should deal with the water path first, then allow the wall to dry sufficiently before priming and painting.

Previous patch repairs that stand out

Older repairs can become obvious due to poor texture matching, uneven edges or different paint absorption. If the surrounding render remains solid, these areas can often be refined and blended before repainting the full elevation. This is usually a better result than spot-painting individual patches, which can leave visible changes in colour and sheen.

When Repainting Is Enough

A repaint may be the practical choice where the render is firm, dry and largely free from cracking, but the paint film has reached the end of its life. Common signs include fading from UV exposure, a dull or chalky surface, minor peeling in isolated areas, or a colour scheme that no longer suits the property.

Preparation remains essential. Exterior walls should be cleaned to remove dirt, salt residue, mould and chalking paint. Any loose coating needs to be scraped or sanded, minor defects filled, and bare or repaired areas primed as needed. Skipping this work may save time at the start, but it can shorten the life of the new paint system.

A quality repaint also gives owners the chance to reconsider colour. Lighter colours can help reduce heat absorption on exposed walls, while a well-chosen trim colour can sharpen the look of windows, fascias and architectural details. Colour choice should still work with the roof, paving, neighbouring finishes and the amount of natural light the building receives.

Why Painting Over Damaged Render Is a False Economy

It is understandable to want the quickest route to a tidy exterior, especially before selling, leasing or reopening a commercial space. However, painting over loose render or active cracks usually shifts the cost down the track rather than removing it.

As damaged render continues to move or break down, the paint film above it can crack, blister or detach. Water can then get behind the coating, widening the damaged area. What could have been a targeted repair may become a larger removal and reinstatement job.

There is also an appearance issue. Fresh paint tends to highlight uneven patches, poor repairs and inconsistent textures, particularly in strong side light. Proper preparation is what gives exterior painting its clean, even finish.

A Practical Approach to Exterior Render and Paintwork

The best approach is not automatically the biggest repair job or the fastest repaint. It is a clear assessment of the surface, followed by the work needed to make it stable, presentable and protected.

Start by looking closely at several areas of the exterior, not just the most visible wall. Check around windows and doors, below rooflines, near downpipes, at corners and along lower walls where water can splash back. Note cracks, bubbling paint, staining and sections that appear uneven.

Next, consider timing. Render repairs need appropriate curing time before painting, and exterior work relies on suitable weather conditions. Rushing to coat a damp or uncured repair can affect adhesion and the final appearance. A reliable painter will factor preparation, drying time and access requirements into the scope rather than treating them as afterthoughts.

Finally, make sure the repair materials, primers and topcoats are compatible. Different render types and existing coatings can require different preparation methods. The aim is a complete system that works together, not a patchwork of products applied without regard for the substrate.

Choosing the Right Scope for Your Property

For a recently renovated home with a few small blemishes, localised render repairs followed by a full repaint may be enough to achieve a polished result. For an older property with widespread hollow render, recurring cracks or water damage, it may be wiser to investigate the underlying cause before finalising the paint scope.

Commercial properties have similar considerations, often with the added need to stage work around customers, tenants or business operations. Planning repair and painting work properly can reduce disruption while ensuring the finished surface reflects well on the business.

At Jag Painting Solutions, the focus is on preparing surfaces properly before applying the final finish. Clear advice at the quoting stage helps property owners understand whether they are looking at a straightforward repaint, targeted render repairs, or both.

A fresh exterior should do more than look good on the day the painters leave. Taking the time to repair unstable render first gives your paintwork a sound base, protects the property from avoidable deterioration and helps the finished result hold its appearance for longer.