Categories
Uncategorized

Gold Coast Property Repaint Guide for Owners

A repaint can make a tired property feel cared for again, but the difference between a fresh finish and a short-lived cover-up is usually decided before the first coat goes on. This Gold Coast property repaint guide is designed to help homeowners, renovators and property managers make sound decisions about timing, preparation, colour and workmanship.

The Gold Coast climate is tough on painted surfaces. Strong UV exposure, humidity, salt air near the coast and seasonal rain can all shorten the life of an exterior coating. Inside, scuffs, moisture marks, ageing plaster and changing light can make rooms look older than they are. A well-planned repaint protects the building while improving how it looks and feels to live or work in.

Gold Coast Property Repaint Guide: Start With Condition

Before choosing colours, assess the condition of the surfaces. Paint can improve appearance, but it will not permanently hide movement cracks, failing plaster, dampness or rot. Addressing these issues first is what gives the new finish a clean look and a longer service life.

Walk around the exterior in good daylight. Look for peeling or bubbling paint, chalky residue, cracked timber, rust stains, mould, gaps around windows and failed sealant. On rendered walls, fine hairline cracking may be cosmetic, while larger or recurring cracks can point to movement that needs closer attention. Timber fascias, decks and exterior trim deserve particular care because exposed edges often deteriorate first.

Inside, inspect ceilings, cornices, walls and skirting boards. Water stains should be investigated rather than painted over. If the moisture source is still active, the stain and damage are likely to return. Cracks around door frames, joins and ceilings may need filling and sanding, while damaged plasterboard or loose tape may require repair before painting begins.

A professional inspection is useful when the property has widespread peeling, persistent mould, visible water damage or surfaces that have been painted many times. Good painting work begins with identifying the cause, not simply coating over the symptom.

Choose the Right Time for the Work

Painting is affected by weather more than many property owners expect. Exterior coatings need suitable temperature, surface conditions and drying time to cure properly. A forecast of rain, heavy humidity or very hot direct sun can affect application and finish quality.

On the Gold Coast, exterior projects are best planned with enough flexibility to work around changing conditions. This does not mean waiting for a perfect week, but it does mean allowing an experienced painter to schedule preparation and coating stages sensibly. Surfaces must be dry, and painters may need to work around strong afternoon sun or incoming wet weather.

Interior repainting is less weather-dependent, although ventilation and drying conditions still matter. If you are renovating, schedule painting after major plastering, electrical work and dusty carpentry are complete, but before new flooring or delicate finishes are installed where possible. This reduces the chance of damage and avoids unnecessary touch-ups.

For rental properties, plan ahead of tenant changes where practical. A vacant property gives painters clearer access and allows repairs, cleaning and curing time without disrupting occupants. For occupied homes and businesses, the work can still be organised in stages to keep key areas usable.

Preparation Is Where the Finish Is Won

The most noticeable painting results come from preparation, not from applying extra coats. A quality repainting process generally includes cleaning, scraping loose material, sanding rough edges, patching defects, sealing gaps, treating stains or mould where required, and priming bare or repaired areas.

Exterior washing is particularly important in coastal and humid locations. Dirt, salt residue, mould and chalking can prevent new coatings from bonding properly. The correct cleaning method depends on the surface. High-pressure washing can be effective in the right hands, but it can also force water into vulnerable areas or damage softer materials if used incorrectly.

Primer selection matters as well. Bare timber, metal, patched plaster and stained areas may each need a different primer or sealer. Skipping this step can lead to uneven sheen, stain bleed, poor adhesion or premature peeling. It may seem like a saving at the time, but it often creates a more expensive repaint sooner than expected.

Protecting the property is part of proper preparation. Floors, furniture, garden areas, fixtures and nearby surfaces should be covered or masked carefully. At Jag Painting Solutions, respectful site care is treated as part of the job, not an optional extra. Clear communication about access, daily clean-up and which rooms or areas will be worked on helps make the process far less disruptive.

Select Colours for Light, Use and Longevity

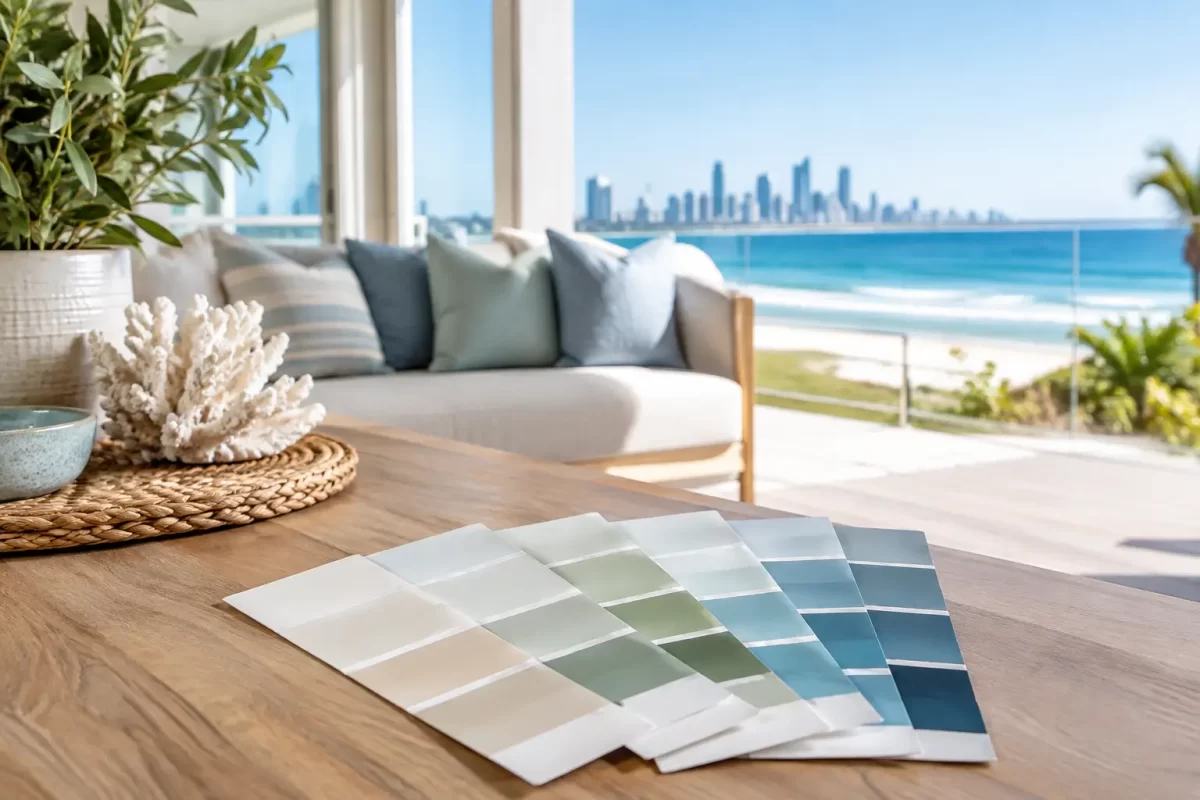
Colour choices should suit the property, but they also need to work with the way the space is used. Natural light on the Gold Coast can be intense. A colour that looks soft on a small sample may appear much brighter on a full exterior wall or in a north-facing room.

For interiors, consider the fixed elements first: flooring, tiles, benchtops, cabinetry and window furnishings. These items are costly to replace, while paint can be adjusted more easily. Whites and neutrals remain popular because they provide flexibility, but they are not all the same. Some have warm undertones that suit timber and cream finishes; others are cooler and better suited to contemporary grey, stone or black details.

In busy households, washable finishes are often worth considering for hallways, kitchens, children’s rooms and high-traffic living spaces. Ceiling paint generally needs a low-sheen finish to reduce glare and disguise minor surface variation. Walls may suit a low sheen or washable finish, while doors, trims and skirting boards typically need a tougher enamel-style coating with a different sheen level.

Exterior colour selection involves another trade-off. Dark colours can look striking, but they absorb more heat and may show fading or surface imperfections more readily. Very light colours can reduce heat absorption but may reveal dirt in exposed locations. The right answer depends on the building materials, orientation, surrounding landscape and how much ongoing maintenance you are prepared to do.

A colour consultation can prevent costly second-guessing. Test sample colours on different sides of the building and view them in morning, midday and late-afternoon light. For a commercial property, consider brand presentation, customer expectations and the need to maintain a professional appearance over time.

Match the Coating System to the Surface

Not every painted surface should receive the same product. Exterior masonry, timber weatherboards, metal railings, rendered walls and previously painted cladding each need suitable preparation and coating systems. The same principle applies indoors, where bathrooms, kitchens, living areas and joinery all face different demands.

Bathrooms and laundries need coatings that cope with moisture and regular cleaning, alongside adequate ventilation. Kitchens benefit from durable, washable wall finishes. For commercial spaces, practical considerations may include operating hours, public access, safety requirements and the need for hard-wearing finishes that keep looking presentable under frequent use.

Ask your painter what products are proposed and why they suit the surface. A clear quote should explain the scope of preparation, the areas included, the coating approach and any repairs that are required. If a quote appears much cheaper than another, check whether it allows for cleaning, patching, primers, the number of coats and proper protection of surrounding areas. Price matters, but scope matters more.

Plan for Access, Communication and Care

A repaint runs smoothly when expectations are agreed before work begins. Let the painting team know about pets, security requirements, parking restrictions, access issues, fragile items and areas that need to remain in use. Move smaller valuables and personal items where possible, and discuss furniture moving in advance.

For exterior work, trim back plants that are touching walls and make sure gates, side paths and access points are available. For interiors, confirm room order and whether you would prefer work completed one area at a time. Business owners may need to plan around trading hours, staff movements and customer access, particularly when painting entrances, amenities or shared spaces.

Good communication also includes a final walk-through. Inspect the work in normal lighting, note any agreed touch-ups and ask how to care for freshly painted surfaces. Most coatings need time to fully cure, even if they feel dry to touch, so avoid heavy cleaning or placing items hard against painted walls too soon.

A repaint is a chance to protect your property and make it feel properly finished, whether you are preparing to sell, renovating for the long term or refreshing a commercial space. Take the time to address the surface condition, choose colours with confidence and engage experienced tradesmen who respect the property from preparation through to the final clean-up. A clear, detailed quote is a practical first step towards a result you will be happy to live or work with.

Categories
Uncategorized

Damaged Wall Restoration Example: From Cracks to Finish

A wall can look like it needs nothing more than a fresh coat of paint, yet the paint often hides the real problem. This damaged wall restoration example shows why proper preparation matters: the difference between a repair that looks good for a few months and a finish that stays neat, smooth and durable.

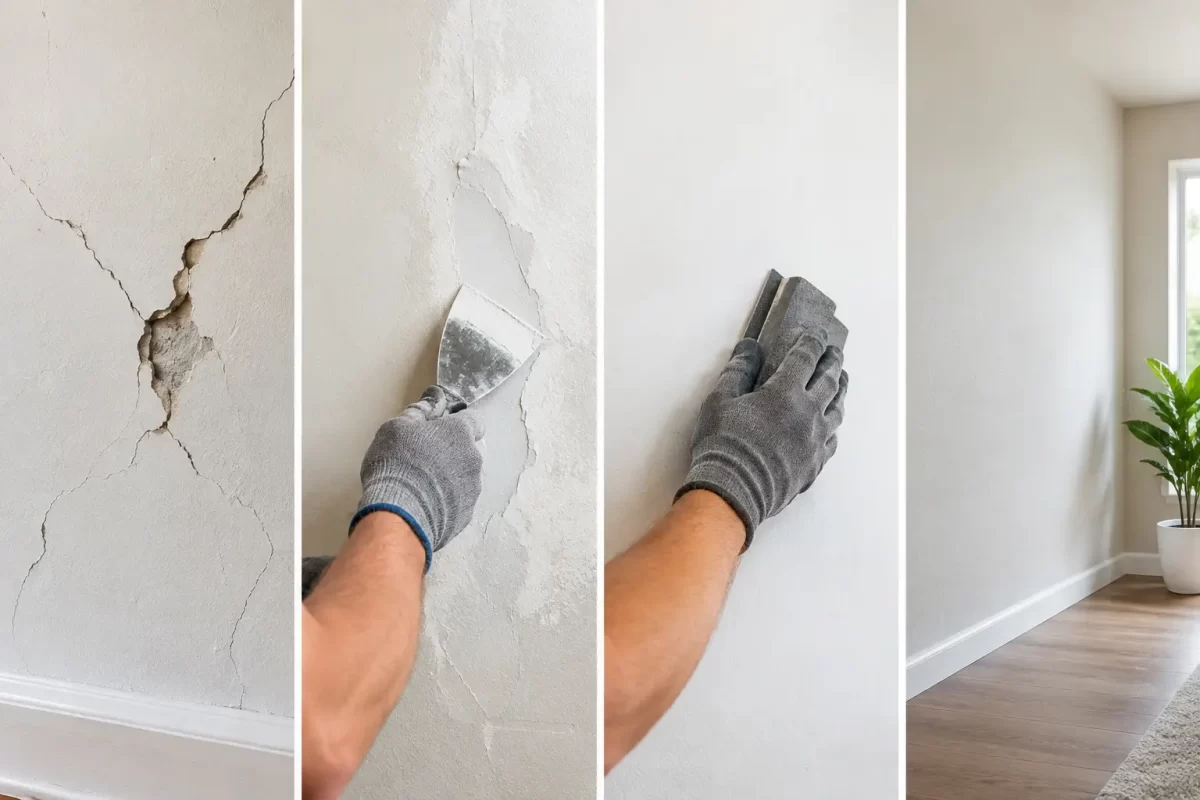
A homeowner had a damaged internal living-room wall following minor water ingress around an external window. The immediate signs were familiar – bubbling paint, a brownish stain, a small section of softened plaster and several hairline cracks extending from the window reveal. The room was otherwise well maintained, so the repair needed to blend into the existing finish without creating an obvious patch.

Start with the cause, not the paint

Painting over water staining or loose plaster does not restore a wall. It only covers the evidence temporarily. Before any surface work began, the source of moisture needed to be resolved. In this case, the external window seal had been repaired and the wall was allowed adequate time to dry.

This step is essential. If moisture remains behind the surface, new paint can blister, stains can bleed back through, and freshly repaired plaster may fail. A qualified painter or plasterer can identify visible symptoms, but active leaks, plumbing issues or significant mould may require the appropriate specialist before restoration starts.

Not every damaged wall has a moisture issue. Settlement cracks, impact damage, failed old patching and worn paint each call for a slightly different approach. The right repair depends on what caused the damage, how much of the wall has been affected, and whether the wall is plasterboard, solid plaster, masonry or another surface.

Damaged wall restoration example: assessing the surface

Once the wall was dry, the damaged area was assessed by touch as well as sight. Paint that had lifted away from the wall was scraped back until the remaining edges were firmly bonded. The soft, compromised plaster beneath was removed rather than filled over.

This is where shortcuts often show up later. Filling over loose material may make the wall appear level on the day, but the weak layer underneath can move or detach. The repair should always be built on a sound, clean surface.

The hairline cracks were also checked. Fine, stable cracks can usually be opened slightly and repaired as part of the plastering process. Wider cracks, recurring movement or cracks around doors and windows may need further investigation. A good tradesman will be clear about the difference rather than treating every crack as a simple cosmetic issue.

Preparing a sound base for plaster repair

After loose paint and failed plaster were removed, the edges of the repair were feathered to avoid a hard ridge around the patch. Dust and residue were cleaned away so the new materials could adhere properly.

Any exposed plasterboard or porous substrate was sealed where required. This helps control suction and gives the repair compound an even base. Without this step, one area of the patch can dry differently from another, making it harder to achieve a consistent surface.

For the cracks, a suitable joint treatment was applied. Where movement or a larger opening warranted it, reinforcing tape was embedded to provide extra stability. This does not solve structural movement, but it gives a properly prepared, stable wall a much better chance of remaining smooth after finishing.

The damaged section was then rebuilt with plastering compound in controlled layers. Deep repairs should not be rushed into one heavy application. Several thinner coats allow the material to dry and cure correctly, reducing shrinkage and helping the finished surface sit flush with the surrounding wall.

Getting the wall flat, not just filled

A wall repair can be technically complete and still look poor under natural light. Windows, downlights and lamps cast shadows across the surface, making raised edges, shallow hollows and rough sanding marks easy to spot.

After each plaster coat dried, it was sanded and checked from different angles. Additional skim coats were used to feather the repair beyond the original damaged area. The goal was not simply to fill the hole or crack. It was to restore the plane of the wall so the eye could move across it without catching a change in texture or level.

This part takes patience. A small patch may need a wider finishing area than expected, especially on a long feature wall or a wall painted in a low-sheen finish. Matte and low-sheen paints are forgiving in some ways, but light travelling across them can still reveal uneven preparation.

Careful dust control also matters in occupied homes. Floors, furnishings and nearby areas should be protected before sanding begins, with the work area left tidy at the end of each stage. Restoration work should improve a home without creating an unnecessary clean-up job for the owner.

Priming to stop stains and patchiness

With the plaster repair smooth and dry, the wall was primed before painting. Primer is not an optional extra on a repaired surface. New plaster is more porous than an existing painted wall and can absorb paint differently, leading to dull patches known as flashing.

Because the original damage included water staining, a suitable stain-blocking primer was used over the affected area. This creates a barrier between the stain and the topcoat. The exact product and preparation method depend on the type of stain, the condition of the old coating and whether the surface has been fully dried.

Applying the right primer also improves adhesion and helps the final coats dry to a more even sheen. It is a small stage in the overall job, but one that has a major effect on how professional the finished wall looks.

Repainting for an even finish

For this restoration, the best result came from repainting the full wall rather than only the repaired section. Even when the original colour is known, older paint can fade or change slightly over time. A touch-up can be visible because of colour variation, sheen differences or the direction of roller application.

The surrounding surfaces were masked and protected, then the wall received two even finish coats. Maintaining a wet edge and using the right roller nap helped achieve a consistent texture across the wall. Once dry, the repaired area was no longer noticeable from normal viewing positions.

There are occasions when a small touch-up is appropriate, particularly if the paint is recent and the exact product is available. However, painting corner to corner is usually the safer option when presentation matters. In living rooms, entry areas, offices and rental properties, a complete wall repaint often provides better value than repeating spot repairs later.

What this restoration achieved

The completed wall had no visible staining, bubbling or rough patch edges. More importantly, the repair addressed the failed surface materials instead of hiding them. The room was ready for use with a clean, uniform finish that matched the standard of the rest of the home.

For Gold Coast and Tweed properties, moisture and humidity can add another layer of consideration, particularly around windows, wet areas and external walls. Allowing adequate drying time and using suitable preparation products is worth it. Fast work is not always good work when water damage has been involved.

When to call a professional

Small scuffs and picture-hook holes can often be handled with basic patching. It is wise to arrange professional advice when paint is peeling extensively, plaster feels soft, stains keep returning, cracks are growing, or the wall needs to blend into a high-visibility area.

Jag Painting Solutions can assess damaged internal surfaces, complete plaster repairs and repaint the area with care for your home or business. A clear quote should explain the required preparation as well as the painting, so you know what is being repaired and why.

If a wall is showing early signs of damage, deal with it before the affected area grows. A careful inspection and the right restoration process can protect the finish, reduce future repair work and make the room feel properly looked after again.

Categories
Uncategorized

A Queenslander Repaint Example Done Properly

A Queenslander can look tired long before it is beyond saving. Peeling paint on the weatherboards, dark staining beneath eaves and cracked trim are not just cosmetic issues – they can allow moisture into the timber. This Queenslander repaint example shows how a careful exterior repaint can restore the home’s character while giving its surfaces the protection they need.

This is the kind of project where preparation decides the outcome. A fresh coat applied over failing paint may look acceptable briefly, but it will not address loose timber, open joints or the causes of paint breakdown. A professional repaint should leave the home looking sharp from the street and ready to handle Queensland conditions for years to come.

The Queenslander repaint example: assessing the home first

Picture a classic elevated Queenslander with timber weatherboards, a verandah, decorative timber fretwork and a corrugated roof. The existing paintwork is a faded cream with a darker green trim. On the sunny side, paint has become chalky and thin. Around several window sills and the lower weatherboards, there are small areas of bubbling and exposed timber.

Before choosing colours or opening a tin of paint, the first job is to inspect every surface. This means checking the weatherboards for movement, testing suspect timber for softness, looking closely at previous patch repairs, and identifying any gaps where water may be entering. Fascias, soffits, balustrades, posts, external doors and window frames all need the same attention.

Not every weatherboard with flaking paint needs replacing. Sometimes the issue is limited to surface failure and can be properly prepared. If timber is split, rotten or no longer sound, however, replacement or repair should happen before painting begins. Paint is a protective finish, not a repair for damaged building materials.

Understanding why the old coating failed

Queenslander homes often have sections that weather very differently. Northern and western elevations can take a beating from sun and rain, while sheltered areas may hold moisture longer and develop mould. Older homes can also carry several generations of paint, with incompatible coatings or poor past preparation hidden below the top layer.

In this example, the most exposed weatherboards needed more extensive sanding and spot priming than the shaded side of the house. The verandah handrails had worn from daily use, while the decorative fretwork required patient hand preparation rather than aggressive sanding that could damage the detail.

A proper inspection also helps set a realistic quote and timeline. If substantial timber repairs, lead-safe work practices or difficult access are involved, they should be identified from the start rather than added halfway through the job.

Preparation is where a quality repaint begins

The repaint starts with protecting the property. Verandah floors, garden beds, windows and adjacent surfaces are covered as needed, while the work area is kept tidy throughout. Respect for the home matters just as much as the finished paintwork, particularly when people are living on site during the project.

The exterior is then washed to remove dirt, chalking, cobwebs, mould and loose contaminants. This step is easily underestimated. Paint needs a clean, stable surface to bond to, and applying new coatings over powdery or dirty paint can shorten the life of the system.

After drying, loose and flaking paint is scraped back. Sound painted areas are sanded to create an even surface and provide a suitable key for the new coating. Bare timber is feathered at the edges so repaired areas do not stand out once painted.

In this Queenslander repaint example, a few degraded sections of weatherboard were repaired before paint preparation continued. Open gaps at selected joins and around trim were sealed with a paintable exterior gap filler. The aim is not to seal every moving joint indiscriminately, but to close areas where water and draughts can enter while allowing the building to perform as intended.

Bare timber, repaired areas and stains need an appropriate primer before topcoats are applied. Primer is chosen for the substrate and the issue being addressed. For example, tannin-rich timber and water stains may need a stain-blocking product, while previously painted surfaces may require a suitable undercoat to ensure adhesion and consistent colour.

Choosing colours that suit the home

The best colour scheme is not always an exact copy of what was there before. Queenslanders can carry bold heritage colours beautifully, but a scheme still needs to suit the home’s proportions, surrounding properties and the owner’s taste.

For this example, the faded cream weatherboards were updated to a soft warm white. The trim was finished in a muted charcoal, giving the windows, posts and fretwork definition without making the facade feel heavy. A restrained accent colour on the front door added personality and drew attention to the entry.

Lighter main colours are a practical choice for many Gold Coast and Tweed homes because they reflect more heat and can make a detailed timber facade feel open. Dark trim can be very effective, though it tends to show dust, salt residue and imperfections more readily. It also absorbs more heat, so the condition of the timber and the suitability of the paint system should be considered.

Colour consultation is particularly useful when the house has heritage features but the owner wants a cleaner, more current look. Sample colours should be viewed outside at different times of day. A shade that appears crisp in the morning can look much warmer or darker in afternoon light.

Applying the paint system with care

Once repairs and preparation are complete, painting can begin. Large weatherboard areas may be sprayed for an even finish, then back-brushed or back-rolled where required to work the coating into the timber profile. Detailed areas such as fretwork, windows, balustrades and posts are generally brushed for control and clean edges.

The right application method depends on the surface, access and desired finish. Spraying can be efficient on broad areas, but it requires careful masking and weather awareness. Brush and roller work may take longer, yet it can offer greater precision around detailed timber and occupied homes.

Quality exterior systems are applied in the manufacturer’s recommended number of coats, with suitable drying time between them. Rushing coats because rain is forecast or because the job needs to finish early is not good practice. Weather conditions affect adhesion, drying and the appearance of the final finish.

For this example, the painting sequence was organised around the forecast and the home’s most exposed elevations. Work began on protected areas where possible, then moved to the weatherboards and trim as conditions allowed. That approach helps maintain a consistent finish rather than treating the job as a race against the clock.

The details people notice

A Queenslander’s appeal sits in its details. Straight lines along weatherboards, clean cut-ins at window frames and neatly finished posts make the whole property feel well cared for. Missed edges, paint on glass and heavy brush marks are especially noticeable on a traditional home because there is so much joinery to inspect.

The final stage includes a close check of all painted surfaces, touch-ups where required and removal of masking and protective coverings. Rubbish is cleared, and the work area is left presentable. A homeowner should not have to spend the weekend cleaning up after a painting crew.

What changes the cost and scope?

No two Queenslander repaints are identical. A compact cottage with sound timber and straightforward access will need a different scope from a large elevated home with ageing verandahs, extensive fretwork and multiple areas of repair.

The main variables are the condition of existing coatings, the amount of timber repair required, house height and access, the complexity of architectural details, and the selected paint system. Colour changes can also affect the process. Moving from a dark colour to a much lighter one may require additional coats for even coverage.

A detailed site inspection is the best way to avoid a vague estimate. It allows the painter to explain what is included, identify any repair work that should be completed first and recommend a finish suited to the home rather than simply pricing the visible square metres.

For homeowners planning a repaint, the most useful next step is to address early signs of failure before exposed timber becomes a larger repair. A careful assessment and well-prepared paint system can protect the features that make a Queenslander worth preserving – and make coming home feel good again.

Categories
Uncategorized

How to Paint Feature Walls for a Professional Finish

A feature wall can make a room feel more considered without the cost or disruption of a full renovation. Knowing how to paint feature walls properly is what separates a sharp, confident result from patchy coverage, uneven edges and a colour that feels out of place once the furniture goes back in.

The best feature walls are not chosen at random. They work with the room’s natural light, proportions and existing finishes, then are prepared and painted with the same care as any high-visibility surface. Because the wall draws the eye, small defects and rushed cut-in lines are far more noticeable than they would be on a standard wall.

Choose the right wall before choosing the colour

Start with the wall you naturally see when entering the room, such as the wall behind a bed, sofa, dining setting or reception desk. In many rooms, this gives the colour a clear purpose and makes the space feel anchored.

Avoid making a feature of a wall that is broken up by several doors, windows or built-in cupboards unless the design calls for it. A large, mostly uninterrupted wall will usually deliver the cleanest effect. In a narrow room, painting the shorter end wall a deeper colour can make it feel less tunnel-like. In a generous open-plan area, a feature wall can help define a living or dining zone.

Colour needs to be assessed in the actual room, not just on a paint chart. Gold Coast homes often receive strong natural light, and a shade that looks soft in a showroom can appear much brighter or cooler at home. Paint a generous sample area, then check it in the morning, afternoon and under artificial lighting at night. Consider adjoining rooms too, particularly where there is no door separating the spaces.

How to paint feature walls with a colour that lasts

A deeper tone is a popular choice, but it is not the only option. Muted greens, warm clay shades, soft blue-greys and rich charcoals can all work well when they suit the flooring, cabinetry, window furnishings and lighting. The goal is contrast with balance, not a wall that competes with every other finish in the room.

For most interior feature walls, a quality low-sheen acrylic paint is a practical choice. It offers a refined finish, is generally washable and is more forgiving than high-gloss products. Flat or matte paints can look elegant, but they may mark more easily in busy areas. In hallways, children’s rooms, commercial spaces or behind dining settings, durability and cleanability deserve extra consideration.

If you are changing from a dark colour to a light one, or applying a strong colour over a pale surface, allow for additional coats. Some deep reds, yellows and blues have lower hiding power and may need a tinted undercoat or a third finish coat for even depth. The correct system is worth discussing before work begins, rather than trying to make a thin coat cover more than it can.

Preparation is where a quality finish starts

Move furniture away from the wall and cover floors properly before opening a tin of paint. Remove switch plates where safe to do so, or carefully mask around them. Take down artwork, blinds or wall-mounted accessories that could interrupt the work.

Next, inspect the wall in good light. Fill nail holes, dents and minor cracks with a suitable filler, allow it to dry, then sand it smooth. Feather the edges of old repairs so they do not show through the new paint. Any flaking paint must be scraped back, and glossy surfaces should be lightly sanded to provide a sound surface for adhesion.

Wipe away sanding dust and clean marks, grease or residue with an appropriate sugar soap solution. This step matters in kitchens, near light switches and on walls that have been handled often. Paint adheres best to a clean, dry, stable surface.

Fresh plaster repairs and bare areas should be sealed or primed as required. Skipping this can lead to flashing, where repaired spots absorb paint differently and remain visible after the wall appears dry. If there are water stains, mould, recurring cracks or widespread peeling, address the underlying issue first. A new coat of paint will not solve moisture movement or failing plaster.

Get straight edges without relying on luck

Masking tape can help protect skirting boards, architraves and adjoining walls, but it does not replace careful preparation. Press quality painter’s tape down firmly along the edge so paint cannot creep underneath. Do not stretch it as you apply it, as this can cause it to lift.

For the sharpest line where the feature colour meets a different wall colour, experienced painters often cut in by hand with a quality angled brush. This creates a more precise edge than tape alone on textured walls or uneven corners. If you are using tape, remove it carefully while the final coat is still slightly wet or tacky. Leaving tape until paint has fully hardened can cause the new paint film to tear.

Use a small brush to cut in around ceilings, corners, trims and fittings first. Work in manageable lengths, maintaining a wet edge so the brushed section blends with the rolled paint. Do not overload the brush. Too much paint is more likely to run, build up along edges and leave visible ridges.

Apply paint evenly from top to bottom

Stir the paint thoroughly before starting and occasionally during the job, especially with deeper colours. Pour only what you need into a roller tray and use a roller sleeve suited to the wall texture. A medium nap sleeve is often appropriate for standard plasterboard walls, while a rougher surface may require a longer nap.

After cutting in, roll the main area in sections. Begin near the top and work down, applying paint in a loose W or M pattern before spreading it evenly. Finish each section with gentle, consistent strokes in the same direction. This helps reduce roller marks and keeps the sheen uniform.

Do not stretch the paint too far. A roller should be loaded enough to cover properly without dripping, and the wall should look evenly wet as you complete each section. Work quickly enough to maintain a wet edge, particularly on warm days when paint can dry faster. Avoid stopping halfway across a broad wall if possible, as lap marks can form where one area begins drying before the next is blended into it.

Allow the first coat to dry for the manufacturer’s recommended time. Check it from different angles before applying the second coat. Thin spots, dull patches and missed areas are easier to correct now than after furniture has been returned. Two coats are standard for a solid, professional appearance, although colour changes and surface conditions can require more.

Common feature wall mistakes to avoid

The most common mistake is choosing a colour based solely on a tiny sample card. Another is rushing the prep work because the wall is small. A feature wall may take less paint than a whole room, but it is not a shortcut job. Every imperfection is concentrated in one focal area.

Using poor-quality tools can also undermine good paint. A shedding roller sleeve, worn brush or low-tack tape that lifts mid-job creates unnecessary rework. It is also tempting to apply a heavy coat to finish faster, yet thick paint is more likely to sag, dry unevenly and leave texture differences.

Be mindful of the finish level too. Dark colours and higher sheens reveal uneven plaster, dents and roller marks more readily. If the wall has significant imperfections, it may need additional plastering and sanding before painting. This is often the difference between a wall that looks impressive in daylight and one that only looks acceptable from across the room.

When professional help makes sense

A DIY feature wall can be a satisfying weekend project when the surface is sound and the room has straightforward edges. Professional painting is often the better choice where there are high ceilings, detailed trims, difficult plaster repairs, strong colour changes or a finish that needs to match the standard of a renovation or business fit-out.

An experienced painter can also provide practical colour guidance, recommend the right products for the surface and manage preparation, protection and clean-up properly. For property owners who want a crisp finish without living around drop sheets and paint tins, Jag Painting Solutions can assess the wall and provide a clear, obligation-free quote.

A well-painted feature wall should look intentional from every angle, not merely colourful. Take the time to test the shade, prepare the surface and apply each coat carefully, and the room will feel refreshed long after the paint has dried.

Categories
Uncategorized

Coastal Home Colour Guide for Gold Coast Homes

A coastal home should feel calm and light, but choosing the right paint colours is rarely as simple as picking a pale blue and white. On the Gold Coast, strong sunlight, salt air and lush surroundings can change how a colour looks from one wall to the next. This coastal home colour guide will help you choose a scheme that feels right for your property and continues to look good once it is exposed to real coastal conditions.

The best result is not about copying a display home or following a short-lived trend. It is about selecting colours that suit your home’s architecture, the available light, existing finishes and the way you want to live in the space.

Start with the light around your home

Coastal light is bright, often harsh and constantly changing. A white that appears soft and warm on a paint card can look stark outside at midday. A grey with a cool undertone may turn noticeably blue in a south-facing room, while deep colours can become much stronger under direct sun.

Before settling on a colour, paint a generous sample on the actual wall or use large sample boards. Check it in the morning, afternoon and evening, rather than making a decision under showroom lighting. This matters particularly for exterior work, where sunlight and reflected light from paving, pools, windows and neighbouring homes can alter the final appearance.

On the Gold Coast, north and west-facing elevations receive intense sun. Softer mid-tones and warm whites generally cope well visually in these areas. Very dark exterior colours can look dramatic, but they absorb more heat and may show fading, chalking or movement in some substrates sooner. They can still be an excellent choice when used deliberately on a feature area, entry or architectural detail rather than across every external surface.

Build a coastal palette from fixed elements

Paint is one of the most flexible parts of a renovation, so it should work with the elements that are expensive or difficult to replace. Start by looking at your roof, brickwork, stone, tiles, flooring, benchtops, window frames and decking.

A home with cream tiles and warm timber will usually sit better with creamy whites, sandy beiges, muted greens or warm greys. By contrast, a property with concrete finishes, charcoal roofing and crisp aluminium frames may suit cleaner whites, soft greys and blue-green accents.

The key is undertone. White is not simply white. It can lean yellow, pink, grey, blue or green. Grey can be warm and earthy or cool and steely. When undertones clash, a freshly painted room can feel unsettled even when every individual colour looked good in isolation.

For a whole-home scheme, choose one main neutral first. From there, select supporting colours that share a similar warmth or coolness. This keeps the result considered without making every room look identical.

Coastal home colour guide: colours that age well

Coastal style does not need to mean a house painted in blue and white. In fact, the most successful coastal homes often take their cues from the natural landscape rather than using obvious beach-themed colours.

Warm whites and soft neutrals

Warm white remains a reliable choice for interiors and exteriors because it reflects light without feeling clinical. It suits weatherboards, rendered homes, modern apartments and classic Queenslander-style properties. A warm off-white also works well with timber, rattan, natural stone and linen furnishings.

Soft beige, putty, mushroom and pale greige are useful alternatives when pure white feels too sharp or impractical. They bring enough depth to define walls while remaining easy to live with. These colours are especially effective in open-plan homes where light changes throughout the day.

Sand, clay and natural earth tones

Sandy tones connect naturally with coastal surroundings and are more forgiving than white on external walls. Pale biscuit, muted clay and light taupe can give an older brick or rendered home a more contemporary appearance without making it feel overly stark.

Earthier shades are also a sensible option for high-traffic interiors. Hallways, family rooms and entryways can benefit from a little more depth, provided the colour is not so dark that it closes in the space.

Muted greens and blue-greens

Eucalypt, sage, olive-grey and muted teal bring colour into a home without overpowering it. They suit bedrooms, studies, powder rooms and joinery, and can work beautifully on a front door or external feature wall.

Choose restrained versions of these shades rather than bright aqua or heavily saturated blue. Strong blues can feel dated quickly and may compete with the view, pool or landscaping. A greyed-off green or blue-green tends to feel more timeless and is easier to coordinate with neutral finishes.

Charcoal and deep accents

Charcoal, deep navy and near-black are useful for creating contrast around doors, trims, fences and selected cladding. They can make a light exterior feel sharper and more architectural.

There is a trade-off. Dark paint is less forgiving of dust, salt residue, surface imperfections and sun exposure. On exterior surfaces, preparation and product selection are just as important as the colour itself. If you love a deep tone, consider using it where it adds impact without carrying the full maintenance burden of an all-dark façade.

Choose exterior colours for more than street appeal

An exterior colour scheme needs to look good from the street, but it must also suit the building materials and environment. Coastal homes are exposed to UV, moisture and, in many locations, airborne salt. A quality exterior coating system, correct surface preparation and attention to gaps, cracks and failing paint will influence durability far more than colour alone.

As a general approach, use a main wall colour, a complementary trim colour and one accent colour. Keeping the palette limited gives the property a clean, professional finish. Too many competing colours can make a façade appear busy, particularly when there are already strong elements such as roof tiles, garage doors, fencing and landscaping.

If your home is close to the beach, avoid treating paint selection as purely decorative. Salt build-up should be cleaned from exterior surfaces, and any peeling, mould, rust staining or damaged render should be addressed before repainting. Applying premium paint over a poorly prepared surface is not a lasting fix.

Create flow indoors without painting every room the same

Interior colour flow makes a home feel larger and more settled. That does not mean every wall needs one shade. It means the colours should relate to each other as you move through the home.

A practical approach is to use a consistent neutral through main living areas, hallways and connecting spaces, then introduce variation in bedrooms, bathrooms or feature zones. A slightly deeper version of the main neutral can add definition to a study or media room. A muted green may work in a bedroom where a brighter living space would not.

Ceilings, doors and trims deserve attention too. Crisp white trims can give contrast against warmer walls, while a softer white across walls and trims can create a quieter, more contemporary look. The right choice depends on the character of the home and the level of detail you want to highlight.

For smaller rooms, do not assume white is the only option. A well-chosen mid-tone can make a powder room or bedroom feel purposeful and inviting. The important part is to test it in the room, with its lighting and furnishings, before committing.

Avoid common colour selection mistakes

Many disappointing paint jobs begin with a good colour used in the wrong context. Choosing from a tiny swatch, matching a photo online or selecting colours room by room without considering the overall home can lead to expensive changes later.

Another common issue is overlooking sheen level. Low-sheen finishes are popular for walls because they provide a soft appearance and hide minor imperfections better than higher sheen paints. Semi-gloss or gloss is commonly used for doors, trims and hard-wearing areas, although the higher the sheen, the more clearly it shows surface flaws. Your paint system should suit both the room and the condition of the surfaces.

It is also worth being realistic about maintenance. Brilliant white external walls, dark fences and very deep feature colours can all look excellent, but they may need more regular cleaning or touch-ups. The best choice balances the look you want with the upkeep you are comfortable managing.

Get the finish right with professional preparation

Colour consultation is valuable because it connects design decisions with the practical realities of paint, light and surface condition. An experienced painter can identify whether old coatings need stripping, whether plaster repairs will show through a low-sheen finish, and which colours are likely to behave differently outdoors.

At Jag Painting Solutions, colour guidance is part of helping clients make confident decisions before work begins. Careful preparation, clean workmanship and the right coating system give your chosen palette the best chance of looking its best for years to come.

Take your time with samples, look beyond the paint card, and choose colours that suit the way your home faces, wears and feels. A considered scheme will do more than freshen the walls – it will make the whole property feel like it belongs where it is.

Categories
Uncategorized

How to Read Plastering Company Ratings Well

A freshly painted wall can only look as good as the surface beneath it. When plasterboard joints show through, repairs crack again or sanding dust is left throughout the home, the lowest quote quickly stops looking like value. Plastering company ratings can help you narrow down your options, but the star score alone will not tell you whether a trade is right for your property.

For homeowners, renovators and business owners, a review is most useful when it answers practical questions: Did the team arrive when they said they would? Was the repair blended properly? Did they protect floors and furniture? Was the job left clean? Reading ratings with this in mind helps you choose a plasterer with the workmanship and service standards your project deserves.

What plastering company ratings can tell you

Ratings provide a snapshot of a business’s customer experience over time. A strong average score, supported by detailed and recent comments, can indicate that a company communicates well, turns up reliably and completes work to a consistent standard. For plastering, that consistency matters. Surface preparation is not always obvious on day one, but it becomes very obvious once light hits a painted wall or ceiling.

Look for comments that mention the type of work completed. Reviews that refer to patch repairs, water-damaged ceilings, cornice work, full internal re-sheeting or preparation before painting are generally more helpful than a simple “great job”. Specific details suggest the reviewer has seen the work completed and can explain what made the experience positive.

The number of reviews also deserves context. Ten detailed reviews collected steadily over several years may tell you more than a large batch posted over a short period. Neither is automatically better, but patterns are worth noticing.

Read the words, not just the score

A five-star rating is encouraging, yet the written feedback is where the useful information sits. Pay attention to repeated themes. If several customers mention clear communication, tidy work practices and a smooth finish, those are likely part of the team’s normal approach rather than a one-off good experience.

For a home renovation, comments about respect for the property are particularly valuable. Plastering can involve cutting, sanding and dust, even with careful preparation. A professional team should explain how they will contain the work area, protect nearby surfaces and clean up at the end of each stage. A review that mentions these details is often more meaningful than a general compliment.

Be equally alert to vague praise. It is not necessarily unreliable, but it gives you less to work with. The best reviews usually describe the original problem, the agreed scope and how the contractor handled it.

How to assess plastering company ratings fairly

No established trade business is likely to have a perfect record forever. A single lower rating does not automatically mean you should rule a company out. What matters is whether the issue is isolated, how recent it is and how the business responded.

A calm, professional response can be a positive sign. Delays can happen when materials are unavailable, weather affects external work, or an existing wall reveals more damage than expected. The key question is whether the contractor communicated early, explained the options and worked towards a fair outcome. Blaming the customer or responding defensively is less reassuring.

It also helps to separate complaints about price from complaints about workmanship. A customer may have expected a cheaper outcome, while the quoted work may have included proper preparation, multiple visits or repairs that another contractor left out. That does not mean a price concern should be dismissed, but it does show why you need to compare scopes, not ratings alone.

Check whether the review matches your job

A quick patch repair, a full house repaint and a commercial fit-out place different demands on a trade. If you are repairing cracks before selling your home, reviews about punctuality and clean work may be most relevant. If you are renovating, seek feedback from clients who had broader repair and finishing work completed around other trades.

For commercial property, look for signs that the contractor can work around tenants, staff, customers and access restrictions. Good finishes still matter, but so do planning, site safety and keeping disruption to a minimum.

If a review describes painting as well as plastering, that can be especially useful for projects requiring both. The same team can assess the wall condition, complete repairs and apply the finish coat with one clear standard of accountability. It is not always necessary to use one contractor, but it can reduce handovers and avoid disputes about who is responsible for a poor final result.

Questions ratings cannot answer for you

Online feedback is a starting point, not a substitute for a proper conversation and written quote. Before booking, ask the contractor to inspect the work where possible. Photos can be helpful for an initial discussion, but they may not show loose sheeting, moisture issues, uneven framing or the extent of previous repairs.

A detailed quote should make clear what is included. For plastering work, that may cover removal of damaged material, replacement sheets, setting joints, corner beads, cornice repairs, sanding, sealing and painting where required. It should also state what happens if hidden damage or moisture is found once the work begins.

You should understand the finish level being allowed for. A wall that will be painted in a low-sheen colour under ordinary lighting has different requirements from a feature wall with gloss paint, strong downlights or large windows. Light from the side can highlight even minor imperfections, so an experienced plasterer will consider the intended paint finish and room conditions before setting expectations.

Ask how the team will manage dust and furniture, when they can start, how long the work will take and who will be your point of contact. These are not fussy questions. They are the practical details that make a project feel organised rather than stressful.

Warning signs to look beyond in ratings

High ratings should not override common sense. Be cautious if a business cannot provide a clear scope, avoids questions about preparation, pressures you to accept a quote immediately or gives a price that seems far below comparable quotes without explaining why.

Also take notice if reviews repeatedly mention missed appointments, surprise costs or poor communication. These issues can be just as disruptive as a visible defect, particularly when you are coordinating painters, flooring installers, tenants or a move-in date.

At the same time, avoid judging a contractor solely on one unhappy review. Read the date, the circumstances and the response. A reasonable decision comes from the overall pattern, the quality of the quote and how confidently the contractor explains the work.

Turn good ratings into a better quote comparison

Once you have shortlisted two or three well-reviewed plastering companies, compare like for like. A cheap figure for “patch and paint” may exclude proper sealing, multiple coats, protection or preparation. A higher quote may include the steps needed to achieve a finish that lasts.

Rather than asking who is cheapest, ask what each contractor proposes to do and why. The right choice depends on the wall condition, the room’s use, the paint finish and how long you expect the result to last. For a rental touch-up, the scope may be straightforward. For a renovation or a home you plan to enjoy for years, careful repairs and preparation are usually money well spent.

At Jag Painting Solutions, plastering and painting are approached as connected parts of the same finish. A clear quote, respectful work practices and honest advice give clients a better basis for deciding what their property needs.

The most useful rating is one that helps you ask better questions. Choose a team that can explain the work in plain language, put the scope in writing and treat your home or business with care. That is how a positive review becomes confidence in the result on your own walls.

Categories
Uncategorized

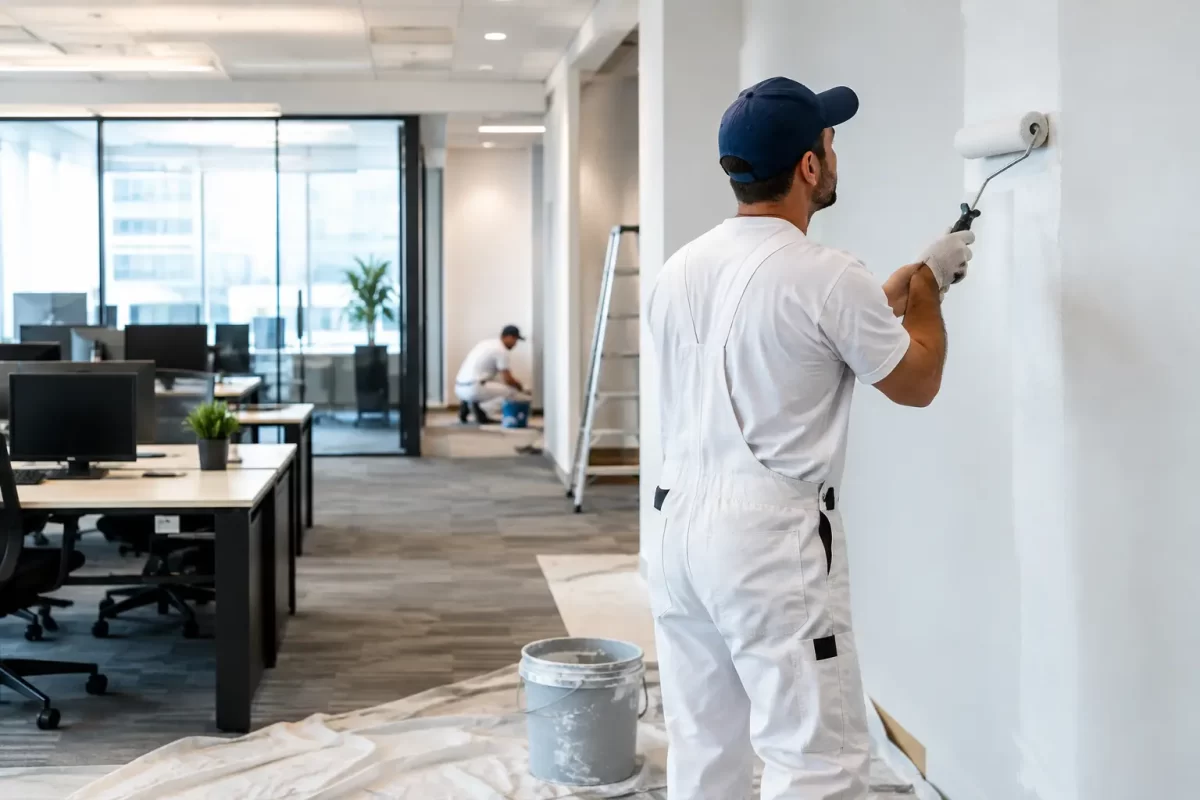
How to Schedule Occupied Office Painting

A fresh office can lift the way staff and clients feel about the business, but repainting cannot come at the cost of lost trading time or a disrupted workplace. To schedule occupied office painting well, the work needs to fit around the people using the space, the tasks they perform and the areas that cannot be out of action at the same time.

For Gold Coast and Tweed businesses, the best result is usually not the fastest possible job. It is a carefully planned project with clear access arrangements, realistic drying time and a painting team that respects a working environment.

Start with how your office actually operates

Before setting a date, look at the day-to-day rhythm of the office. A quiet professional practice may be able to paint meeting rooms during normal hours, while a busy reception, medical clinic or customer-facing showroom may need work completed after hours or over a weekend.

Consider where staff sit, when clients visit and which rooms are essential to daily operations. Reception counters, interview rooms, boardrooms, kitchens and amenities are often used differently, so they should not automatically be treated as one painting area. A staged plan keeps the business operating while the refresh takes place section by section.

It also helps to identify fixed dates early. Avoid painting immediately before an important presentation, audit, staff event or major client meeting. Allow a little breathing room after the final coat for touch-ups, furniture reset and a proper clean before the area returns to full use.

Schedule occupied office painting in workable stages

For most active workplaces, dividing the project into zones is the most practical approach. One area is prepared and painted while staff work from another part of the office, work remotely where possible or use a temporary desk arrangement. Once that zone is dry and ready, the team moves to the next.

The right stage size depends on the office layout and the number of people involved. Painting one room at a time gives the least disruption, although it can extend the overall programme. Closing a full wing or floor may complete the job sooner, but only works if the business has enough alternate space. The best choice depends on your deadline, available workspace and how much movement of staff and equipment is realistic.

A typical staged arrangement may include:

  • reception and waiting areas completed after hours or on a weekend
  • meeting rooms painted one at a time and temporarily removed from bookings
  • open-plan workspaces completed in sections, with desks relocated in advance
  • kitchens, corridors and amenities timed for quieter periods

A professional painter should talk through these details before work begins, rather than arriving with a one-size-fits-all plan.

Allow for preparation, not only painting time

The paint itself may be the visible part of the job, but preparation often determines the finish and the schedule. Walls may need cleaning, holes filled, cracks repaired, stains sealed or damaged plaster patched before a top coat can be applied.

If an office has old adhesive marks, scuffed corridors, peeling paint or previous water damage, allow additional time for repairs and drying. Rushing this stage can leave visible defects under a new coat and create more inconvenience later. It is better to assess surfaces properly at the quoting stage so there are fewer surprises once furniture has been moved.

Choose timing that protects productivity

After-hours painting is a sensible option for businesses with regular client traffic, phones that need answering and teams who cannot easily relocate. Evening work can keep disruption low, particularly for entry areas and shared spaces. Weekend work can be useful for larger stages, as it gives paint more time to dry before staff return.

That said, after-hours access is not always necessary. Smaller enclosed rooms can often be completed during business hours if access is controlled and the room is taken out of use. In some offices, a combination works best: preparatory work and low-impact painting during the day, with high-traffic areas completed outside normal hours.

Ventilation, drying conditions and the coating system all affect timing. Water-based low-odour paints are generally well suited to occupied interiors, but a responsible schedule still allows for drying and airing out. Your painter can recommend suitable products for the surfaces, traffic level and required finish, rather than selecting paint based on colour alone.

Give staff clear notice before work starts

Even a well-planned painting project can feel disruptive if people do not know what is happening. Staff should be told which areas are being painted, when access will change and what they need to remove from desks, shelves and cupboards. Clear communication avoids last-minute scrambling and protects personal items.

For a larger office, nominate one person from the business to coordinate with the painting team. This contact can confirm access, security procedures, parking, alarm requirements and any changes to the work schedule. They can also make quick decisions if an unexpected issue is found behind a filing cabinet or on a wall that was previously hidden.

Clients and visitors may need notice too. A simple sign at reception, an update in appointment reminders or temporary directions to an alternate entry can prevent confusion. The goal is not to draw attention to the works, but to make the experience feel organised.

Prepare the workplace for a clean result

Painters can protect floors, fixed furniture and nearby fittings, but the office team can make the process smoother by clearing movable items beforehand. Remove artwork, loose wall décor, desk accessories and paperwork from the work zone. Sensitive electronics and important files should be moved or securely covered as agreed.

Large furniture does not always need to leave the room. Often it can be moved to the centre and protected, provided there is enough room for safe access to the walls. However, crowded spaces can slow the job and make detailed preparation more difficult. If a room can be cleared fully, the finish is usually easier to achieve and the work can be completed more efficiently.

Access arrangements matter as well. Confirm where painters can park, how materials will be brought in, where ladders and equipment can be stored securely, and whether there are building management rules for lifts, loading bays or noise. These practical details are small, but they prevent lost time on the day.

Keep safety and security part of the plan

An occupied office needs more than drop sheets and paint tins. Walkways, emergency exits and shared access points must remain clear. Work areas should be separated where needed so staff and visitors are not walking under active preparation or around equipment.

Security is equally important. Discuss keys, swipe access, alarms and who will open and close the premises if work is taking place outside business hours. If the office handles private client information, arrange for documents and screens to be secured before painters arrive. A professional team will respect the workplace, but a clear site process gives everyone confidence.

Check each stage before reopening the area

Do not wait until the entire project is finished to inspect the work. At the end of each stage, check the agreed colour, coverage, edges, repaired areas and overall appearance in normal lighting. It is much easier to address a question while the team is still working in that zone than after desks and décor have been put back.

This is also the time to confirm that furniture can return safely and that the space is ready for staff. A quality painting job should leave the office looking refreshed, not leave your team with a long reset to manage.

For businesses that need reliable planning as well as a high-standard finish, Jag Painting Solutions can help arrange commercial painting around the way your office works. A clear site visit and detailed quote are the right place to start – before dates are locked in and staff calendars are affected.

Categories
Uncategorized

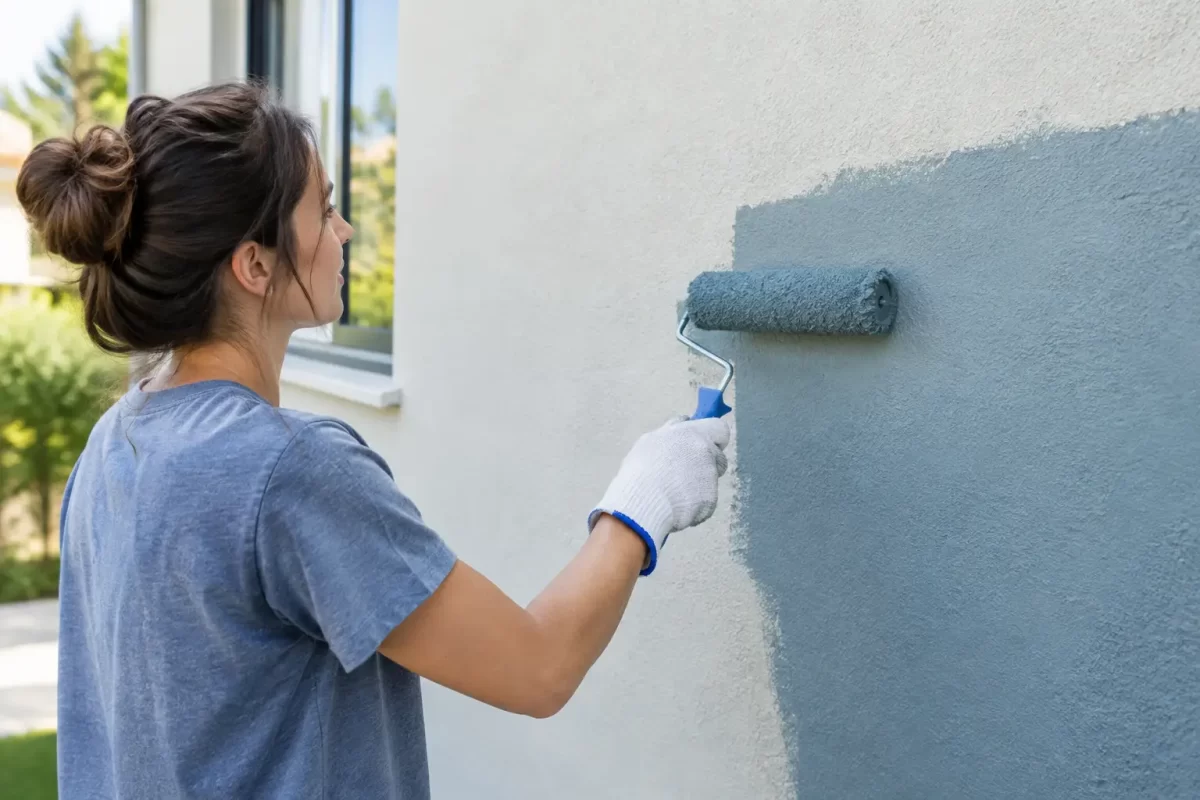
How to Repaint Rendered Walls for a Lasting Finish

A rendered wall can look tired long before the render itself needs replacing. Fading, chalky paint, fine cracking and patchy repairs are common on homes exposed to strong sun, coastal air and wet-season humidity. To repaint rendered walls properly, the job needs more than a fresh top coat. The condition of the surface, any moisture issues and the coating system all affect how the finish will look and how long it will last.

For Gold Coast homes especially, exterior paintwork has to deal with heat, UV exposure, driving rain and, in some areas, salt in the air. Good preparation is what prevents a repaint from peeling, blistering or showing every old defect again within a year or two.

Start by assessing the render, not the paint colour

Before choosing colours, inspect the walls closely in daylight. Look for hairline cracks, larger movement cracks, hollow or loose render, bubbling paint, white powdery deposits and areas where the coating has lifted. Each points to a different issue, and painting straight over the problem usually only hides it temporarily.

Hairline cracks are common as a building settles and as render expands and contracts through changing temperatures. These can often be filled with a suitable flexible exterior filler before painting. Wider cracks, repeated cracks in the same location or cracks around windows and doors deserve closer attention. They may indicate movement, failed joints or water entering behind the render.

Also run a hand across the wall. If a chalky residue comes away on your palm, the old paint has weathered and needs thorough cleaning and stabilising before new paint is applied. If the surface sounds hollow when lightly tapped, or sections of render are breaking away, those areas should be repaired before any coating work begins.

Check for moisture before repainting

Moisture is the main reason a well-painted wall can fail early. Blistering, mould, staining, flaking low on the wall or persistent damp patches may come from leaking gutters, damaged flashings, plumbing leaks, poor drainage or water tracking in through cracks.

Painting over a damp rendered wall traps the problem beneath the coating. The result can be peeling paint, mould growth and further damage to the render. Identify and fix the water source first, then allow the wall adequate time to dry. On shaded sides of a property, this can take longer than expected after rain.

Efflorescence is another warning sign. It appears as a white, powdery or crystalline deposit and occurs when moisture carries salts to the surface. Brush it off, clean the area and address the moisture path before coating. A professional painter can help assess whether the wall is suitable for painting or whether remedial repairs should come first.

Preparing rendered walls for painting

Preparation is where the quality of an exterior repaint is won or lost. A clean, sound and dry surface gives primer and paint the grip they need. Skipping this stage may save time at the start, but it often leads to a shorter-lasting finish and a more expensive repaint later.

Start by washing down the walls to remove dirt, salt, cobwebs, mould and loose paint. The cleaning method should suit the condition of the render. High-pressure cleaning can be effective when done carefully, but excessive pressure can damage soft or deteriorated render, force water into cracks or strip sound coatings unnecessarily. A controlled wash, mould treatment where required and thorough rinsing are often the safer approach.

Once clean and dry, scrape back all loose or peeling paint to a firm edge. Sand rough patches, feather the edges of repairs and remove dust before priming. Any existing mould should be treated rather than simply painted over, as it can return through the new coating.

Repair cracks and damaged areas correctly

Small surface cracks can generally be filled with a flexible exterior crack filler designed for rendered masonry. The filler needs to be compatible with the planned paint system and allowed to cure fully. Rigid fillers can crack again when the wall moves, which is why product selection matters.

For damaged render, the repair should match the surrounding texture and profile as closely as possible. A flat patch on a textured wall will stand out after painting, particularly in low-angle sunlight. Larger repairs may need re-rendering rather than filling, and they should cure properly before primer is applied.

It is also worth checking joints between render and other materials, such as timber trim, window frames or masonry additions. These areas move differently and often require a flexible sealant rather than a hard patching compound.

Choose the right coating system

Not every exterior paint is right for rendered walls. Render is porous and can be prone to fine movement, so it benefits from a quality exterior masonry coating with good adhesion, weather resistance and flexibility. The best system depends on whether the surface is new, previously painted, chalky, repaired or affected by coastal conditions.

A suitable primer or sealer is often essential. Bare render and repaired patches can absorb paint unevenly, creating a patchy sheen or inconsistent colour if they are not sealed first. A primer can also bind a chalky surface once it has been cleaned and prepared correctly. Where old paint is sound, a full prime may not always be needed, but spot-priming repairs and exposed areas is still good practice.

For many rendered exteriors, a premium low-sheen acrylic finish offers a practical balance. It is easier to maintain than rougher finishes, helps disguise minor surface irregularities and provides a modern appearance. More textured coatings can suit heavily textured render, while elastomeric-style systems may be considered where fine cracking is a recurring issue. These products have benefits, but they are not a solution for structural movement or ongoing moisture.

Colour also affects performance. Dark colours absorb more heat, which can place extra stress on sun-exposed render and make surface imperfections more obvious. That does not mean dark shades are off limits, but they should be chosen with an understanding of the wall’s condition, aspect and the coating manufacturer’s recommendations. A colour consultation can help homeowners make a choice that suits both the property and the environment.

The right way to apply paint to rendered walls

After repairs, cleaning and priming are complete, apply the coating in line with the product’s spread rate and drying requirements. Render has plenty of texture and porosity, so thin coats applied too quickly can leave missed areas, poor coverage and reduced protection.

Brushes are useful for cutting in around windows, eaves, downpipes and tight details. Rollers with an appropriate nap help work paint into the texture, while spray application can provide efficient coverage on larger walls when it is followed by back-rolling. Back-rolling pushes the paint into pores and evens out the finish, which is particularly valuable on textured render.

Two full top coats are normally required for consistent colour and protection. Allow proper drying time between coats, and avoid painting when rain is expected, when the wall is hot to the touch or when humidity is too high for the product to cure as intended. On the Gold Coast, planning around changing weather conditions is part of doing the job properly.

Common mistakes that shorten the life of a repaint

The most common mistake is treating a rendered wall like any other painted surface. Covering cracks without investigating them, applying paint over chalking, or using a cheap coating on a harshly exposed wall can all lead to early failure.

Another issue is painting too soon after pressure cleaning, repair work or rain. The surface may look dry while moisture remains within the render. Poor masking, rushed cutting-in and missed edges around fixtures can also spoil an otherwise good exterior repaint.

DIY work can be suitable for a small, sound wall with straightforward access. However, a full house exterior, significant cracking, mould, high areas or uncertain paint failure are usually worth having assessed by experienced tradesmen. Professional preparation, safe access equipment and a coating system matched to the surface make a visible difference to the result.

When to call a professional painter

If you are unsure whether cracks are cosmetic, if render is drummy or loose, or if paint is peeling in more than one area, seek advice before committing to a colour. A professional inspection can identify what needs repairing, whether the existing coating is stable and which products are appropriate for the job.

Jag Painting Solutions prepares and repaints rendered exteriors with the same care given to interior and commercial work: protecting surrounding areas, repairing surfaces properly and applying finishes designed to perform. Clear advice before work begins helps avoid surprises and gives you confidence in the finished result.

A rendered wall should not just look freshly painted on the day the job is finished. With sound repairs, careful preparation and the right exterior coating, it can stay clean, protected and presentable through years of coastal weather. If the condition of your walls is unclear, arranging a professional quote is a sensible first step before choosing the paint tin.

Categories
Uncategorized

How to Plan Office Repaint With Less Disruption

An office repaint can improve first impressions quickly, but only if the work is planned around the people who use the space. Knowing how to plan office repaint work means more than choosing a wall colour. It means setting a realistic scope, protecting equipment, managing access and allowing enough time for proper preparation and drying.

A rushed paint job can interrupt staff, inconvenience customers and leave a finish that does not hold up. A well-organised project, on the other hand, can refresh your workplace with minimal disruption and give your business premises a cleaner, more professional feel.

Start with the reason for the repaint

Be clear about what you want the repaint to achieve before requesting quotes. You may be preparing a tenancy for new occupants, updating tired reception areas, repairing scuffed corridors, changing branding colours or improving the presentation of a client-facing workplace.

Your purpose affects the scope and paint system. A small cosmetic refresh may only involve feature walls and high-traffic areas. An older office with cracking, stains, failed coatings or damaged plaster may need repairs and more thorough preparation before any finish coats are applied.

Walk through the office and make notes by area. Include walls, ceilings, doors, skirting boards, window frames, built-in cabinetry and any metalwork that needs attention. This gives your painter a clearer picture and helps avoid assumptions in the quote.

How to plan office repaint timing

Timing is usually the biggest factor in a commercial repaint. Offices are working environments, so the best schedule depends on your operating hours, staff numbers, access requirements and the rooms being painted.

For a smaller workplace, painting after hours or over a weekend may be enough. Larger offices are often better handled in stages, with one zone completed at a time while staff continue working elsewhere. This approach takes longer overall, but it can reduce the impact on daily operations.

Allow time for preparation, not just painting. Filling holes, sanding repairs, sealing stains and protecting surfaces are essential to a quality result. Drying and curing time also matters, particularly in enclosed rooms or humid Gold Coast conditions. A room may be dry to touch relatively quickly, but it should not be crowded with furniture before the coating has had suitable time to harden.

Talk openly with your painting contractor about non-negotiables. For example, reception may need to remain presentable every morning, meeting rooms may be booked on certain days, or a server room may have restricted access. A professional team can build these requirements into the work plan rather than trying to work around them on the day.

Inspect surfaces before selecting paint

Paint performs best on sound, clean and properly prepared surfaces. Before choosing colours, inspect the condition of the office carefully. Look for dents, nail holes, peeling paint, water marks, mould, cracking cornices and damaged plasterboard.

Water staining deserves particular attention. Painting over it without fixing the source of moisture can lead to the same issue returning through the new finish. Likewise, flaking or chalky paint needs to be stabilised or removed before repainting. These details can affect cost, but addressing them early protects the investment in your office refresh.

A proper site inspection should also identify areas that receive more wear. Hallways, kitchens, entry points, bathrooms and shared workspaces often need a tougher, more washable coating than a quiet boardroom. The cheapest paint option is not always the most economical once ongoing touch-ups and cleaning are considered.

Choose colours that work for the space

Office colour selection should support the way the space is used, not simply follow a current trend. Neutral tones can make a workplace feel brighter and more spacious, while deeper colours can add definition to reception areas, meeting rooms or brand feature walls.

Lighting changes the result considerably. A colour that looks right on a small sample card can appear cooler under fluorescent lighting, warmer in afternoon sun or darker on a large wall. Test sample colours in the actual room and view them at different times of day before making a final decision.

If your office has a brand palette, use it with restraint. Strong colours often work well on one feature wall, behind reception signage or in collaborative spaces. Applying them across every wall can make the area feel enclosed or visually tiring. Colour consultation can be particularly useful where you want a polished result but are unsure how to balance branding, light and existing finishes.

Create a practical access and protection plan

Painting crews need safe, clear access to do quality work. Before the project starts, decide who will move furniture, remove wall decorations and disconnect or relocate sensitive equipment. This should be agreed on before the start date, especially where heavy desks, screens or storage units are involved.

Your plan should cover four practical areas:

  • Staff workstations, including computers, documents and personal belongings.
  • Shared spaces such as kitchens, bathrooms, corridors and reception.
  • Access to rooms with security, alarms, swipe cards or restricted equipment.
  • Protection for floors, furniture, signage and fixed fittings.

Most office furniture can be moved to the centre of the room and covered where appropriate, but completely clearing smaller rooms usually allows a cleaner and faster finish. Sensitive electronics and confidential documents should be removed or secured by your team. A reputable painting contractor will use drop sheets and careful masking, but preparation is always easier when the workplace has been organised in advance.

Confirm the scope in writing

A detailed quote is one of the best ways to prevent confusion. It should explain which areas are included, the preparation work required, the number of coats, the paint type or finish, and whether repairs are allowed for.

Ask how variations will be handled if hidden damage is found after work begins. In older offices, it is not unusual to uncover loose plaster, previous patch repairs or wall damage behind furniture. Clear communication at this point prevents unwanted surprises and helps you decide whether additional work is worthwhile.

It is also sensible to confirm the finish level for each surface. Low-sheen wall paint is a common practical choice because it gives a refined appearance and is generally easier to maintain than flatter finishes. Ceilings, doors and trim may require different products and sheen levels. The right system depends on the surface, traffic level and the look you want to achieve.

Keep staff and customers informed

Even a carefully scheduled repaint creates some movement, noise and temporary changes to access. Give staff plenty of notice, including which areas will be affected and when they need to clear desks or relocate. If customers visit your premises, consider temporary signs directing them around work zones or advising of alternate entry points.

Paint odour is usually manageable with suitable ventilation and modern low-odour products, but it should still be considered. Staff with sensitivities, health concerns or close proximity to the work area may need to work remotely or from another part of the office while painting is underway.

A single contact person on your side makes the project run more smoothly. They can answer access questions, approve minor decisions and communicate changes to staff. This avoids delays when the painters need clarification about a room, colour placement or furniture arrangement.

Plan for the final inspection and ongoing care

Before furniture is returned and normal operations resume, inspect the completed work with the contractor. Check walls in natural and artificial light, look over repaired areas, and ensure doors, trims and edges have been finished neatly. A good final walkthrough gives you the chance to raise any reasonable touch-up items while the crew and materials are still on site.

Keep a record of the paint colours, product names and finishes used. This makes future maintenance far easier, whether you need to touch up a damaged wall, repaint a single office or extend the same colour scheme into another area.

For office managers across the Gold Coast and Tweed, a repaint should feel like a planned improvement rather than a disruption to manage. When the scope, timing and surface preparation are handled properly, the result is a workplace that looks cared for and is ready to represent your business well. If you are unsure where to begin, an experienced commercial painter can inspect the space and provide a clear, obligation-free quote before work is booked.

Categories
Uncategorized

Paint Fumes Indoors and How to Clear Them

A freshly painted room should feel like an improvement, not somewhere you avoid using for days. Paint fumes indoors are a common concern for homeowners, particularly when bedrooms, nurseries, offices or living areas need to be back in use quickly. The good news is that the right paint choice, preparation and ventilation can make a major difference without compromising the finish.

The smell after painting does not always tell the full story, but it is a useful signal that the room needs more fresh air and time to cure. A professional painter plans for this before the first coat goes on, protecting your home while helping the new finish look its best.

What causes paint fumes indoors?

Most paint odours come from volatile organic compounds, commonly called VOCs. These are chemicals released into the air as paint dries and cures. Traditional oil-based products generally have a stronger odour and can continue releasing VOCs for longer than many water-based paints.

Water-based acrylic paints are now widely used for interior walls and ceilings because they dry faster, have lower odour and are easier to clean up. That does not mean every water-based product is odour-free. Primers, specialty coatings, spray applications and products used for timber, metal or mould treatment can each have different drying times and ventilation requirements.

Humidity and airflow matter too. On the Gold Coast, a wet or humid day can slow drying and leave odours lingering longer than expected. Closing a room up immediately after painting may protect it from dust, but it can also trap moisture and fumes where you least want them.

How long do paint fumes last?

For a typical interior wall painted with a quality low-VOC water-based product, the noticeable smell often settles within a few days when the room is well ventilated. Full curing takes longer, sometimes several weeks, depending on the product, number of coats, weather conditions and airflow.

Oil-based paint, strong primers and solvent-based finishes can smell for considerably longer. A newly painted cupboard, wardrobe or small bathroom may also hold odours because there is less air movement. Fresh paint inside cabinetry is a common reason a room still smells noticeable even when the walls appear dry.

Dry to the touch is not the same as fully cured. Paint may look ready within hours, yet still be releasing low levels of odour while it hardens. Check the product label for recoat, dry and cure times, and allow extra time where the space has limited ventilation.

Reducing paint fumes indoors safely

The best approach starts before painting. Choosing the right coating for the room and opening up airflow early is easier than trying to mask a strong smell after the job is done.

Choose low-odour products for living spaces

For bedrooms, living rooms, hallways and offices, ask about low-VOC or very low-VOC interior paint. These products can reduce odour while still delivering good washability and coverage when matched to the surface and the way the room is used.

There is a trade-off. The lowest-VOC option is not automatically the best product for every surface. High-traffic commercial areas, kitchens, bathrooms and timber trim may need coatings chosen for durability, moisture resistance or adhesion. An experienced painter can recommend a suitable system rather than applying one product across every room.

Create cross-ventilation

Open windows and doors on opposite sides of the area where practical to move air through the space. Use ceiling fans or portable fans to direct air towards an open window or doorway, rather than simply circulating it around the room.

Avoid creating a pathway that pushes fumes into bedrooms or other occupied areas. If possible, keep internal doors to those rooms closed and ventilate the painted room directly outside. Exhaust fans can help in bathrooms and laundries, provided they vent outdoors.

On very hot, wet or still days, natural airflow may be limited. Air conditioning can make a room more comfortable, but it does not replace fresh-air ventilation unless the system is designed to bring outdoor air in. A dehumidifier may assist drying in a damp room, although it will not remove fumes on its own.

Give the room time before moving back in

Do not rush furniture, curtains and bedding back into place while the paint is still drying. Leaving clear space around walls improves airflow and reduces the chance of scuffs, marks or fabric picking up paint odour.

For a child’s room, nursery or a room used by someone sensitive to smells, plan the work around an alternative sleeping arrangement where possible. Allow the paint to dry and the room to air out thoroughly before returning to normal use. The exact timeframe depends on the coating used, so follow the manufacturer’s advice rather than relying on smell alone.

Do not try to cover the smell

Scented candles, incense, air fresheners and strong cleaning products only add more particles and fragrances to the air. They can make it harder to judge whether the room is properly ventilated.

Houseplants may be pleasant to have indoors, but they are not a substitute for opening windows, using appropriate extraction and selecting lower-odour paints. Fresh air remains the most practical solution.

When paint odours need more attention

A mild paint smell after a fresh coat is expected. A very strong smell that persists, causes discomfort, or becomes more noticeable in a closed room deserves a closer look. The cause may be a solvent-based coating, insufficient ventilation, damp conditions, paint applied too heavily or a product that was not suitable for the area.

If anyone experiences headaches, dizziness, nausea, eye irritation or breathing discomfort while paint is drying, move them to fresh air and ventilate the space. Seek medical advice promptly if symptoms are severe, persist or you are concerned. People with asthma, allergies or chemical sensitivities may need extra care when planning interior works.

Never use a room with active fumes as a place to sleep just because the paint feels dry. This is especially relevant to small rooms with shut windows, freshly coated cabinetry or projects completed late in the day. Give the space more time and airflow.

Why professional preparation makes a difference

Good indoor painting is more than applying an even coat. It involves assessing the existing surface, selecting compatible primers and topcoats, repairing plaster correctly and allowing realistic drying time between stages. These details affect both the quality of the finish and how comfortably the property can be used during the project.

A careful painting team will also protect floors and furniture, keep the work area orderly and communicate clearly about which rooms are being painted and when they can be used again. For occupied homes and operating businesses, that planning helps minimise disruption.

At Jag Painting Solutions, we help property owners choose suitable interior coatings and complete the work with care for the space around us. If you are planning a repaint and concerned about odour, ventilation or the right product for a particular room, raise it when requesting your quote. A little planning before work begins can make the difference between a room that merely looks fresh and one that feels ready to enjoy.