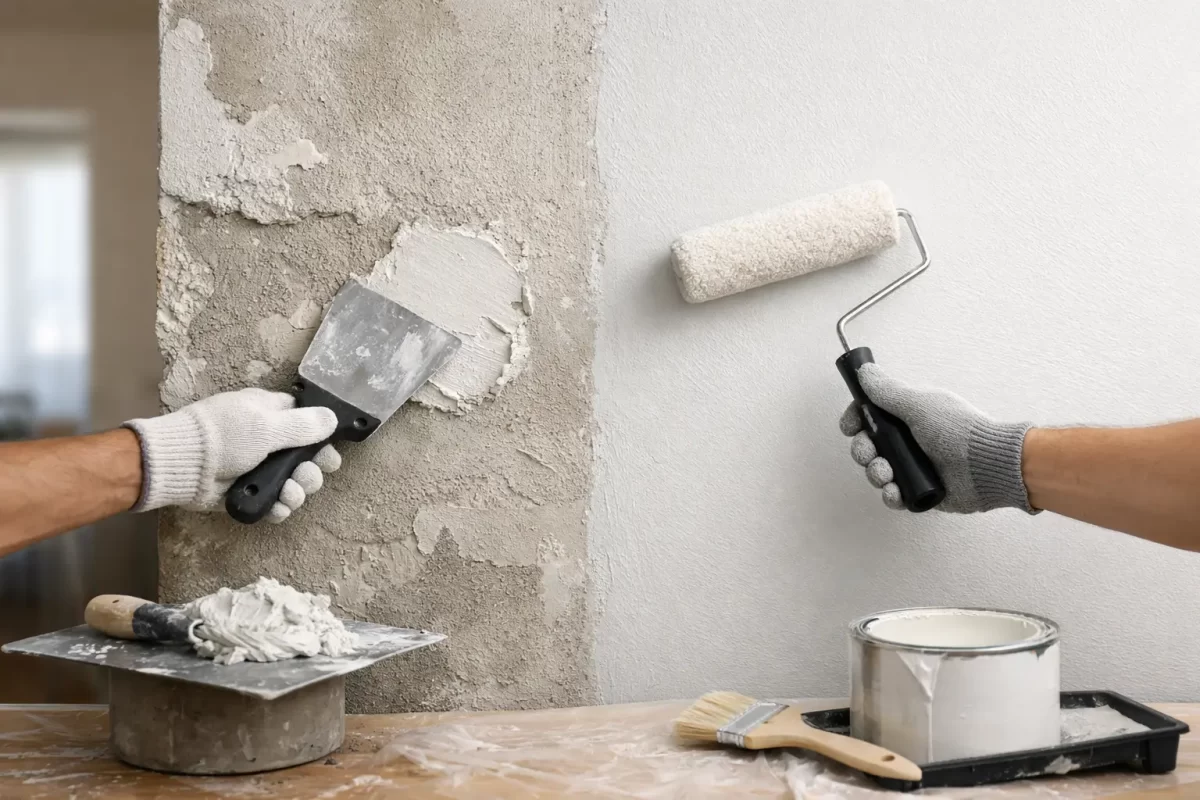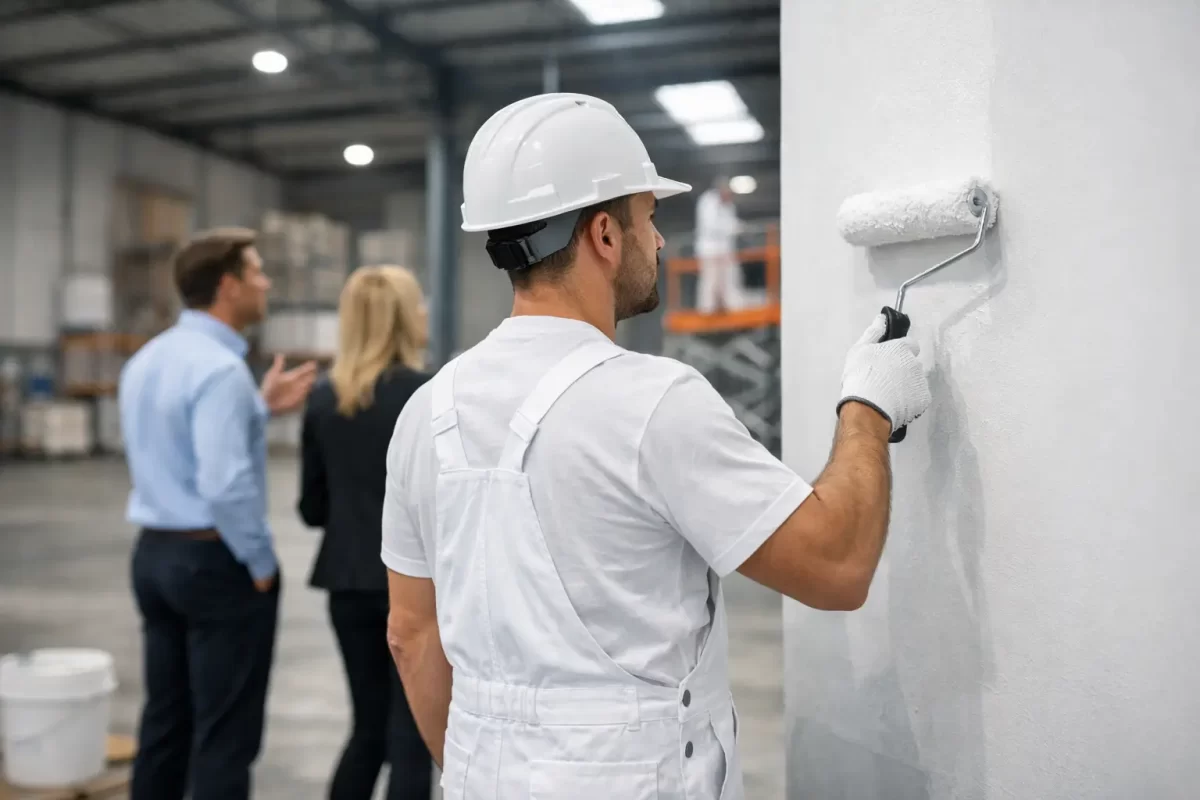
Categories
Uncategorized

Licensed QBCC Painter and Why It Matters

A paint job can look fine on day one and still turn into an expensive problem six months later. Peeling trim, patchy coverage, poor prep and water-damaged surfaces usually do not come from the paint tin alone. They often come from who was hired to do the work. That is where choosing a licensed QBCC painter and why it matters becomes more than a box to tick.

If you own a home, manage an investment property or are updating commercial premises, licensing is one of the clearest signs that you are dealing with a legitimate trade professional. It will not tell you everything about workmanship on its own, but it does tell you the painter is operating within the right framework for Queensland building work. For clients, that means less guesswork and a better starting point.

What a licensed QBCC painter actually means

QBCC stands for the Queensland Building and Construction Commission. In practical terms, a licensed QBCC painter is a contractor who is properly licensed to carry out relevant building and trade work in Queensland when the job requires it.

That matters because painting is not always just painting. On some projects, surface preparation, repairs, plastering, coatings and building-related work overlap. Residential repaints, renovation work and commercial fit-outs can involve more than applying finish coats. When that happens, you want a contractor who understands the scope of work, the standards expected and the obligations that come with licensed trade work.

For the client, licensing helps cut through one of the biggest risks in this industry – hiring someone who talks confidently but operates informally. Plenty of people can hold a brush. Fewer run a proper business, quote clearly, prepare surfaces correctly and stand behind the result.

Licensed QBCC painter and why homeowners should care

Most property owners are not comparing painters based on trade legislation. They are comparing them based on trust. Will they turn up? Will they protect the floors? Will they help with colour decisions? Will the finish last?

That is exactly why licensing matters. It is part of the trust picture.

A licensed QBCC painter is more likely to approach the work as a professional service, not a cash job. That usually flows through to how the project is quoted, how prep is handled, how defects are addressed and how the site is treated while work is underway. It does not guarantee perfect work every time, but it does show the business is operating with a level of accountability.

For homeowners, that can be especially important during renovations or larger maintenance works. Once painters start, they are in your personal space for days or weeks. You want a team that respects your home, communicates properly and treats the project as more than a quick turnover job.

Why licensing matters beyond the final coat

The best painting results are built before the first coat goes on. Preparation, repairs and product selection all shape the finish and how long it holds up.

That is one reason unqualified or underqualified operators can cost more in the long run. A cheap quote often looks attractive at the start, but if corners are cut on washing, sanding, filling, sealing or moisture treatment, the paint can fail early. Then you are paying for the same walls twice.

A properly licensed contractor is also more likely to understand where painting sits within the wider condition of the property. If a wall has cracking, plaster issues, water staining or failed previous coatings, the answer is not always another coat of paint. Sometimes the surface needs repair first. Sometimes the substrate needs to be stabilised. Sometimes the real issue is moisture ingress or poor ventilation.

That broader view matters because painting is a finishing trade. The finish is only as sound as what sits underneath it.

Workmanship still matters just as much

Licensing is important, but it is not the only thing that should guide your decision. A licensed painter can still be rushed, hard to deal with or average on detail. That is the trade-off clients should understand.

The best choice is usually a licensed contractor with proven workmanship, clear communication and a reputation for treating clients and properties properly. Look for signs of care in how they talk about preparation, cleanliness, scheduling and problem-solving. If they brush off prep or cannot explain their process clearly, that is worth noticing.

Good painters tend to be practical in how they speak about the job. They will tell you what needs repairing, what can be improved, where expectations should be realistic and what finish is best for the space. That sort of guidance is often just as valuable as the painting itself.

What can go wrong when you hire the wrong painter

Most clients who regret a painting job are not upset because a shade looked slightly different in afternoon light. They are upset because the whole experience became harder than it needed to be.

The common problems are familiar. Poor surface prep leaves roller marks, blistering or flaking paint. Inadequate masking and floor protection create damage and mess. Weak communication causes delays and confusion. Vague quotes lead to disagreements over what was included. And when defects appear later, an unprofessional operator can become very difficult to reach.

These risks matter even more on larger homes, renovation projects and commercial spaces where access, timing and coordination affect other trades or occupants. In those situations, reliability is not a bonus. It is part of the job.

How to choose a licensed QBCC painter with confidence

A good hiring decision usually comes down to a few practical checks. First, confirm the contractor is properly licensed for the work being done if the project requires it. Second, look at how they quote. A clear quote should reflect the actual work involved, not just a price with little detail.

Then pay attention to how they discuss preparation. A professional painter should be comfortable explaining what needs washing, filling, sanding, sealing or repairing before painting begins. If colour selection is part of the project, it also helps to work with someone who can guide you based on light, surface type and the feel you want in the room or exterior.

You should also notice how they speak about your property. Respect for the home or workplace is not a small thing. Cleanliness, protection of furnishings, tidy work habits and realistic scheduling all shape the experience from start to finish.

For Gold Coast and Tweed properties, local experience can add real value too. Coastal conditions, humidity and sun exposure can be tough on exterior finishes, so product choice and preparation matter more than many people realise.

Commercial and renovation work needs a steadier hand

On commercial sites and renovation projects, painting often sits within a larger program of works. That changes the standard required from the contractor.

A licensed, experienced painter is usually better placed to work in sequence with plastering, fit-out, repairs and other finishing tasks. They are more likely to understand access constraints, staging, site expectations and how to keep the job moving without sacrificing finish quality.

This is also where a full-service approach becomes useful. If your painter can also manage related surface preparation and finishing work properly, the project tends to run more smoothly. There are fewer gaps between trades, fewer assumptions and less risk of one issue being left for someone else to fix.

The real value is peace of mind

Most clients are not looking for the cheapest painter. They are looking for the safest pair of hands at a fair price.

That is the real answer to licensed QBCC painter and why it matters. Licensing supports confidence. It shows the business takes its responsibilities seriously. Combined with sound workmanship, clear advice and respectful service, it helps protect your property and improves the chance of a result you will still be happy with long after the job is finished.

At Jag Painting Solutions, that standard matters because clients are trusting us with homes, investment properties and business spaces that matter to them. A good paint job should improve the property, not create another problem to chase later.

When you are choosing a painter, look beyond the quote total. The right contractor should make the process feel clear, well managed and worth the investment from the first conversation onwards.
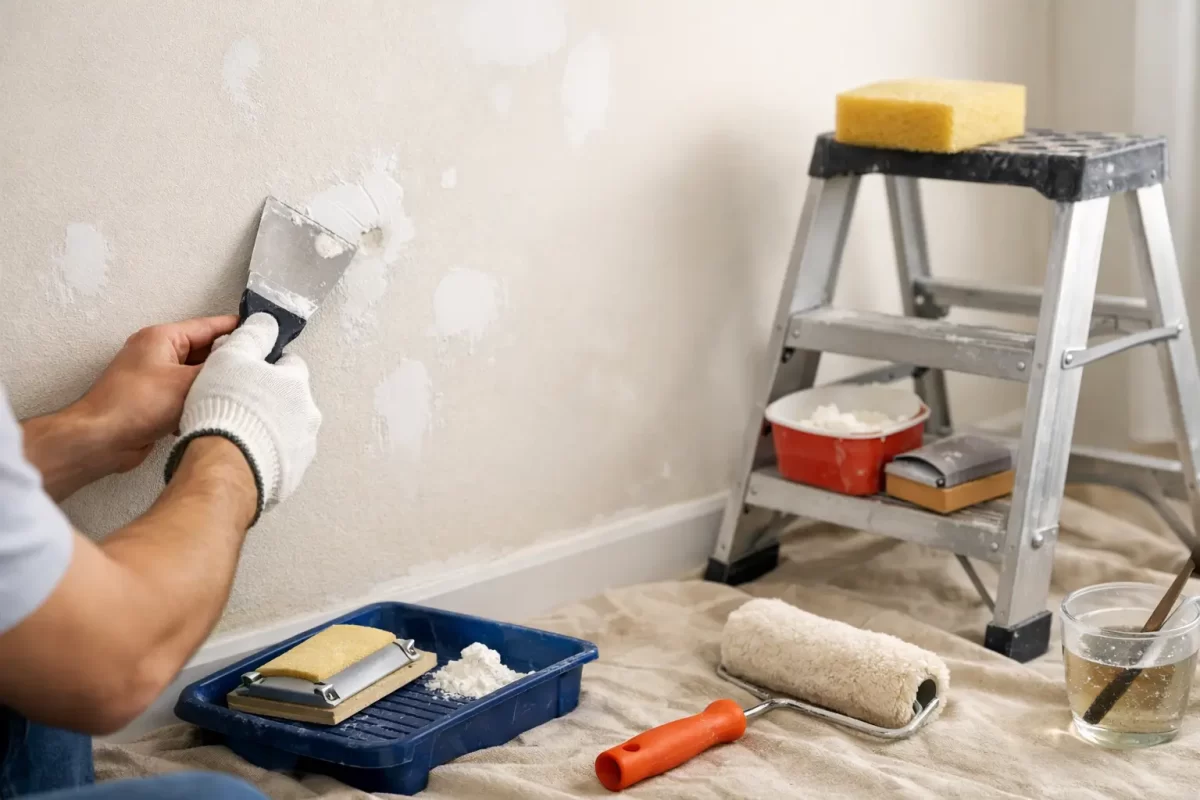

Categories
Uncategorized

How to Prepare Walls for Painting Properly

A paint job can only look as good as the surface underneath it. If you are wondering how to prepare walls for painting, the short answer is this: clean them properly, fix what needs fixing, and create a sound, even surface before any paint goes on. That prep work is what separates a tidy, lasting finish from one that shows every dent, crack and patch.

Many painting problems that people blame on the paint are really surface problems. Peeling, flashing, patchy absorption, rough spots and visible repairs usually start long before the first coat. Good preparation takes more time than most expect, but it is the part that protects the final result.

Why wall preparation matters

Fresh paint highlights defects rather than hiding them. A wall that looked acceptable in flat daylight can suddenly show sanding marks, dents, old patching and greasy fingerprints once a new coat goes on, especially with low-angle light or darker colours.

Preparation also affects durability. Paint needs a clean, stable surface to bond properly. If there is dust, chalking, loose material or moisture trapped underneath, the finish may fail earlier than it should. In homes, that can mean scuffed walls and premature wear. In commercial spaces, it can affect presentation just as quickly.

How to prepare walls for painting step by step

There is no single method for every wall, because surface condition matters. A newly plastered room needs different treatment from an older home with cracks and previous repairs. Still, the process usually follows the same order.

Start by clearing and protecting the area

Move furniture away from the walls where possible and cover floors properly. Remove wall art, hooks, switch plates and anything else that will get in the way of a clean cut line. Taking a few extra minutes here makes the job neater and helps avoid accidental splatter on fittings and flooring.

Good lighting also helps at this stage. Side lighting from a lamp or open window makes imperfections easier to spot before you start repairs.

Clean the walls before anything else

Dust, grease and grime are common reasons paint does not adhere as it should. Even walls that look clean can carry cooking residue, hand marks, smoke staining or fine dust.

Wash the surface with sugar soap or a suitable wall cleaner, especially in kitchens, hallways, bathrooms and commercial areas with heavier use. After cleaning, allow the wall to dry fully. Painting over damp surfaces can lead to adhesion issues and uneven drying.

If mould is present, it needs proper treatment first. Painting over it will not solve the problem, and if the source of moisture remains, it is likely to return.

Inspect the surface closely

Once the wall is clean, defects are easier to see. Look for nail holes, dents, flaking paint, hairline cracks, larger movement cracks, bubbling, water stains and soft areas in plaster. Press gently around damaged spots to check whether the problem is only cosmetic or whether the substrate has failed underneath.

This is where experience matters. A small crack may only need filling, but repeated cracking can point to movement that needs a more durable repair. Water stains may need stain blocking, but they also raise a more important question: has the leak been fixed?

Remove loose and failing material

Any peeling or flaking paint has to come off. Scrape back loose edges until you reach firm, sound material. If you paint over unstable areas, the fresh coating will only be as strong as what sits beneath it.

Glossy painted surfaces may also need sanding to dull them down and improve adhesion. The goal is not to remove every previous coat, but to give the new system a clean, keyed surface to grip to.

Fill holes, cracks and damaged areas

Small dents and screw holes can usually be patched with a suitable filler. Wider cracks may need a more flexible compound, and deeper damage may require patching in layers rather than overfilling in one go.

This stage is often rushed, and it shows later. Filler shrinks as it dries, so some repairs need a second application to sit flush with the surrounding wall. On plasterboard joins or larger cracks, tape may also be needed to reinforce the repair and reduce the chance of it reappearing.

If the wall has widespread damage, it may be more practical to skim or re-plaster sections rather than trying to spot-repair everything. That depends on the age of the wall, the finish expected and how visible the room is.

Sand for a smooth, even surface

After repairs dry, sand them level with the rest of the wall. Sanding also helps feather out scraped edges and smooth minor surface texture. The aim is consistency. You do not want repaired areas standing proud or sinking under the final coat.

Use the right grit for the task and avoid over-sanding plasterboard paper or soft surfaces. Once sanding is complete, remove all dust thoroughly. Dust left on walls can interfere with primer and paint and leave a gritty finish.

Prime where needed

Not every wall needs a full prime, but many need at least spot priming. Bare plaster, fresh filler, repaired sections, stained areas and porous surfaces should be primed before painting.

Primer helps even out porosity so the topcoat dries more consistently. Without it, patched areas can flash through the finish, meaning they show up as duller or shinier spots even after painting. Stains from water damage, smoke or tannins may also need a specialised sealer rather than a standard primer.

For new plaster, timing matters. It has to be fully cured before coating. For previously painted walls in good condition, a wash and light sand may be enough before topcoating, but that depends on the existing finish and whether there are compatibility concerns.

Common mistakes when preparing walls for painting

The biggest mistake is assuming paint will hide poor prep. It rarely does. In fact, a fresh coat often makes defects more obvious.

Another common issue is skipping cleaning because the wall “looks fine”. In lived-in homes and working commercial spaces, invisible residues are common. Grease near light switches, aerosol residue in bathrooms and dust from nearby renovation work can all affect adhesion.

People also tend to underestimate drying times. Filler, washed surfaces and primers all need proper time to dry before the next step. Rushing the process can trap moisture or create a finish that does not cure evenly.

Then there is product choice. Not all fillers, primers and paints suit every surface. Older homes, patched plaster, water-damaged walls and high-moisture areas each have their own considerations.

Different walls need different preparation

Previously painted walls

If the old paint is sound, preparation may be fairly straightforward: clean, sand, patch minor defects and prime repaired spots. If there is peeling, chalking or incompatible old coatings, more intensive preparation is needed.

New plaster or plaster repairs

These surfaces are more absorbent and usually need sealing before topcoats. Any trowel marks, ridges or rough patches should be corrected first, because once paint goes on, they are far harder to ignore.

Kitchen and bathroom walls

These often need extra attention due to grease, steam and mould risk. Surface cleaning is especially important, and any ongoing moisture issue should be addressed before painting starts.

Commercial interiors

In offices, shops and tenancy fit-outs, presentation matters, but so does durability. Preparation often needs to account for higher traffic, more visible wear and tighter project timing. A quick cosmetic fix might suit a short-term refresh, but it is not always the right choice for long-term value.

When it is worth bringing in professionals

Some wall preparation is simple enough for basic maintenance. But if you are dealing with widespread cracking, damaged plaster, water staining, failed previous coatings or high-visibility areas, professional preparation can save time and avoid a disappointing finish.

This is particularly true when the goal is a premium result rather than a quick repaint. Experienced painters and plasterers know how to read a surface, choose the right repair method and prepare walls so the paint performs as it should. That is a big part of why professionally painted rooms tend to look cleaner, sharper and more even.

For homeowners and businesses across the Gold Coast and Tweed, that level of preparation is often what makes the project feel worthwhile. At Jag Painting Solutions, careful prep is treated as part of the job, not an optional extra, because it is the foundation of the finish.

Painting starts well before the first coat. If you take the time to prepare the surface properly, the colour will sit better, the finish will last longer, and the room will look the way it should from day one.

Categories
Uncategorized

Exterior Paint Colour Trends for 2026

Street appeal can rise or fall on one decision – the exterior colour. And while exterior paint colour trends can be useful, the best result is never about copying the latest look without thinking about the home, the light and the setting around it.

For homeowners and property renovators, that matters more than ever. A colour that looks sharp on a new build in a display village can feel out of place on an older brick home. A shade that works beautifully in a cool southern climate can read too harshly under the stronger sun we get in coastal Queensland. Trends are a starting point, not the whole answer.

What exterior paint colour trends are shifting towards

The strongest move in exterior paint colour trends is away from stark, high-contrast schemes that can feel a bit rigid. In their place, we are seeing softer whites, warmer neutrals, natural greens and more grounded feature colours. Homes still look clean and modern, but less clinical.

That shift reflects how people want their homes to feel. Many owners are renovating for longevity rather than chasing a quick flip. They want a finish that looks current now but will still feel right in five or ten years. That tends to favour colours with a little warmth and depth rather than extremes.

It also suits the way many Australian homes sit within their surroundings. On the Gold Coast and in Tweed, for example, bright sun, greenery, coastal conditions and varied architectural styles all influence how colour performs visually. A paint chart under indoor lighting does not tell the full story.

Warm whites are replacing cold whites

White is still a major exterior choice, but the version of white is changing. Crisp blue-based whites can look sharp in some settings, yet they can also appear glaring outdoors. In full sun, they may bounce too much light and make trims or render feel flat.

That is why warm whites and off-whites are gaining ground. They still give a home a fresh, clean appearance, but they feel more settled and more expensive. They tend to work especially well on render, weatherboard and modernised brick exteriors.

The trade-off is that not every warm white suits every fixed surface. Roof colour, paving, stonework and guttering can all bring out yellow, grey or cream undertones. A white that looks balanced beside charcoal roofing may look muddy next to terracotta. This is where proper colour testing becomes more valuable than following trend photos.

Where warm whites work best

Warm whites are often a safe choice for full exterior repaints when owners want to modernise without making the house feel overdesigned. They also pair well with timber accents, black window frames and soft grey roofing. If the home has strong architectural lines, a warm white can keep the look clean without becoming too stark.

Earthy greens are moving from accent to main colour

Green has become one of the more interesting directions in exterior palettes. Not bright or overly decorative greens, but muted gum, olive, sage and deeper native-inspired tones. These colours sit comfortably in established suburbs and leafy streetscapes because they feel connected to the landscape rather than imposed on it.

They are also more flexible than many owners expect. A soft sage can freshen an older weatherboard home. A deep olive can add character to a front door, cladding section or fencing. Darker greens can create a strong, premium look on contemporary exteriors when balanced with lighter trims or natural textures.

The catch is that green carries undertones quickly. Some lean grey and sophisticated, others turn khaki or muddy if paired badly. On large areas, that difference becomes obvious. Testing samples on multiple sides of the house is the safest way to see how morning light, shade and afternoon sun change the colour.

Greige, taupe and stone are outlasting cooler greys

Cool grey had a long run, and it is not disappearing overnight. But many exteriors painted in icy grey now feel a bit dated, particularly when combined with bright white trims and black accents. The newer neutral palette is warmer and more natural.

Greige, taupe, mushroom and stone shades are becoming more popular because they soften the overall appearance of a home without making it feel beige or old-fashioned. They work well across brick, render and fibre cement, and they tend to sit more comfortably with landscaping, timber and natural stone.

These colours are also practical for owners who want broad buyer appeal. They are less polarising than darker statement colours and usually handle dust, weathering and day-to-day exposure better than very light finishes. That does not mean they are maintenance-free, but they can be forgiving visually.

Dark trims still have a place, but balance matters

Black and very dark charcoal trims remain popular, especially on modern homes. Used well, they can define windows, sharpen rooflines and give the exterior a premium finish. The problem is that dark contrast became so common that some homes now feel more trend-led than timeless.

Current colour schemes are using contrast with more restraint. Instead of pairing pure white walls with jet black trims everywhere, many owners are choosing softer wall colours and charcoal, bronze or deep olive accents. The result is still crisp, but less harsh.

This matters for practical reasons too. Very dark colours absorb more heat, and on certain surfaces that can affect performance over time. Product selection, surface preparation and the substrate itself all come into play. A good-looking colour choice still needs to be realistic for the material being painted.

The smarter way to use dark colours

Dark colours often work best as a feature rather than the whole story. Front doors, garage doors, shutters, fencing and selected trims can all carry depth without overwhelming the home. On larger walls, especially in full sun, the wrong dark tone can feel heavy fast.

Natural finishes and mixed materials are influencing colour choices

One reason exterior paint colour trends are becoming softer is the rise of mixed-material facades. Painted render now often sits alongside timber, stone, brick or metal elements. That means the paint colour has to do more than look good on its own – it has to connect the whole exterior.

This is why earthy neutrals and muted colours are doing so well. They allow feature materials to stand out without clashing. A painted exterior should not fight the roof, driveway, retaining walls or surrounding garden. It should pull them together.

For renovators, this is especially important. If you are not replacing every fixed element, the paint scheme needs to work with what stays. Choosing a trend colour without considering existing brick, tiles or paving is where many repaint projects lose cohesion.

How to choose a trend that will still look right in a few years

A good exterior colour scheme should feel current, but not temporary. The easiest way to achieve that is to separate trend from foundation. Use the more timeless shades on the largest areas of the home, then bring in trend through accents and details.

That might mean using a dependable warm white, greige or stone tone across the main facade, then introducing a current green or deep charcoal on the front door, feature cladding or trim. If tastes change later, those smaller elements are easier to update.

It also helps to be honest about the style of the home. Not every house needs to look ultra-modern. A Queenslander, a coastal home, a brick renovation and a commercial frontage all respond differently to colour. The best outcomes come from working with the building rather than forcing it into a trend category.

Why sample testing matters more outside than inside

Exterior paint behaves differently because the environment is doing half the work. Sunlight intensity, shade, reflections from neighbouring surfaces and even surrounding greenery can all shift how a colour reads. A colour card or small sample pot viewed in isolation is not enough.

Large painted test patches on different sides of the property give a much clearer picture. What looks like a soft neutral at 9 am can appear far darker by late afternoon. What seems like a calm grey may reveal a strong purple or green undertone once it is up on the wall.

This is one area where experienced guidance saves time and money. Jag Painting Solutions often helps clients narrow colour choices down to what will actually suit the property, not just what is popular on paper. That kind of advice can prevent expensive second-guessing once the project is underway.

The trend that matters most is suitability

The most reliable exterior colour choices are not always the boldest or the newest. They are the ones that suit the architecture, handle local conditions and still look right after the excitement of the repaint has settled.

If you are planning an exterior update, treat trends as useful direction rather than a rulebook. A well-chosen colour scheme should improve the look of the property, respect its style and give you confidence every time you pull into the driveway. That is what makes a repaint feel worth doing.

Categories
Uncategorized

Choosing Commercial Painting Contractors

A tired office, shopfront or strata common area shows wear faster than most owners expect. Scuffed walls, faded exterior surfaces and patchy repairs do more than look untidy – they shape how customers, tenants and staff see the space. That is why choosing commercial painting contractors is less about finding the cheapest quote and more about finding a team that can protect presentation, minimise disruption and deliver a finish that lasts.

Commercial work has its own pressures. There are trading hours to work around, tenants or staff moving through the site, safety requirements to manage and surfaces that often need more preparation than they appear to at first glance. On top of that, the job usually needs to look professional from day one, because there is no room for streaks, missed edges or paint failure a few months down the track.

What good commercial painting contractors actually do

A professional commercial painter does far more than apply paint. The real value is in planning, preparation and control of the job from start to finish. That includes assessing the condition of surfaces, identifying plaster repairs, choosing systems suited to high-traffic areas and scheduling the works so your business or property can keep operating with as little interruption as possible.

For a retail tenancy, that might mean organising works outside peak hours or staging the project so sections remain accessible. For an office, it could involve quiet coordination with management so teams can keep working. For a body corporate or property manager, it often means clear communication with multiple stakeholders, practical timelines and confidence that common areas will be left clean and safe at the end of each day.

The best contractors also know where problems usually start. Water stains, movement cracks, poor previous patching and low-grade coatings can all affect the end result. If those issues are painted over instead of properly addressed, the finish may look acceptable for a short time but will rarely hold up well.

Why the cheapest quote often costs more

Price matters. Every owner and manager has a budget. But in commercial painting, low quotes can hide shortcuts that create extra cost later.

A quote can come in cheaper because preparation has been underallowed, premium products have been swapped for lower-grade alternatives or the labour time has been squeezed too hard. On paper, the difference may not be obvious. On the wall, it usually is.

Poor prep is the most common issue. If flaking paint is not removed properly, if surfaces are not cleaned, if repairs are rushed or if primers are skipped where they are needed, the coating system starts at a disadvantage. You may save at the start, then pay again for touch-ups, complaints or a repaint much sooner than expected.

There is also the cost of disruption. A contractor who misses deadlines, leaves areas messy or creates avoidable access issues can affect trading, staff productivity and tenant satisfaction. A realistic quote from an organised team is often better value than a cheap one that causes headaches from the first day.

How to assess commercial painting contractors properly

When comparing contractors, look beyond the total figure. Ask what is included, how the work will be carried out and who will actually be on site. A clear, detailed quote is usually a good sign. It should explain the scope, surface preparation, coatings to be used and any exclusions that could affect the final cost.

Experience in commercial settings matters as well. Residential and commercial painting share core trade skills, but the working environment is different. Commercial projects often demand tighter scheduling, more coordination and stronger site management. A contractor who understands occupied premises will usually be better prepared to protect floors, contain dust, manage access and communicate around day-to-day operations.

It is also worth asking how they handle repairs. Painting and surface finishing often go hand in hand. If cracked plaster, dents or previous patching are present, the finish is only as good as the substrate underneath. A team that can address both the surface condition and the final coating gives you a more consistent result.

Commercial painting contractors and project timing

Timing is one of the biggest concerns for business owners and property managers. A well-finished space matters, but so does keeping the site functional while the work is underway.

This is where planning becomes a major part of the service. Some jobs can be completed after hours or across weekends. Others are better staged in sections so the whole site is not disrupted at once. The right approach depends on the building, the amount of foot traffic, ventilation requirements and how sensitive the business is to noise and downtime.

There is no single method that suits every project. A medical practice, for example, has different needs from a café or warehouse. Good contractors will talk through those site-specific pressures before the work starts, rather than forcing your business into a rigid timetable.

For properties across the Gold Coast and Tweed, weather can also influence exterior work. Heat, humidity and rain all affect preparation, drying times and the timing of certain coatings. A professional team plans around those conditions instead of pretending they do not matter.

What a quality finish depends on

A strong result comes down to three things: preparation, product selection and workmanship. All three matter equally.

Preparation sets the foundation. Surfaces need to be clean, sound and properly repaired. That may involve washing down exterior walls, sanding glossy areas, filling imperfections, treating stains or addressing minor plaster damage. Without this stage, even high-end paint can struggle.

Product selection should match the environment. High-traffic hallways, shopfronts exposed to sun, office interiors and industrial areas all place different demands on coatings. Washability, durability, sheen level and coverage all need to be considered. The best finish is not always the most expensive product. It is the one that suits the space and the use of that space.

Workmanship ties it together. Straight cut-in lines, even coverage and consistent texture are the details people notice, even if they cannot always explain why a room or façade looks better. Those details are what separate a rushed repaint from a professional finish.

Signs you have found the right contractor

Reliable commercial painting contractors are usually not the ones making the biggest promises. They are the ones asking sensible questions, inspecting the site properly and being upfront about what the job requires.

You want a team that communicates clearly, turns up when they say they will and treats the property with respect. That includes protecting surrounding areas, keeping the site orderly and being honest if unexpected repair work is needed. In commercial settings, professionalism is not a bonus. It is part of the job.

A customer-first approach also matters. Painting can feel straightforward until colours, access, staging and repairs start intersecting. Having experienced tradesmen who can guide those decisions makes the process much smoother. If colour selection is part of the project, practical advice can help avoid choices that look too harsh under office lighting or too flat on a large exterior wall.

For many clients, trust comes down to consistency. They want to know the finish will match the promise, the schedule will be managed properly and the people on site will be respectful. That confidence is often what turns a one-off job into an ongoing trade relationship.

A better result starts before the first coat

By the time paint goes on, most of the important decisions have already been made. The quality of the quote, the condition of the surfaces, the planning around your operations and the care taken in preparation all shape the final outcome.

If you are weighing up commercial painting contractors, take the time to look past headline price and focus on how the job will actually be delivered. A well-run commercial paint project should improve the look of your property without creating unnecessary stress along the way. When the right team is involved, the result is not just a fresh coat of paint. It is a cleaner, sharper and more professional space that works better for the people using it every day.

Categories
Uncategorized

Painting Paradise Point the Right Way

A paint job can lift a property fast – but only when the preparation, finish and site care are done properly. For anyone planning painting Paradise Point homes, units or business premises, the difference is rarely the paint alone. It comes down to workmanship, product choice and a team that respects your space from start to finish.

Why painting in Paradise Point needs experience

Coastal properties deal with more than everyday wear and tear. Sun exposure, moisture, salt in the air and general ageing can all affect how long a finish lasts. That is why surface preparation matters just as much as the final coat. Peeling areas, fine cracks, water marks or damaged plaster should be addressed before painting begins, otherwise fresh paint can quickly show the same problems again.

For many property owners, colour selection is another sticking point. A shade that looks great on a sample card can feel too dark, too bright or too cold once it is across a full wall. Clear guidance helps avoid expensive mistakes and gives the finished space a more considered look.

Painting Paradise Point properties with less stress

Whether the job is interior repainting, exterior maintenance or a commercial refresh, the process should feel organised and straightforward. That means turning up when promised, protecting floors and furniture, keeping the site tidy and communicating clearly throughout the work.

Good painting is also about knowing where extra care is needed. High-traffic family homes need durable, easy-clean finishes. Renovation projects often need plaster repairs before any colour goes on. Commercial spaces usually need efficient scheduling to reduce disruption. There is no one-size-fits-all approach, and that is exactly the point.

What to look for in a painter

When choosing a contractor, look beyond the quote. Ask whether they handle prep work thoroughly, whether they can assist with colour decisions, and how they protect the property while the job is underway. A reliable painter should be able to explain the process in plain language and give you confidence in the result before work starts.

Jag Painting Solutions focuses on quality finishes, respectful service and practical guidance that helps property owners make the right decisions for their space. If you want a result that looks sharp and lasts well, start with a free quote and clear advice tailored to your property.

Categories
Uncategorized

How to Repaint Commercial Office Walls

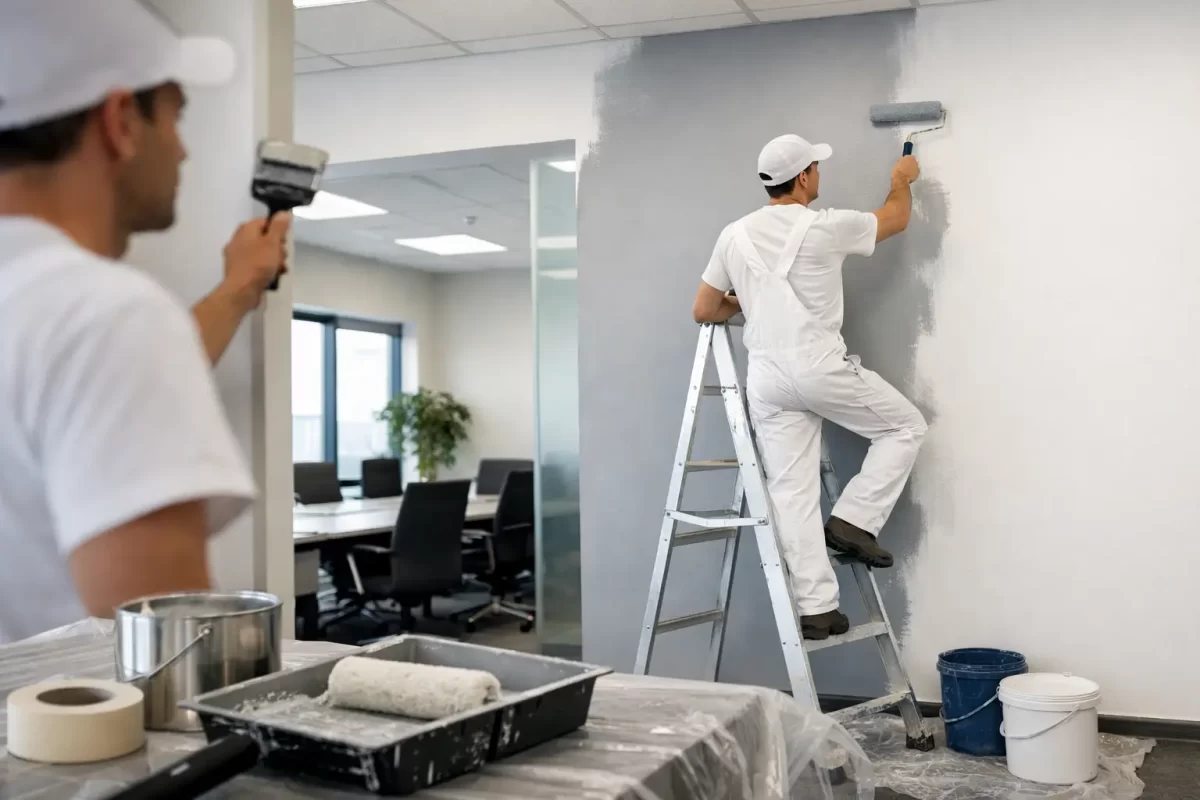
A tired office shows up faster than most managers expect. Scuffed corners, patched plaster, roller marks and faded colour can make a workspace feel neglected, even when the business itself is running well. If you are working out how to repaint commercial office walls, the real challenge is not just getting fresh paint on the surface. It is doing the job with minimal disruption, a clean finish and enough durability to cope with daily wear.

Commercial office painting is different from repainting a spare room at home. Offices have foot traffic, furniture movement, shared spaces, meeting rooms, workstations and often tighter timeframes. That means the finish needs to look sharp, but the planning behind it matters just as much.

How to repaint commercial office walls without disrupting work

The best office repaint starts before a brush or roller comes out. A clear plan saves time, avoids rework and helps keep the workplace functional while painting is underway.

Start by assessing the condition of the walls properly. Many office walls look like they only need a fresh coat, but once you inspect them in natural and artificial light, the issues become clearer. You may find dents from chairs, cracking around cornices, old patch repairs, stains, adhesive residue from signage, or glossy sections where previous touch-ups do not match. If those problems are painted over without treatment, the new finish will not look professional for long.

It also helps to decide early whether the office can be painted in stages. In many commercial settings, this is the most practical option. Reception areas, boardrooms, hallways and individual offices can often be completed zone by zone. That lets staff continue working in other parts of the premises and reduces downtime. For some businesses, after-hours or weekend work is the better fit, particularly where privacy, noise or access is an issue.

Colour choice should be practical as well as visual. Lighter neutrals can make offices feel cleaner and more open, but they may show marks sooner in high-traffic areas. Darker feature walls can add depth, though they tend to show surface imperfections more clearly and may require extra coats for even coverage. In client-facing spaces, the safest option is usually a clean, modern colour scheme that reflects the business brand without dominating the room.

Surface preparation matters more than the final coat

If there is one part of repainting office walls that should never be rushed, it is prep. Good preparation is what separates a finish that looks crisp for years from one that starts failing within months.

The first step is clearing or protecting the area. Furniture should be moved where possible, and anything that stays in the room needs proper covering. Floors, skirting boards, glass partitions, power points and fixtures should all be masked carefully. In a commercial office, neatness during the job is part of professionalism. Paint splatter on carpet tiles or dust across workstations is not acceptable.

Walls then need to be cleaned. This is often overlooked in offices because the surfaces do not always look dirty at first glance. But airborne dust, hand marks, grease near kitchenettes, and residue from cleaning products can all affect adhesion. A clean surface gives the new coating the best chance to bond properly.

After cleaning comes repair work. Nail holes, dents and cracks need filling, while damaged plaster may need more extensive treatment before painting can begin. If there are signs of bubbling, peeling or moisture damage, it is worth pausing to find the cause. Repainting over water-damaged plaster or unstable old paint usually leads to the same problem reappearing.

Sanding is another step that makes a visible difference. It smooths filled areas, removes minor surface irregularities and helps dull glossy existing finishes. In offices with strong overhead lighting, even small imperfections can stand out once the walls are repainted. That is why careful sanding and feathering patch repairs matter.

Primer is not always needed across every wall, but in many office repaint jobs it plays an important role. It is especially useful over repaired sections, stains, colour changes and surfaces with uneven porosity. When walls have had multiple touch-ups over time, a suitable primer can help create a more consistent final appearance.

Choosing the right paint for an office environment

Not all interior paints are suited to commercial use. Office walls need a coating that can handle regular cleaning, occasional knocks and changing light conditions without losing its appearance too quickly.

Washability is a key factor. In corridors, reception areas and shared spaces, walls collect marks from bags, chairs and everyday traffic. A higher quality washable finish makes maintenance easier and extends the life of the repaint. That does not mean the glossiest product is best. In many offices, a low-sheen or matte finish gives the right balance between appearance and practicality. Matte finishes hide imperfections better, while low-sheen coatings can be easier to wipe down.

Low-odour, low-VOC products are also worth considering, especially if the office will stay partly operational during the work. Strong paint smells can be disruptive for staff and unpleasant for clients. Better quality commercial-grade coatings often provide a more comfortable working environment during and after application.

Colour consistency matters more in offices than people think. Large wall areas, open-plan spaces and artificial lighting can all exaggerate minor differences in tone. Using the correct product system, maintaining a wet edge during application and applying enough coats are all part of achieving an even result.

Application techniques that affect the final look

Once the prep is done, the painting itself needs to be methodical. Rushing this stage is where visible lap marks, patchiness and poor coverage often begin.

Cutting in around edges should be tidy and consistent. In commercial interiors, lines around ceilings, trims, glazing and joinery need to look sharp because these details are more noticeable in professional spaces. Roller selection matters too. The wrong nap can leave too much texture or not enough paint on the surface, which affects both appearance and durability.

Most office walls need at least two coats for a proper repaint, even if the colour change is minor. One coat may freshen the wall temporarily, but it rarely gives the depth, uniformity and wear performance expected in a commercial setting. Drying times between coats also need to be respected. Pushing ahead too quickly can compromise the finish.

Lighting should be checked as the job progresses. What looks even under one light source can show streaks or flashing under another. Offices often combine daylight, LED panels and feature lighting, so inspecting the finish from different angles is a worthwhile step rather than an extra one.

When DIY works – and when it usually does not

Some smaller office repaint projects can be handled in-house, particularly if it is a single room with clear access and walls in good condition. If the team has the time, the right equipment and realistic expectations, a basic refresh may be manageable.

But larger or active workplaces are a different story. The moment access needs to be staged, repairs are visible, colours need to match across multiple areas, or disruption must be tightly managed, professional help often becomes the more cost-effective option. A poor paint job in a commercial office can be expensive to fix, especially if staff productivity is affected or client-facing areas look unfinished.

That is where experience counts. A professional team understands how to sequence the work, prepare surfaces properly, protect the site and deliver a finish that stands up to office use. For businesses in the Gold Coast and Tweed region, working with an experienced contractor such as Jag Painting Solutions can also make colour decisions and scheduling much easier.

Common mistakes when repainting commercial office walls

The most common mistake is underestimating the prep. Skipping repairs, failing to clean surfaces or painting over unstable coatings nearly always leads to an uneven result. Another issue is choosing paint based on price alone. In a commercial office, cheaper products often need more maintenance and can wear out faster, which shortens the value of the repaint.

Poor scheduling is another problem. Painting during peak business hours without a plan for noise, access and drying times can create unnecessary frustration for staff and visitors. There is also the temptation to do spot touch-ups instead of repainting complete wall sections. While touch-ups sound efficient, they often remain visible, especially on older painted surfaces where colour and sheen have shifted over time.

Finally, some offices chase trends too hard. Bold colours can work well in the right setting, but they should support the workplace rather than date it quickly. In most professional environments, a restrained palette with well-chosen feature areas delivers a longer-lasting result.

A well-painted office does more than cover marks. It changes how the space feels to staff, clients and anyone walking through the door. If you are planning how to repaint commercial office walls, take the time to get the prep, product choice and timing right – because the smoothest projects are the ones that look effortless when they are finished.

Categories
Uncategorized

Painting Gyms for Durability and Presentation

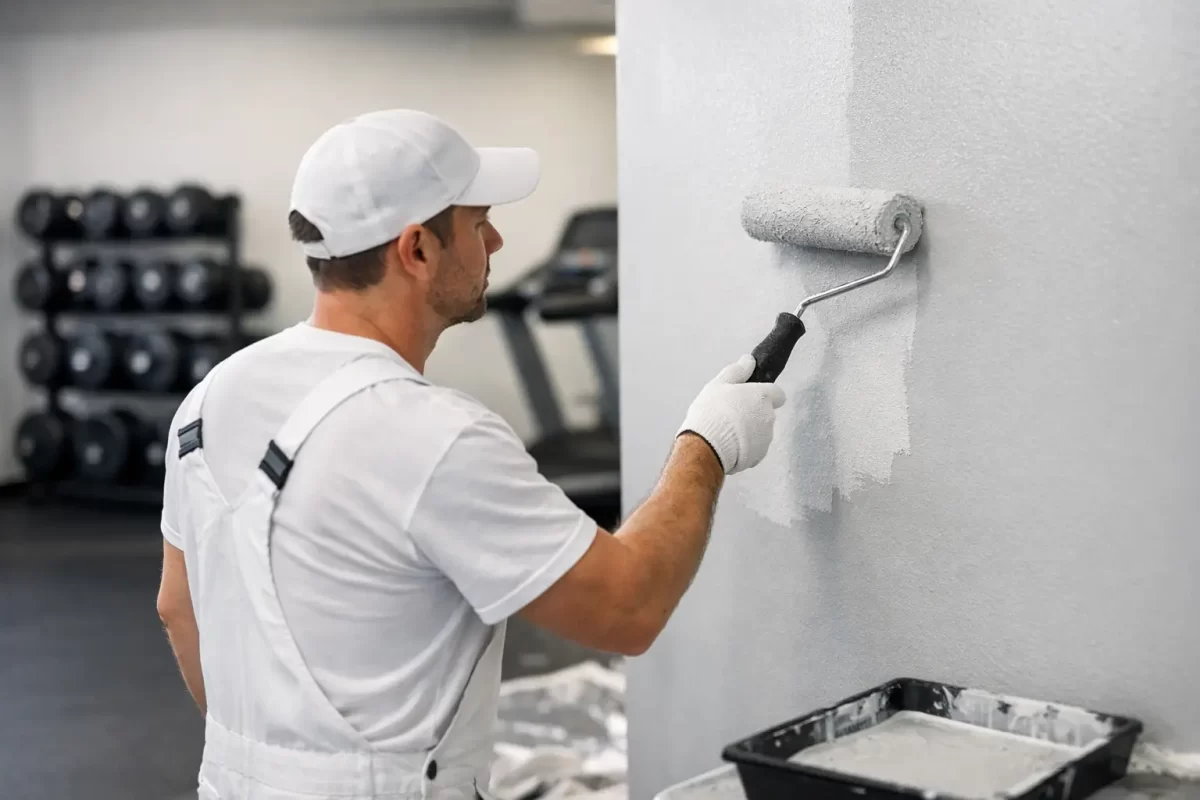
A gym copes with more punishment in a week than many interiors see in a year. Weights clip walls, sweat settles into surfaces, cleaning is constant, and every mark shows under bright lighting. That is why painting gyms is not simply about making the space look better. It is about choosing the right preparation, the right coatings, and the right finish for a high-traffic environment that needs to stay presentable.

For gym owners and facility managers, the paintwork does more than cover walls. It affects first impressions, day-to-day maintenance, and how well the space stands up over time. A clean, well-finished gym feels better to train in. It also signals that the business is run properly, which matters whether you manage a boutique studio, a school gymnasium, or a larger commercial fitness centre.

Why painting gyms needs a different approach

A gym is not an ordinary commercial interior. In most cases, surfaces deal with repeated contact, fluctuating moisture, scuffing from equipment, and strong overhead light that highlights every defect. If the wall preparation is poor or the wrong paint system is used, the finish can start looking tired far too quickly.

This is where experience matters. A good-looking result depends on more than applying fresh paint. Walls may need patching, plaster repairs, sanding, stain treatment, or primer suited to the existing substrate. In older facilities, there can also be issues with peeling coatings, impact damage, or uneven surfaces that need attention before any topcoat goes on.

The practical question is not just what colour to choose. It is how the paint system will perform after months of use, cleaning, and wear.

The main challenges in painting gyms

The biggest challenge is durability. Gym walls, ceilings, change rooms, reception areas, and training zones all have different demands, and a one-size-fits-all approach rarely gives the best result.

In weight areas and functional training spaces, impact resistance matters. These zones often cop bumps from bars, benches, racks, and moved equipment. A finish that looks excellent on day one but marks too easily can become a maintenance issue almost straight away.

In cardio zones and group fitness rooms, appearance and atmosphere tend to matter more, but durability is still essential. These areas usually need a finish that is easy to clean and holds its colour and sheen under regular lighting.

Bathrooms, amenities, and shower areas bring moisture and cleaning chemicals into the picture. Here, surface preparation and product choice are especially important. If the substrate is not properly sealed or repaired, problems can show up early.

Then there is scheduling. Many gyms cannot afford lengthy disruption. Work often needs to be planned around trading hours, staged in sections, or completed with minimal interruption to members and staff.

Surface preparation sets the standard

Most disappointing paint jobs fail before the first topcoat is even applied. If a gym has dents, cracks, flaking paint, or plaster issues, these need to be addressed properly. Painting over damage only hides it briefly.

Preparation usually includes cleaning down surfaces, removing loose material, filling and sanding damaged areas, sealing stains, and applying the right undercoats. In a gym setting, this stage is especially important because lighting is often bright and direct. That makes imperfections more obvious.

Where there is repeated wall contact, it can also be worth considering extra protection in vulnerable areas. The right system may involve tougher finishes or strategic planning around high-impact sections rather than treating every wall identically. That can be a smarter investment than repainting too often.

Choosing the right finish for a gym environment

When painting gyms, the best finish depends on how the room is used. There is always a balance between appearance, washability, and how well a coating handles wear.

Low-sheen and washable finishes are often a practical choice for main wall areas because they help reduce the visibility of minor imperfections while still allowing for regular cleaning. Flat finishes can look good in some spaces, but they are not always ideal where walls are touched often or need frequent wipe-downs.

Higher-sheen coatings can offer better washability in some settings, though they also tend to show more surface defects. That is why preparation and product selection need to work together. A harder wearing finish is only as good as the surface beneath it.

Ceilings are another area where shortcuts can stand out. In large open gym spaces, ceiling marks, patchiness, or roller lines are easy to spot. A clean, even finish overhead helps the whole interior feel brighter and more professional.

Colour matters more than many owners expect

Colour choice affects more than style. It shapes how spacious, clean, and energised a gym feels.

Dark feature walls can work well in strength zones or boutique studios where a more dramatic atmosphere suits the brand. Lighter neutrals often help reception areas, corridors, and general training spaces feel cleaner and more open. If natural light is limited, the wrong colour can make the room feel flat or closed in.

There is also a practical side to colour selection. Very light walls can show marks quickly in high-contact areas, while very dark colours may reveal dust, scuffs, and uneven finishing more than expected. In many gyms, mid-tone neutrals with well-placed feature colours strike the best balance between presentation and maintenance.

This is often where professional guidance helps. What looks good on a sample card does not always behave the same way across a full wall under gym lighting.

Minimising disruption during gym repainting

For operating businesses, timing is often just as important as finish quality. Gym owners need work completed safely, cleanly, and with as little interruption as possible.

A well-planned painting project should consider access, ventilation, drying times, and the movement of staff and members through the space. In some cases, works can be staged after hours or across selected zones. In others, it makes more sense to tackle reception first, then training areas, then amenities.

The right plan depends on the layout, the condition of the surfaces, and how the facility operates. A small studio has different needs from a multi-zone fitness centre. That is why clear communication before the job starts makes such a difference. It allows expectations, timelines, and site requirements to be sorted properly from the outset.

When a fresh coat is not enough

Sometimes the issue is not tired colour. It is damaged plaster, poor previous workmanship, or surfaces that were never properly finished to begin with. In those cases, repainting alone will not deliver the result most owners want.

If walls have obvious dents, patchy repairs, peeling areas, or old water marks, those problems need to be fixed first. The same applies where there are cracks, surface movement, or uneven sections that become more obvious under fresh paint.

This is where a full-service approach is valuable. Painting and plastering often need to work hand in hand to achieve a result that looks good and lasts. Rushing through preparation to save time usually costs more later.

What to look for in a contractor for painting gyms

Not every painter is suited to gym environments. Commercial repainting in active spaces calls for more than basic paint application.

You want a contractor who understands surface preparation, can recommend suitable coatings for different zones, and takes care with cleanliness and scheduling. Respect for the site matters. So does clear advice. If a painter cannot explain why one finish suits a weight room and another suits a reception area, that is worth paying attention to.

For property owners on the Gold Coast and in Tweed, it also helps to work with a team that understands local conditions, especially where humidity and regular cleaning can affect product performance over time. Jag Painting Solutions approaches this sort of work with the same focus we bring to other commercial interiors – proper preparation, quality workmanship, and a finish designed for the way the space is actually used.

The long-term value of painting gyms properly

A gym does not need fancy paintwork. It needs paintwork that lasts, looks clean, and supports the overall impression of the business. Members notice when walls are marked, patchy, or peeling. They also notice when a space feels fresh, well-kept, and professionally presented.

Done properly, repainting can improve the look of the facility, reduce maintenance headaches, and help protect the underlying surfaces. Done cheaply, it often becomes a repeat expense sooner than expected.

The best results come from treating the project as more than a cosmetic update. When preparation is thorough, colours are chosen with care, and the finish matches the use of the space, a gym can keep looking sharp well after the painters have packed up. If you are planning work, start by asking not just how it will look when finished, but how it will perform six months later.

Categories
Uncategorized

8 Best Low Maintenance Exterior Finishes

If you have ever spent a weekend washing walls, touching up peeling paint or dealing with chalky, weather-beaten surfaces, you already know why the best low maintenance exterior finishes matter. A good-looking exterior is one thing. A finish that still looks good after harsh sun, rain, salt air and everyday wear is what really saves time, money and frustration.

On the Gold Coast and across similar coastal areas, exterior finishes work harder than many property owners expect. UV exposure is intense, moisture hangs around, and salt can shorten the life of the wrong product. That means low maintenance is not just about choosing something advertised as durable. It is about choosing the right finish for the surface, the location and the level of exposure.

What makes an exterior finish low maintenance?

A low maintenance finish does three jobs well. It protects the substrate underneath, resists visible ageing, and stays easier to clean over time. If one of those fails, the upkeep usually starts early.

The best-performing options tend to resist fading, peeling, mould growth and surface breakdown. They also need proper preparation before application. Even the most durable coating will struggle if it is applied over unstable paint, damp surfaces or damaged render. That is where experience matters. The finish is only as good as the surface under it.

Best low maintenance exterior finishes for lasting results

1. High-quality exterior acrylic paint

For many homes, a premium exterior acrylic paint is still one of the best low maintenance exterior finishes available. It suits a wide range of surfaces including render, fibre cement, masonry and previously painted timber, and modern formulations hold up well against Australian conditions.

Acrylic paint is flexible enough to cope with small movements in the substrate, which helps reduce cracking and peeling. It also tends to retain colour better than cheaper alternatives and is easier to wash down when dirt builds up.

The trade-off is that quality varies significantly. Lower-grade paint can fade faster, lose its finish and need repainting sooner. If you want a low maintenance result, this is not the place to save a few dollars on materials.

2. Elastomeric coatings for masonry and render

Elastomeric coatings are a strong option for rendered exteriors and masonry surfaces that are prone to fine hairline cracking. These coatings create a thicker, more flexible film than standard paint, which helps bridge small cracks and improve weather resistance.

On properties with rendered facades, this can reduce the cycle of patch, repaint, patch again. They also offer strong water resistance when the right system is used.

That said, elastomeric coatings are not right for every substrate. They need correct preparation and should be matched carefully to the wall system underneath. Used well, they can be excellent. Used in the wrong setting, they can trap issues instead of solving them.

3. Texture coatings

Texture coatings are popular on modern exteriors because they combine coverage, durability and visual appeal. They can help mask minor surface imperfections better than flat paint and generally hold up well on masonry and rendered walls.

From a maintenance point of view, they can be a smart choice because they are tough and less likely to show every scuff or blemish. They are especially useful on renovation projects where the substrate is sound but not perfectly uniform.

The main consideration is cleaning. Heavier textures can hold more dirt than smoother finishes, especially in exposed areas. If low maintenance is your top priority, a finer texture often gives a better balance between durability and ease of washing.

4. Pre-finished cladding

Factory-finished cladding products, including certain fibre cement and metal systems, can be an excellent low maintenance solution. Because the finish is applied under controlled conditions, it often has strong consistency and durability straight from installation.

These products appeal to owners who want fewer repainting cycles and cleaner lines. In many cases, maintenance is limited to routine washing and occasional inspections rather than full recoating every few years.

The downside is that repairs can be more noticeable if one section gets damaged. Matching older pre-finished panels is not always straightforward. Still, for many modern homes and commercial buildings, pre-finished cladding offers reliable long-term performance.

5. Powder-coated aluminium

For trims, screening, balustrades and some architectural features, powder-coated aluminium is one of the best low maintenance exterior finishes you can choose. It is widely used for good reason. It resists corrosion well, does not need frequent repainting and handles outdoor exposure better than many standard painted metal surfaces.

This is particularly useful in coastal environments where salt can be hard on exterior materials. A quality powder-coated finish, properly specified for the environment, can hold its appearance for years with basic cleaning.

Not all powder coating is equal, though. Coastal-grade specifications matter. If you are close to the water, the wrong system can age faster than expected.

6. Stained and sealed hardwoods

Timber can still be low maintenance, but only if expectations are realistic. Compared with paint, a quality stain and sealer system on the right hardwood often ages more naturally and can be easier to refresh without extensive scraping.

This works well for entry features, soffits and selected exterior highlights where a natural finish adds warmth. Instead of peeling like paint can, penetrating stains generally wear down more gradually.

The catch is simple. Timber is never the lowest-maintenance material in full sun and rain. It can be practical in sheltered areas or where the natural look is worth the upkeep, but it is usually not the best choice if your main goal is minimal attention over the long term.

7. Exterior membrane systems for problem areas

On balconies, parapets and other exposed sections that cop heavy weather, membrane systems can offer protection that standard paint cannot. These are not decorative coatings first and foremost. Their real value is moisture control and durability in vulnerable areas.

When water ingress is the issue, using a standard exterior finish often becomes a false economy. A proper membrane system may cost more up front, but it can reduce recurring maintenance and prevent larger repair bills.

This is a specialist area, and the details matter. Product choice, substrate condition and application method all affect how long the system performs.

8. Brick left unpainted with a clear protective sealer where suitable

In some cases, the lowest-maintenance finish is not a coloured coating at all. Face brick that is in good condition can be left unpainted, with a suitable breathable sealer used only where needed. That avoids the long-term repainting cycle that starts once brick is painted.

For owners who like the natural appearance of brick, this can be a practical option. It keeps maintenance simpler and preserves the original character of the building.

It is not suitable for every property, especially where previous coatings, staining or patchy repairs have already changed the look. But where the substrate is clean and consistent, it can be a smart long-term choice.

How to choose the right low maintenance finish

The right finish depends on more than appearance. Surface type, sun exposure, moisture levels, proximity to the coast and the current condition of the exterior all matter. A sheltered rendered wall and a west-facing timber facade do not need the same system.

This is where many maintenance problems begin. People often choose based on colour charts or product marketing, when the better question is how the finish will age on that specific building. A professional assessment can save a lot of rework later.

Preparation matters more than most people think

A low maintenance finish starts long before the first coat goes on. Cleaning, repairing cracks, treating problem areas, sanding unstable surfaces and using the right primer all make a direct difference to lifespan.

If the preparation is rushed, even premium coatings can fail early. If the surface is properly stabilised and the coating system is suited to the material, maintenance becomes far more manageable. That is why experienced tradesmen focus just as much on what happens before painting as the finish itself.

When paying more upfront saves money later

The cheapest option on quote day is rarely the cheapest option over ten years. Better products, stronger prep and a finish matched to the environment usually mean fewer touch-ups, fewer repairs and longer intervals before recoating.

For homeowners and property managers, that reduces disruption as much as cost. You are not just paying for paint or coating. You are paying for a result that keeps presenting well without constant attention.

If you are comparing the best low maintenance exterior finishes for your property, the smart move is to think beyond the immediate look. Choose a finish that suits the surface, suits the conditions and gives you a realistic maintenance cycle. A well-finished exterior should not become another job on your weekend list.

Categories
Uncategorized

Is Plastering Needed Before Painting?

A wall can look fine from the doorway and still turn into a problem the moment paint goes on. Hairline cracks, uneven patches, old repairs and rough texture tend to show up more once fresh paint catches the light. That is why homeowners and renovators often ask, is plastering needed before painting? The honest answer is sometimes yes, sometimes no – and the right choice depends on the condition of the surface, the finish you want, and how long you expect the result to last.

Painting and plastering are closely linked, but they are not the same job. Paint adds colour, protection and presentation. Plastering creates or restores the surface underneath so the paint has something sound, smooth and consistent to sit on. If the wall or ceiling is already in good condition, full plastering may be unnecessary. If it is cracked, uneven or damaged, skipping the prep usually means the finished paintwork will never look as clean as it should.

Is plastering needed before painting every wall?

Not every wall needs plastering before it is painted. In many homes and commercial spaces, the existing surface is solid enough to move straight into cleaning, sanding, priming and painting. That is especially true where walls have only minor scuffs, light nail holes or small cosmetic marks from day-to-day use.

Where plastering becomes necessary is when the substrate is no longer even or stable. Larger dents, peeling sections, old water damage, movement cracks, poor previous repairs and patched areas with obvious texture differences are all warning signs. In those cases, paint alone will not hide the issue. More often, it makes it stand out.

This is where experience matters. A professional painter is not just looking at whether the wall can physically hold paint. They are assessing how the final finish will read in natural light, under downlights, across long hallways and in rooms where smooth walls matter. A surface can be technically paintable and still be the wrong surface for a quality result.

What plastering actually fixes before painting

Plastering is often misunderstood as a cosmetic extra, but its main role is to correct the substrate. That could mean skimming over an uneven wall, repairing damaged plasterboard joints, filling wider cracks, levelling patched sections or restoring areas affected by wear and tear.

If you are repainting after a renovation, plastering is especially common. New walls, moved power points, removed cabinetry, replaced cornices and patched openings usually leave behind join lines and inconsistencies. These need to be blended properly before the painter starts. Otherwise, the wall can end up with visible flashing, ridges or dull patches where the paint absorbs differently.

Ceilings are another area where plastering often matters more than people expect. Ceiling imperfections are easy to miss until a fresh white paint reflects daylight across the room. Even a small repair can stand out if it has not been feathered and sanded properly.

When patching is enough and full plastering is not

There is a middle ground between doing nothing and replastering an entire room. In many cases, localised patching is enough. Small holes from picture hooks, minor settlement cracks and isolated chips can often be repaired, sanded and sealed without the need for broad plastering work.

This is usually the most practical option when the majority of the wall is in sound condition. It keeps the scope sensible and avoids paying for work that will not materially improve the finish. That said, patching only works when the repairs can be blended invisibly. If there are multiple defects across the same surface, spot repairs can become a false economy. You save at the start, then end up with a wall that still looks tired once painted.

A good tradesman will tell you when patching is enough and when it is just delaying a better fix. That kind of advice can make a big difference to both budget and outcome.

Signs plastering should be done before painting

If you are unsure whether plastering is needed before painting, a few common signs usually point to the answer. Walls with visible cracking around door frames or corners may need more than filler. Surfaces that look wavy along the light line often need skim work. Repairs that are clearly visible even before painting generally need more preparation, not less.

You should also pay attention to surfaces with bubbling, softness or staining from past moisture issues. Plastering may be part of the solution, but only after the source of the problem is properly addressed. Painting over damaged plaster without fixing the cause rarely ends well.

Older properties can present a different challenge. Years of repainting can leave a build-up of texture, inconsistent patch jobs and surface wear that stops a new coat from looking crisp. In those homes, plastering can be the step that turns an ordinary repaint into a proper refresh.

How plastering affects the final paint finish

A quality paint finish starts long before the first coat goes on. The smoother and more consistent the surface, the better the paint will look. This matters even more with low-sheen and satin finishes, which can highlight defects depending on the angle of the light.

Dark colours and feature walls also tend to expose imperfections more than lighter shades. If you are investing in a more considered interior scheme, skipping plaster repairs can let the whole room down. The same goes for commercial spaces where presentation matters and clients or customers notice the details.

There is also a durability factor. Paint adheres better and performs more evenly on a properly prepared surface. Where plastering has stabilised cracks or repaired weak areas, the coating system has a better chance of lasting well. That does not mean plastering prevents every future issue, especially in buildings with ongoing movement, but it does give the finish a stronger foundation.

Is plastering needed before painting exterior surfaces?

The answer is less often, but sometimes. Exterior painting usually involves different substrates such as render, masonry, fibre cement and weatherboard rather than interior plaster walls. Still, similar principles apply. If the surface is cracked, blown, patched poorly or uneven, repairs should be completed before painting begins.

On rendered exteriors, for example, patching and surface correction are often necessary to get a consistent finish. Paint will not disguise structural cracking or failed render. It can only coat what is already there. In exposed coastal areas like the Gold Coast, where properties deal with heat, moisture and weather changes, sound surface preparation becomes even more important.

The cost question people are really asking

Often, when someone asks whether plastering is needed before painting, they are really asking whether they can skip it and save money. That is a fair question. Sometimes you can. Sometimes you should not.

If plastering is genuinely unnecessary, leaving it out is sensible. But if the wall needs work and it is ignored, the saving is usually short term. You can end up paying for premium painting over a surface that still looks patched, uneven or tired. At that point, the money spent on paint has not delivered the finish you expected.

The better way to look at it is value rather than just cost. Good plastering can reduce rework, improve appearance and help the paint job last. For clients preparing a home for sale, updating a rental or improving a commercial space, that finish can influence the overall impression of the property.

Why professional assessment matters

Surface prep is one of those areas where photos and quick guesses only go so far. Two walls can look similar at first glance and need completely different approaches. One may only need sanding and filler. The other may need proper plaster repairs to stop defects telegraphing through the topcoats.

That is why a site assessment is useful. An experienced team can identify whether the issue is cosmetic, structural, moisture-related or simply the result of poor previous workmanship. From there, the prep can be matched to the surface instead of using a one-size-fits-all approach.

For property owners who want a clean, lasting finish without surprises, that upfront honesty matters. At Jag Painting Solutions, that is part of how we approach painting work – not just applying paint, but making sure the surface underneath is ready for it.

If you are planning to repaint, the best question is not whether plastering always comes before painting. It is whether your walls or ceilings are in the right condition to make the new paint worth doing. Getting that part right is what gives you a finish you can feel good about every time you walk into the room.

Categories
Uncategorized

Choosing a Gold Coast Warehouse Painter

A warehouse does not give you much room for error. Forklifts keep moving, stock keeps turning over, and every wall, ceiling and line-marked zone has to stand up to hard use. If you are looking for a Gold Coast warehouse painter, the real question is not simply who can apply paint. It is who can prepare the surface properly, work safely around your operations, and leave you with a finish that lasts.

Warehouse painting is a practical job with a direct effect on presentation, maintenance and day-to-day efficiency. A tired, flaking or poorly finished space can make the whole site feel neglected. On the other hand, a clean, well-prepared and professionally painted warehouse supports safety, reflects well on your business and reduces the need for constant touch-ups.

What a Gold Coast warehouse painter should actually handle

Warehouse projects are rarely as simple as painting four walls. In many sites, the surfaces include high internal walls, suspended ceilings, structural steel, office sections, roller door surrounds, loading areas and amenities. Each area has different wear levels, surface conditions and coating requirements.

A capable warehouse painter should be able to assess the full site and recommend the right system for each part of the building. That may mean low-sheen finishes for office areas, harder-wearing coatings for heavy traffic zones, or specialised products where moisture, dust or regular cleaning are part of the environment. Good results start well before the first coat goes on.

Preparation is often where quality separates itself from a cheap quote. Warehouses tend to collect dust, grease, impact marks and old coating failures over time. If these are painted over, the new finish will not bond well and the job will age faster than it should. Proper washing, patching, sanding, sealing and repairs are what give the final result its lifespan.

Why warehouse painting is different from standard commercial work

A shopfront or office fit-out usually focuses on appearance first. A warehouse has to look professional too, but performance matters just as much. The coating needs to cope with movement, machinery, scuffs and the occasional knock from pallets or equipment.

That is why product choice matters. A lower-cost paint may reduce the upfront quote, but it can become expensive if it marks easily, fades too quickly or starts to peel in high-use areas. In some cases, spending more on the right coating system saves money over the life of the building.

Timing also plays a bigger role. Many warehouse owners and managers cannot afford long disruptions. Work may need to be staged around deliveries, staff access, production schedules or tenancy requirements. An experienced contractor understands how to plan around these realities rather than treating the site like an empty shell.

The biggest mistakes property owners make

One of the most common mistakes is comparing quotes on price alone. Two painting proposals can look similar on paper but be very different in what they include. One may allow for detailed prep, surface repairs and premium coatings, while another may be priced around a faster, lighter process.

Another mistake is assuming all commercial painters are equally suited to warehouse work. Warehouses bring specific challenges, including access equipment, large-scale surface preparation, safety controls and the need to minimise disruption. Experience in this type of environment matters.

There is also the issue of scope. Some clients focus only on the obvious walls and leave out damaged plaster, old water stains or neglected office sections that affect the overall result. A thorough inspection helps avoid a patchy finish where one part of the building looks fresh and the rest still feels worn out.

How to assess a warehouse painter properly

When you speak with a contractor, look at more than availability and price. Ask how they approach prep work, what coatings they recommend for your site, and how they manage access and safety. A reliable painter should be able to explain the process in plain terms.

It also helps to ask how they stage the work. For some warehouses, painting after hours or across defined sections is the best option. For others, a shutdown period may be more efficient. There is no single right method. The best approach depends on how your business operates and which areas are most critical.

Communication is another strong indicator. Clear quoting, realistic timeframes and straightforward advice usually signal a professional operator. If a contractor is vague about prep, products or project timing, that uncertainty often carries into the job itself.

Surface condition changes everything

No two warehouses are in exactly the same condition. Some are relatively clean and only need a refresh. Others have years of coating failure, impact damage or patchy repairs that need attention before painting begins.

This is why site inspection matters. A painter cannot sensibly recommend the right system without seeing the actual surfaces, checking adhesion, identifying moisture issues and understanding how the space is used. In older buildings, you may also find that sections need plaster repairs or sealing work before any topcoat can perform as intended.

A good contractor will be honest about this. Sometimes the answer is a straightforward repaint. Sometimes the better option is more preparation up front to avoid repeat costs later. It depends on the building, the substrate and your expectations for durability.

Safety and downtime are part of the job

A warehouse painter is working in an environment where safety cannot be treated as an afterthought. Access equipment, overhead work, moving vehicles, stored stock and active staff all affect how the project should be managed.

That means proper planning around work zones, ventilation, drying times and restricted areas. It also means choosing coatings that suit the environment. In some cases, low-odour products are preferable where nearby operations continue during the job. In other cases, durability matters more than speed, and the schedule needs to allow for proper curing.

The cheapest option often underestimates this side of the work. A better painter will account for what the site needs to stay safe and functional while the project is underway.

What quality looks like in a warehouse finish

Good warehouse painting is not flashy. It looks clean, even and properly finished across large surfaces. Cut-in lines should be neat, repaired areas should blend in, and the coating should sit consistently without obvious patchiness, lap marks or early peeling.

The result should also suit the building’s purpose. In some warehouses, a bright, clean finish improves visibility and creates a more professional impression for staff, suppliers and visiting clients. In others, the priority may be harder-wearing surfaces that cope with heavy use and frequent cleaning.

A dependable painter will talk through these trade-offs with you. There is no benefit in recommending a premium decorative finish where a durable, practical system is the better fit. The best outcome is the one that matches how your site actually operates.

Why a full-service finishing team can be the better choice

Warehouse projects often uncover more than just painting needs. Minor plaster repairs, patching, damage around office areas and surface inconsistencies can all affect the final appearance. Working with a team that understands both painting and surface finishing can make the process smoother and the result more consistent.

That is especially useful when you want the whole property to present well, not just the main storage floor. Office entries, staff amenities and customer-facing sections all contribute to how the site feels. A warehouse may be an industrial space, but that does not mean presentation should be an afterthought.

This is where an experienced contractor such as Jag Painting Solutions can add value – not by overcomplicating the project, but by making sure the finish is right from the start and the service is easy to work with.

Choosing the right Gold Coast warehouse painter for your site

The right painter will respect the fact that your warehouse is a working asset, not just a blank space to coat. They will inspect properly, explain the process clearly, recommend suitable products and plan the work around your operations where possible.

They will also be realistic. If the building needs more preparation, they should say so. If a cheaper product is likely to create maintenance issues, they should tell you. Good advice is not about pushing the biggest scope. It is about helping you make a sound decision for the building, the budget and the long-term result.

When you invest in warehouse painting, you are investing in more than appearance. You are improving durability, presentation and the way the property functions day to day. A careful job now can save disruption and avoidable repainting later.

If you are weighing up your next project, take the time to choose a painter who treats preparation, workmanship and communication as part of the same service. That is usually where the best result starts.