Categories
Uncategorized

How to Paint Rendered Exterior Walls Properly

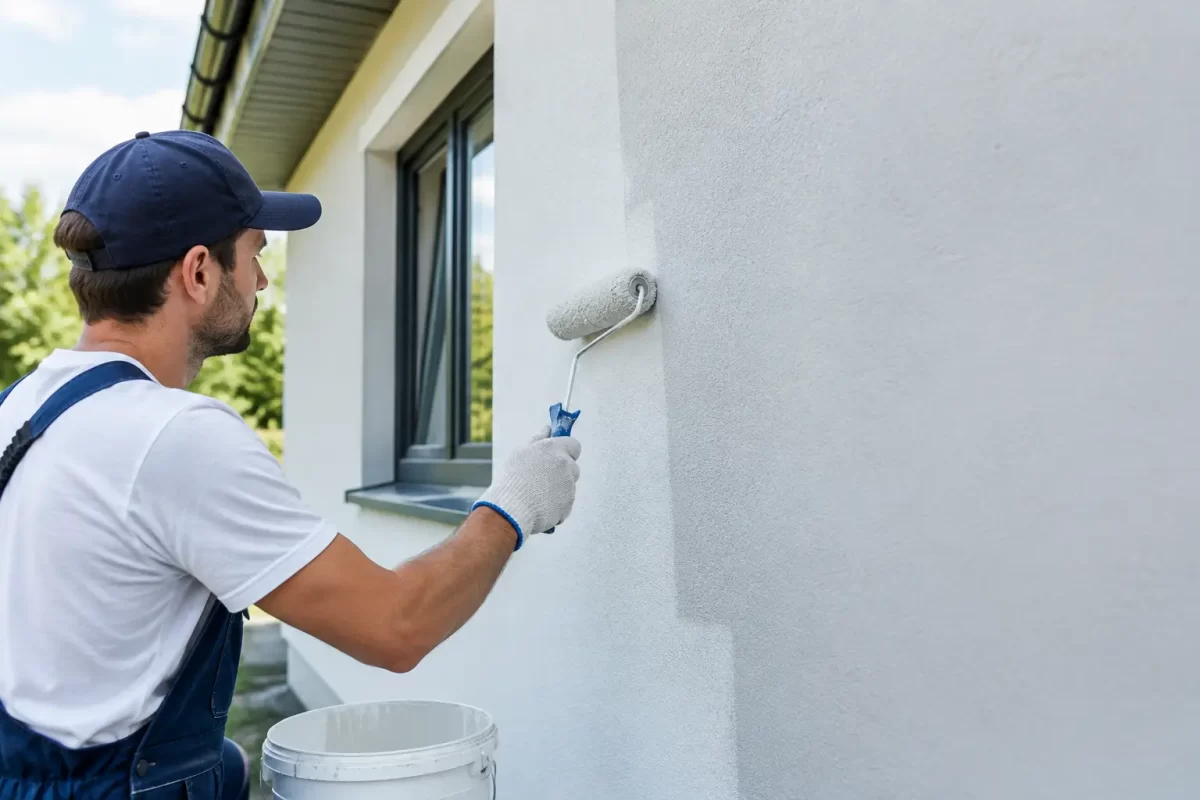
A rendered wall can make a home look crisp and modern, but only when the finish is sound and the paint system suits the surface. Knowing how to paint rendered exterior walls properly is less about putting on a fresh colour and more about dealing with cracks, chalky surfaces, moisture and harsh weather before the first coat goes on.

On the Gold Coast and in Tweed, exterior render is exposed to strong sun, heavy rain, humidity and salt in coastal areas. A rushed paint job may look good for a short time, then start showing peeling, patchiness or hairline cracking. Careful preparation gives the new finish its best chance of staying clean, even and durable.

Check the condition before painting

Render is not one single material. It may be traditional cement render, acrylic render or a textured coating applied over masonry. Each can be painted, but the wall must be stable, dry and clean first. Paint cannot fix movement in the building, active water entry or render that is already coming away from the substrate.

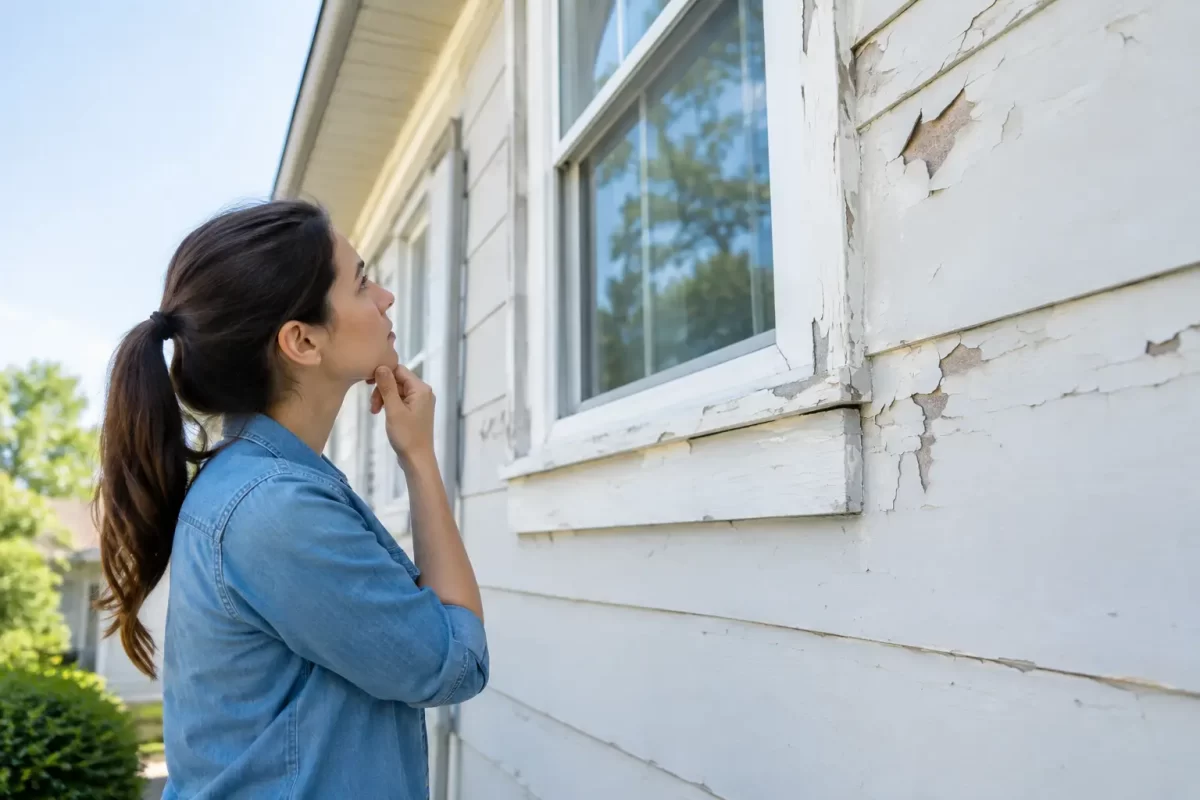
Start by looking closely at the full wall, including around windows, doors, downpipes and garden beds. Fine hairline cracks are common, particularly on older homes. Larger cracks, hollow-sounding areas or loose render need more attention before painting begins. Press gently on suspect areas and look for signs of drummy render, crumbling edges, rust marks, mould or staining that returns after rain.

Moisture is the issue that should never be ignored. Bubbling paint, dark patches, white powdery deposits and persistent mould can indicate that water is getting into or behind the surface. The source might be a leaking gutter, failed flashing, gaps around a window or poor drainage at the base of the wall. Painting over it may temporarily hide the mark, but it will not stop the problem.

New render also needs adequate curing time. The exact period depends on the product, weather and application, so follow the render and coating manufacturer’s guidance. Painting too early can trap moisture and affect adhesion.

Preparation is where a lasting finish begins

Good surface preparation is the difference between a coating that holds up and one that disappoints. Exterior walls collect dust, airborne salt, cobwebs, sunscreen residue near pool areas, mould and general grime. Even a wall that appears clean can have a fine chalky layer that stops paint bonding properly.

Washing is usually the first step. A suitable exterior cleaner can help remove dirt, mould and surface contamination. Pressure washing may be appropriate, but it needs to be done with care. Too much pressure or holding the nozzle too close can damage soft render, force water into cracks and leave a rough surface that requires repair.

Allow the wall to dry thoroughly after washing. This is particularly important in humid weather or after a run of rain. A professional painter will assess conditions rather than work to a fixed schedule when the surface is not ready.

Any loose or flaking paint should be removed, then feathered back to a firm edge. Small cracks can be prepared and filled with a flexible exterior-grade filler or sealant suited to the crack and coating system. Larger cracks should be assessed properly, especially where they follow a structural line, keep reopening or run around door and window openings.

Damaged render needs to be repaired with a compatible render product, allowed to cure and then blended so the patch does not stand out through the final paint. Texture matters here. A smooth repair on a heavily textured wall, or the reverse, will be noticeable even with two fresh coats of paint.

Choosing paint for rendered exterior walls

The best paint for rendered exterior walls is one designed for exterior masonry and compatible with the existing coating. Quality water-based acrylic coatings are commonly used because they offer good colour retention, flexibility and weather resistance. On walls with widespread hairline cracking, an elastomeric or specialised membrane-style coating may be worth considering, provided it suits the render and the level of movement involved.

The right product depends on the wall’s condition, its exposure and the finish you want. A very exposed western wall may benefit from a premium coating with strong UV resistance. A home near the coast may need careful cleaning and a coating system chosen for demanding weather conditions. A shaded wall with recurring mould requires the underlying moisture and ventilation issues to be addressed as well as the surface cleaned and coated.

Paint sheen also affects the final look. Lower-sheen finishes can soften the appearance of minor imperfections and are popular on textured render. Higher-sheen paints can be easier to wash, but they highlight patching, uneven texture and application marks more readily. Colour consultation can be helpful when choosing between a bright white, a warm neutral or a darker feature colour, as light changes significantly across an exterior through the day.

Dark colours deserve extra thought. They can look striking, but they absorb more heat and may make movement or existing imperfections more obvious. Not every rendered surface is suitable for a very dark finish, particularly if it has a history of cracking or faces intense afternoon sun.

Prime where it is needed

Primer is not always a blanket requirement, but it is often essential on bare render, repaired areas, highly porous surfaces and walls with chalky residue. It helps even out absorption so the topcoats dry consistently and achieve better coverage.

Skipping primer to save time can create a blotchy finish, especially where patches have been repaired. It may also mean using more topcoat than expected. The correct primer should be selected to match both the surface and the paint system, rather than treating every exterior wall the same way.

If the wall has previously been painted, checking the condition and type of existing coating is useful. A sound, compatible painted surface may only need cleaning, spot priming and recoating. Where the old paint is failing extensively, more detailed preparation is required before a new system can perform as it should.

Apply the coating in suitable weather

Painting exteriors is weather-dependent work. Direct hot sun can make paint dry too quickly, which affects flow and can leave lap marks or reduced film build. Rain too soon after application can wash or mark a fresh coating. High humidity slows drying, while windy conditions can carry dust and debris onto wet walls.

Plan the work around the wall’s aspect and the forecast. It can be better to paint one elevation in the morning and another later in the day rather than chasing the sun around the building. Check the product’s recommended temperature range and drying times, including how long the coating needs before it can handle rain.

For most rendered walls, two full coats are needed after any primer. Applying paint at the specified spread rate matters. Stretching a tin too far may seem economical, but it leaves the coating too thin to provide the colour depth and protection it was designed to deliver.

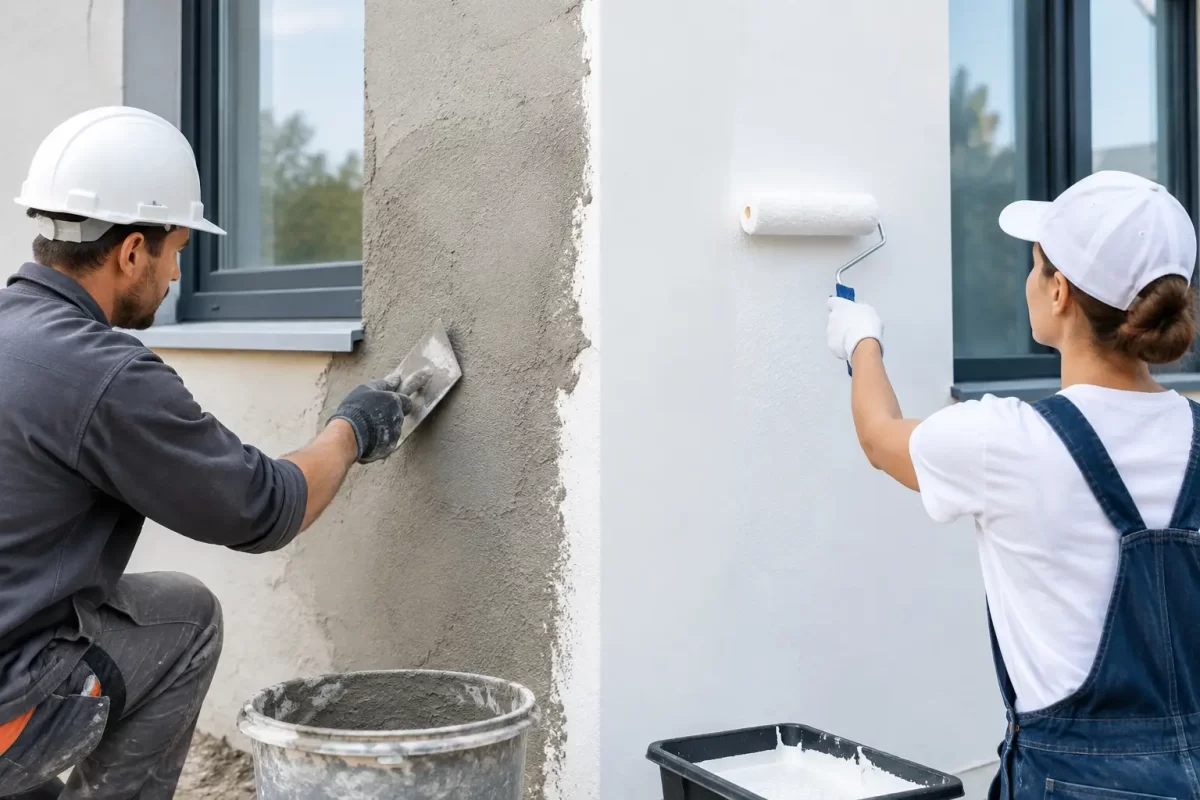
Rollers are efficient on broad, lightly textured surfaces, while brushes are useful for cutting in around edges, fittings and details. Heavier textures may require a roller with a longer nap to reach into the profile evenly. Spray application can produce a fast, consistent result in suitable conditions, but it requires skilled masking, overspray control and back-rolling where needed to work the paint into the render.

Common mistakes that shorten the life of exterior paint

Most exterior paint failures can be traced back to preparation, product selection or unsuitable conditions. Painting over damp render is a common mistake, as is coating walls before repairs have cured. Another is treating every crack as cosmetic when some are a sign of ongoing movement or water entry.

Using a cheap interior-style paint outdoors is also false economy. Exterior coatings need to cope with UV exposure, temperature changes and rain. Likewise, applying only one coat over a dramatic colour change may leave poor coverage and reduced protection, even if the wall looks acceptable from a distance.

Finally, do not underestimate cleaning. Mould, salt and chalky residue are not merely visual issues. They can interfere with adhesion and shorten the lifespan of an otherwise good paint job.

When professional help makes sense

A straightforward, sound render wall may be suitable for an experienced homeowner to repaint. The job becomes more complex when there are widespread cracks, failed render, moisture staining, high walls, difficult access or an uncertain existing coating. These situations benefit from an experienced team that can identify what needs repair before choosing the paint system.

For homeowners and property managers, professional exterior painting also removes the practical strain of surface preparation, safe access, weather scheduling and protecting windows, landscaping and surrounding areas. Jag Painting Solutions approaches rendered exteriors as a finishing system, not simply a colour change, with care taken to prepare the surface and leave the property tidy.

A well-painted rendered wall should look even from the street, up close and in changing light. Give the preparation and product choice the attention they deserve, and your exterior will have a far better chance of looking sharp through the seasons.

Categories
Uncategorized

Body Corporate Painting Guide for Better Results

A body corporate painting guide should start well before colours are selected or painters arrive on site. In a shared property, the job affects residents, owners, tenants, visitors and the long-term presentation of the building. A clear plan helps the committee protect the property, control disruption and achieve a finish that stands up to the Gold Coast climate.

Whether the work covers a small townhouse complex, apartment building, retail frontage or shared common areas, painting is a maintenance decision as much as an appearance upgrade. The best results come from defining the scope properly, allowing for surface repairs and choosing an experienced team that communicates clearly from start to finish.

Start with a clear painting scope

The first question is not simply, “What colour should we use?” It is, “What needs painting, repairing and protecting?” A body corporate scope should identify every relevant surface, including exterior walls, soffits, eaves, balustrades, stairwells, common hallways, doors, fences, car parks and line markings where required.

Walk the property with the committee or building manager and document visible issues. Peeling coatings, hairline cracks, chalky paint, rust, water staining, mould and failed sealant all need attention before new paint is applied. Painting over these problems may improve the look for a short time, but it will not provide the durable result the property needs.

It also helps to separate essential maintenance from optional improvements. For example, repairing damaged render and repainting external elevations may be urgent, while updating feature colours in an entry foyer can be planned as a separate stage. This gives the committee a practical basis for prioritising works and managing the budget.

Plan for the building, not just the paint

Every complex has different access requirements, resident routines and risks. A low-rise townhouse site may allow painters to work in sections with minimal interruption. A multi-level building may need scaffolding, elevated work platforms, safety controls and more detailed scheduling. The painting approach should suit the property rather than forcing the property to fit a standard process.

External painting on the Gold Coast also requires careful consideration of sun, humidity, salt air and seasonal rain. Coastal locations can place extra pressure on exterior coatings and metal surfaces. Preparation, product selection and correct application conditions all influence how well the finish performs over time.

A professional quote should make the proposed work easy to understand. It should outline the areas included, preparation methods, repairs allowed for, coating system, number of coats, access arrangements and any exclusions. If there are uncertain areas, such as concealed timber rot or extensive render failure, these should be identified upfront rather than left as a surprise once work begins.

Prepare surfaces properly

Most painting failures begin with poor preparation. A fresh topcoat cannot compensate for loose paint, moisture problems or an unclean surface. For body corporate projects, preparation often takes a significant part of the programme because the building has been exposed to years of weather, traffic and general wear.

Depending on the condition of the property, preparation may include washing down surfaces, treating mould, scraping and sanding loose coatings, filling cracks, patching plaster, repairing render, sealing stains, priming bare areas and treating rust. Exterior surfaces may also need pressure cleaning before any repairs or coatings are applied.

The right preparation depends on the substrate. Timber, masonry, plasterboard, metal and previously painted surfaces each need suitable products and methods. This is where experienced tradesmen add real value. They can identify whether a surface needs a sealer, primer, patch repair or more extensive remedial work before the finishing coats begin.

For committees, the key point is simple: do not compare quotes only by the final price or the number of litres of paint. Compare the preparation detail. A lower quote can become costly if it leaves out the work needed for the new finish to last.

Choose colours with maintenance in mind

Colour changes can refresh a complex, improve street appeal and make common areas feel cleaner and more welcoming. They should also work with the building’s architecture, surrounding properties and maintenance requirements.

Very dark exterior colours can absorb more heat, particularly on exposed walls. Light colours can look sharp and help reflect heat, but may show dirt or staining more readily in high-traffic areas. The right choice depends on the surface, orientation, surrounding landscaping and how the property is used.

A practical colour scheme often uses a main neutral tone with darker, more forgiving colours on doors, lower walls, handrails or areas likely to receive knocks and marks. Entry points can use a subtle feature colour to create a stronger first impression without making the entire building difficult to maintain.

Before approving a final scheme, view sample colours on the actual building. Light changes throughout the day, and a colour that looks right on a small sample card can appear very different across a large rendered wall. Colour consultation can help the committee make a confident decision that suits the property rather than following a short-lived trend.

Communicate clearly with residents

Painting works are easier when residents know what is happening, when it will happen and what they need to do. Advance communication is not an extra. It is part of running a respectful, well-organised project.

Residents should receive clear notice about work dates, expected hours, access requirements, parking changes, balcony restrictions and any need to keep windows closed. If painters need access to private courtyards, balconies or external walls near individual lots, those arrangements should be confirmed early.

A useful resident notice should cover at least these points:

  • the work areas and expected sequence of works
  • daily working hours and likely noise or odour impacts
  • access, parking and safety restrictions
  • contact details for project questions
  • simple steps residents can take to protect outdoor furniture, vehicles and personal items.

No painting project is completely disruption-free, particularly where access equipment or external preparation is involved. However, a professional team can reduce inconvenience by keeping the site tidy, protecting surrounding surfaces, maintaining safe walkways and providing realistic updates if weather changes the programme.

Check safety, access and site protection

Body corporate painting often takes place around people going about their day. That makes site safety and protection essential. Walkways, entry points, gardens, vehicles and common facilities need to be considered before work starts.

The contractor should plan how ladders, scaffolding or elevated work platforms will be used, how public areas will be separated from the work zone and where equipment and materials will be stored. Drop sheets, masking and careful set-up protect windows, paving, landscaping and fixtures from overspray or paint splashes.

For internal common areas, the team should also consider how residents move through the building. Hallways, stairs and lift areas may need to be completed in stages so access remains practical. Low-odour products and sensible scheduling can be particularly helpful in enclosed spaces.

Inspect the work before sign-off

A final inspection gives the committee an opportunity to check that the completed work matches the agreed scope. It is best done in good natural light and, where possible, with the contractor present so any questions can be addressed promptly.

Look for consistent coverage, clean cut-in lines, even sheen, properly finished repairs and neat edges around windows, doors and fixtures. Check that common areas have been left clean and that temporary protections, rubbish and equipment have been removed. If touch-ups are needed, record them clearly and agree on a timeframe for completion.

It is also worth keeping records of the colour schedule, products used and the date of completion. These details make future maintenance, touch-ups and staged painting easier to manage. A well-kept maintenance record can save the next committee time and avoid guesswork.

When to stage a body corporate painting project

Not every property needs to be painted all at once. Staging can be a sensible option when budgets are limited, access is complex or the building has areas with different levels of deterioration. External elevations exposed to harsh weather may be the first priority, followed by internal common areas, fencing or secondary structures.

The trade-off is that staged work can mean repeat set-up costs and slight colour variation if products or batches change over time. Where possible, plan the full colour scheme and maintenance sequence from the beginning, even if the work is completed in stages.

A well-planned painting project does more than make a property look refreshed. It protects surfaces, supports property value and gives residents confidence that their shared asset is being cared for properly. For body corporates across the Gold Coast and Tweed, working with a skilled painting team that respects the site, communicates clearly and takes pride in preparation is a practical way to make the process easier from the first inspection to the final coat.

Categories
Uncategorized

Painting New Plaster Walls for a Lasting Finish

A freshly plastered wall can make a room feel brand new, but painting new plaster walls too soon is one of the quickest ways to compromise that clean finish. Paint may look acceptable on day one, then develop patchiness, peeling, staining or uneven sheen as moisture continues to leave the surface.

The best result comes from treating new plaster as a surface-finishing job, not simply a painting job. Allowing the wall to dry properly, preparing it carefully and using the right sealer gives your chosen colour the smooth, durable appearance it deserves.

Why new plaster needs special treatment

New plaster holds a significant amount of moisture after it has been applied. While the surface may feel dry to the touch, moisture can still be present below it. If paint is applied before the plaster has fully cured and dried, that trapped moisture can affect adhesion and cause paint films to fail.

Fresh plaster is also highly porous. Without a suitable primer or sealer, it can absorb paint unevenly. This often leaves visible dull patches, roller marks or areas with a different sheen, particularly when light falls across the wall from windows or downlights.

On the Gold Coast and in Tweed, humidity can slow drying times considerably. A wall that might dry quickly in a well-ventilated, low-humidity space can take longer during wet weather or in rooms with limited airflow. Rushing because a renovation schedule is tight usually creates more work later.

How long should plaster dry before painting?

There is no single number that suits every wall. As a practical guide, new plaster commonly needs at least one to two weeks to dry, but thicker plaster, poor ventilation and humid conditions can extend that timeframe. A newly repaired section may dry faster than a fully skimmed room, while solid plaster work can take longer again.

Look for a consistent pale colour across the plaster. Darker areas often indicate retained moisture. The wall should feel dry, firm and free from any cool or damp patches. If there is uncertainty, particularly on a larger renovation or commercial project, moisture testing is the safest way to confirm the surface is ready.

Heating a room aggressively is not always the answer. Very fast drying can contribute to cracking, while a combination of steady ventilation and sensible indoor temperatures is generally more effective. Open windows where practical, use fans to improve air movement and avoid creating excess moisture through drying clothes indoors or running steamy bathrooms nearby.

Preparing new plaster walls before paint

Good paint cannot hide poor preparation. Before primer goes near the wall, the plaster needs to be checked under proper lighting. Small trowel marks, ridges, pinholes and sanding scratches are far easier to address before the first coat than after the final coat has dried.

Light sanding removes minor imperfections and gives the surface an even feel. This should be done carefully. Over-sanding can damage the plaster face and create uneven areas that show through paint. Once sanding is complete, all dust must be removed with a vacuum and a clean, dry microfibre cloth. Dust left on the wall weakens paint adhesion and can leave a gritty finish.

Any cracks, dents or missed joints should be filled with a compatible stopping compound, allowed to dry and sanded smooth. Corners, window reveals, door frames and skirting boards should also be checked before painting starts. Masking and protecting floors, fittings and furniture properly is part of a professional job, especially in occupied homes where care for the space matters just as much as the finish.

Do not rely on a watered-down top coat

You may hear this called a mist coat. It is a common shortcut, but it is not the most reliable approach for every new plaster surface. Adding water to standard wall paint can reduce its binding performance and produce inconsistent coverage if the dilution is wrong.

A quality plaster sealer, primer or undercoat designed for porous surfaces is the safer option. The right product helps stabilise the plaster, improves adhesion and provides an even base for subsequent coats. The exact system depends on whether the wall is solid plaster, plasterboard with set joints, a repaired surface or a previously painted area blended into new work.

Choosing the right paint system

Most internal plaster walls need one preparatory coat followed by two finish coats. This produces better colour depth, more even sheen and a surface that stands up to day-to-day cleaning. One top coat can look fine initially, but it rarely provides the same consistency or durability.

The finish should suit the room. Low-sheen paint is a popular choice for living areas, bedrooms and hallways because it gives a soft appearance while being more washable than flat paint. In bathrooms, laundries and kitchens, moisture-resistant products are worth considering. Ceilings typically need a flatter finish to reduce reflected light and hide minor surface variation.

Colour also changes how plaster imperfections appear. Dark colours, strong whites and higher-sheen paints can highlight unevenness, especially on broad walls with side lighting. If the room receives strong afternoon sun or has large windows, careful preparation becomes even more critical. A colour consultation can help homeowners choose a shade and finish that works with the room, not against it.

Application matters as much as the paint

Even with the correct products, rushed application can spoil the result. Paint should be applied at the recommended spread rate, with a quality roller suited to the wall texture. Applying it too thinly can cause poor coverage. Applying it too heavily can lead to runs, slow drying and uneven texture.

Keeping a wet edge is particularly important on large walls. Work methodically from one section to the next so roller passes blend together before the paint starts to dry. Cutting in around ceilings, cornices, doors and windows should be completed neatly and at a pace that allows the wall area to be rolled without visible overlap.

Drying times between coats should be followed, not guessed. A coat can feel dry while still needing more time before the next layer is applied. Temperature, humidity and airflow all affect this. Allowing each coat to cure properly protects the appearance of the final finish and reduces the risk of marking during clean-up or furniture placement.

Common problems and what they usually mean

Patchy colour or varying sheen often points to uneven absorption, insufficient priming or inconsistent application. Peeling or flaking can indicate moisture, surface dust or a coating system that was not suitable for the plaster. Fine cracks may be normal settling in some new work, but wider or recurring cracks should be assessed before they are simply painted over.

Yellow or brown staining needs attention before repainting as well. It may come from water damage, timber tannins, rusting fixings or a previous issue behind the wall. Painting over a stain without identifying its source can mean it returns through the new finish.

For small repairs, a careful DIY approach can work well. Full rooms, high ceilings, detailed interiors and recently renovated homes are less forgiving. Professional painters bring the preparation standards, product knowledge and controlled application needed to keep the finish consistent from wall to wall.

When professional help is worthwhile

A professional painting team can inspect the condition of the plaster, identify areas that need additional stopping or sanding, and select a coating system suited to the room. This is particularly valuable when the plastering and painting are part of the same renovation, as responsibility for the finished surface remains clear from start to finish.

Jag Painting Solutions works with homeowners, renovators and businesses that want a well-prepared, clean and long-lasting result. A clear quote and practical advice before work begins can prevent costly shortcuts, whether the project is one room or an entire property.

Fresh plaster only gets one first paint job. Give it the drying time, preparation and coating system it needs, and the finished walls will look right long after the renovation dust has settled.

Categories
Uncategorized

10 Common Mistakes to Avoid Before Repainting

A fresh coat of paint can make a tired room, weathered exterior or dated commercial space look completely renewed. But the result is decided well before the first brush touches the wall. The most common mistakes to avoid before repainting are usually preparation shortcuts: painting over moisture, overlooking damaged plaster, choosing a colour too quickly, or starting before surfaces are properly clean and sound.

For Gold Coast properties, preparation deserves even more attention. Humidity, salt air near the coast, strong sun and seasonal rain can all affect how coatings dry, adhere and last. Taking the time to assess the job properly protects the finish you are paying for.

1. Painting Over a Problem Instead of Fixing It

Paint improves appearance, but it does not repair the cause of peeling, stains, cracks or bubbling. If a wall has water marks, for example, repainting it before identifying the leak may only hide the issue for a short time. The stain can return, and the new paint may fail as moisture continues to move through the surface.

The same applies to flaking external paint, mould, rust spots and cracked plaster. These are not simply cosmetic details. They can point to moisture exposure, failed sealants, movement in the substrate or inadequate previous preparation.

Before repainting, inspect walls, ceilings, eaves, doors and exterior cladding in good light. Look for loose material, discolouration, soft spots, fine cracks and areas where paint has lost adhesion. A professional painter can help determine whether the right solution is a minor repair, plastering work, mould treatment, sealing or a more substantial maintenance repair.

2. Skipping Cleaning Because the Surface Looks Fine

A wall can look clean while still carrying contaminants that interfere with paint adhesion. Interior surfaces often collect cooking residue, hand marks, cleaning product residue and dust. Outside, dirt, salt, mildew, chalky old paint and airborne grime are common, particularly on exposed Gold Coast homes.

Painting over contaminants can lead to patchy sheen, poor bonding and early peeling. It can also make a premium paint system perform like a budget one. Cleaning should suit the surface and the issue – a light wash may be enough for some interiors, while exterior areas may need thorough washing, mould treatment or more detailed preparation.

Allow surfaces to dry fully before any sanding, filling, priming or painting begins. This is especially important after wet weather or pressure cleaning. A surface that feels dry on top may still hold moisture underneath.

3. Underestimating Plaster Repairs and Surface Imperfections

Fresh paint draws attention to imperfections rather than disguising them. Small dents, poorly filled holes, lifted tape joins and uneven plaster may be easy to ignore on an old, flat wall. Once painted in a new colour, especially with light coming across the surface, they can become the first thing you notice.

Rushed patching is a common cause of disappointing interiors. Filler needs to be applied cleanly, allowed to dry, sanded smooth and sealed where required. Larger cracks or recurring movement need a more considered repair than simply filling over the top.

Texture also matters. A repaired section with a different surface profile can show through even after several coats. Where a wall has extensive damage or inconsistent previous repairs, skim coating or plastering may provide a cleaner starting point than trying to patch dozens of individual areas.

4. Using the Wrong Primer or Skipping It Entirely

Not every surface needs the same primer, but many repainting projects need one. Bare plasterboard, patched sections, stained ceilings, glossy trim, timber, metal and weathered exterior surfaces all have different requirements. Applying topcoat directly to these areas can cause uneven absorption, flashing, staining or poor adhesion.

Primer is not an optional extra added to make a quote look larger. It is part of the coating system. It helps create a consistent base so the finish coat can achieve the colour, coverage and durability it is designed to provide.

There is a trade-off here. If existing paint is sound, clean and compatible with the new coating, a full primer coat may not be necessary across every surface. Spot priming repairs may be enough. The key is assessing the existing condition rather than assuming one approach suits every wall.

5. Choosing Colour From a Tiny Swatch

A paint card is useful for narrowing down options, but it cannot show how a colour will behave across an entire room or exterior façade. Natural light, artificial lighting, floor finishes, window orientation and nearby buildings can all change the way colour reads.

A soft white can look warm in one room and grey in another. A popular exterior neutral can appear much brighter in direct sun than expected. Dark colours can make an impressive statement, but they also show surface imperfections more readily and may absorb more heat on exposed exterior areas.

Test sample colours on more than one area and check them at different times of day. For larger projects, consider the roof colour, brickwork, paving, cabinetry and landscaping as part of the decision. Colour consultation is particularly valuable when several finishes need to work together, or when you want an update that will still feel right in a few years.

6. Forgetting That Sheen Changes the Look and Maintenance

Colour gets most of the attention, yet sheen has a major effect on the final appearance. Flat and low-sheen paints can help soften minor wall imperfections, while higher-sheen finishes are more washable and reflective. Neither option is automatically better.

For busy family areas, hallways and commercial spaces, a more washable finish may be practical. In a formal living room with imperfect walls, a lower sheen may provide a more forgiving look. Bathrooms, kitchens and laundries need coatings suited to moisture and regular cleaning.

Choosing sheen without considering the room’s use can create regret after the job is complete. A finish that looks excellent in a showroom may not be the right choice for a high-traffic home or business.

7. Starting in Poor Weather or Rushing Drying Times

Weather affects exterior painting more than many property owners realise. Rain, high humidity, excessive heat, wind and cold conditions can all affect application and drying. Paint that dries too quickly in strong heat may not level well. Paint exposed to moisture too soon can lose adhesion or develop surface issues.

Interior work can also be affected by humidity and poor ventilation, especially in bathrooms, laundries or closed-up spaces during wet weather. Each product has recommended application conditions and recoat times. Those instructions are not a suggestion – they are part of getting a finish that performs as intended.

Avoid scheduling exterior repainting solely around a convenient weekend. A professional team will plan work around suitable conditions, monitor forecasts and allow the correct time between coats. This may occasionally mean adjusting the schedule, but it is better than risking a failed finish.

8. Assuming Every Paint Product Is Interchangeable

Low-cost paint can seem appealing when comparing tins on a shelf, but the true cost of repainting includes preparation, labour, access, protection and the inconvenience of doing the job again sooner than expected. Coverage, scrub resistance, UV resistance and long-term colour retention can vary significantly between products.

That does not mean the most expensive option is always required. A guest bedroom, a rental touch-up and a sun-exposed exterior wall have different demands. The right product is the one matched to the surface, environment and expected wear.

A complete system also matters. Compatible primers, undercoats and topcoats are designed to work together. Mixing products without checking suitability can create avoidable adhesion or performance problems.

9. Not Protecting Floors, Furniture and Landscaping

Repainting should improve your property without creating unnecessary damage or disruption. Failing to plan protection can lead to paint spots on flooring, overspray on windows, dust through living areas or damage to garden beds and outdoor furniture.

Before work starts, clear fragile items, valuables and small furniture where possible. Confirm which rooms or areas need access, where materials can be stored and how pets will be managed. For commercial premises, consider staff access, customer safety, operating hours and whether work needs to be staged to minimise interruption.

Good preparation includes respectful site care. A tidy work area, careful masking and proper drop-sheeting make the process easier for everyone and help deliver a cleaner result.

10. Choosing a Painter on Price Alone

The lowest quote can be tempting, particularly when a repaint is part of a larger renovation. But quotes are only comparable when they cover the same scope. One may include washing, repairs, primer, quality materials, protection and multiple coats, while another may allow only for a quick paint-over.

Ask what preparation is included, how damaged areas will be handled, which paint system is proposed and whether the team is appropriately qualified and insured. Clear communication before work begins is often a good sign of how the project will be managed once it is underway.

Jag Painting Solutions approaches repainting as a complete finishing job, not simply an exercise in getting colour onto walls. The right preparation, product selection and attention to detail give your home or business the best chance of looking sharp long after the painters have packed up.

A repaint is an opportunity to protect your property as well as refresh it. Address the small issues before they become larger ones, allow enough time for proper preparation, and choose a team that treats your space with the same care you do.

Categories
Uncategorized

Can Painters Repair Plaster Cracks Properly?

A freshly painted wall will not hide a crack for long. If movement, poor preparation or water damage is behind it, the line can show through the new paint surprisingly quickly. So, can painters repair plaster cracks? In many cases, yes. An experienced painter with plastering skills can prepare, repair and repaint minor to moderate plaster cracking so the finished wall looks smooth and holds up well.

The key is knowing whether the crack is a surface-finishing issue or a sign that something underneath the wall needs attention first. A professional approach does not simply cover the problem. It starts with assessing the crack, addressing its cause where possible, then using the right repair method for the wall and the final paint system.

When painters can repair plaster cracks

Most common plaster cracks around a home can be repaired as part of a painting project. These include fine hairline cracks, small cracks along joints, minor settlement cracks, and damage caused by knocks, removed fittings or picture hooks. They are particularly common in established homes, renovated rooms and areas where different building materials meet.

A capable painting and plastering team can open up the crack where required, remove loose material, apply a suitable filler or joint compound, reinforce the area with tape when needed, sand it smooth and prime it before painting. The repair is blended into the surrounding surface so it does not stand out under natural light or interior lighting.

This work is often best completed before an interior repaint. Repairing cracks at the preparation stage allows the painter to create one consistent finish across the room, rather than leaving patched areas with a different texture or sheen.

Hairline cracks and small movement cracks

Fine cracks in plaster are often caused by normal building movement, seasonal temperature changes or the natural settling of a property. Provided they are stable and there is no sign of moisture or major structural movement, they can usually be repaired successfully.

A painter will not normally just apply paint over a hairline crack. The crack may be widened slightly to give the repair product something to bond to. After filling and sanding, a quality primer and the chosen topcoat help create an even finish. Flexible products may be appropriate in areas prone to minor movement, but no product can guarantee that an actively moving crack will never return.

Cracks at plasterboard joints and cornices

Cracks along plasterboard joins, internal corners and cornices are also common. These repairs may require joint tape, fresh compound and careful feathering over a wider area than homeowners expect. The extra preparation is what prevents a visible ridge or patch once paint is applied.

Cornice cracks can be especially noticeable because they sit at the transition between wall and ceiling. A neat repair depends on stabilising loose sections, filling the gap correctly and matching the existing profile. This is detailed work, but it is well within the scope of painters who also provide professional plastering services.

When a plaster crack needs more than a painter

Not every crack should be treated as a cosmetic repair. Paint and plaster products can restore the surface, but they cannot solve a structural fault, water leak or ongoing movement in the building.

Before work begins, larger or unusual cracks should be assessed carefully. A good tradesperson will explain when a repair is suitable and when another specialist should investigate the issue first. That advice protects both the property and the finished paintwork.

Warning signs to take seriously

A crack deserves further investigation if it is wide, deep, recurring quickly after repair or changing over time. Cracks that run diagonally from doors or windows, extend through brickwork, or appear alongside sticking doors and uneven floors can indicate movement beyond the plaster surface.

Moisture is another concern. Staining, bubbling paint, soft plaster, mould or a damp smell may point to a roof leak, plumbing issue, failed waterproofing or external water ingress. The source of the water needs to be fixed and the area properly dried before plaster repairs and repainting begin. Otherwise, even the best surface work is likely to fail.

On the Gold Coast, humid conditions and heavy rain can make moisture-related damage more likely in poorly sealed or ageing properties. Exterior maintenance, roof condition and ventilation all play a part in protecting internal walls and ceilings.

What a proper plaster crack repair involves

The quality of the paint finish is decided well before the paint tin is opened. Rushing preparation is the main reason repaired cracks reappear as obvious lines, patches or changes in texture.

First, the affected area is inspected to check for loose plaster, signs of dampness and movement. Loose or fragile material is removed rather than filled over. The crack is then prepared to accept the repair product, which may involve opening it slightly and cleaning out dust.

For wider cracks or joints, reinforcing tape may be bedded into compound to help bridge the area. The repair is built up in thin coats, allowing appropriate drying time between applications. This reduces shrinkage and gives the compound the best chance of bonding properly.

Once dry, the repaired section is sanded and feathered well beyond the original crack. This wider blending process matters because paint, particularly low-sheen or semi-gloss finishes, can reveal even small changes in the wall surface. The area is then sealed or primed as needed before the final coats are applied.

Matching the existing surface

A smooth repair is only half the job. The finish also needs to match the surrounding wall. Older homes may have subtle roller texture, while newer interiors are often finished very flat. If the patch is sanded too smooth or left too rough, it can become visible when light falls across the wall.

Professional painters consider the wall texture, paint sheen and lighting in the room. They also keep the work area tidy and protect floors, furniture and nearby fittings while repairs are being completed. This attention to detail is particularly valuable in occupied homes and businesses where disruption needs to be kept to a minimum.

Should you repair cracks before or after painting?

Plaster cracks should almost always be repaired before painting. Painting first and patching later creates an uneven result and may mean repainting a larger section of wall to blend the colour and sheen.

If only one small area needs attention, a touch-up can sometimes work. In practice, paint ages and sheen changes over time, so the repaired spot may still be noticeable. For walls with several cracks, marks or old patch repairs, repainting the full wall after preparation usually provides the cleaner, more consistent outcome.

This is also a good time to deal with other surface issues, such as dents, nail holes, peeling paint and minor wall damage. Completing all preparation in one stage avoids repeated mess and helps the new colour look its best.

Choosing the right team for crack repairs and painting

When requesting a quote, describe where the cracks are, how long they have been present and whether you have noticed any dampness or movement. Clear photos can help with an initial discussion, although an on-site inspection is often needed to confirm the scope of work.

Ask whether the quote includes plaster preparation, crack repairs, sanding, priming and repainting, rather than assuming these details are covered. It is also worth confirming how the area will be protected and whether the painter has experience matching repaired surfaces to existing walls and ceilings.

Jag Painting Solutions can manage plaster repairs as part of a professional interior painting project, giving homeowners and property managers one team to coordinate the surface preparation and final finish. That means fewer handovers and clearer responsibility for the result.

A crack-free-looking wall is not achieved by hiding defects under another coat of paint. It comes from taking the time to identify the issue, prepare the surface properly and apply a finish that suits the room. If you are planning to repaint, arrange an inspection before work starts so the walls can be repaired properly and the finished space looks cared for from every angle.

Categories
Uncategorized

Paint Colour Consultation Guide for Your Property

A wall colour can look perfect on a small sample card, then feel too dark, too cool or unexpectedly bright once it covers an entire room. That is why a paint colour consultation guide should start with the property itself, not a trend board. The best result comes from considering light, surfaces, adjoining spaces and how you want the home or business to feel when the work is complete.

For homeowners and renovators, colour selection is one of the most visible decisions in a painting project. It affects the sense of space, the way flooring and furnishings sit together, and how well the finish holds up over time. Taking a practical approach before paint goes on the walls can prevent costly changes later.

Start with the light, not the paint chart

Natural light changes colour more than most people expect. A warm white in a north-facing Gold Coast living area can feel clean and balanced, while the same colour in a shaded south-facing room may appear flatter or greyer. Strong afternoon sun can also make pale colours look brighter and reveal undertones that were easy to miss indoors at the paint store.

Look at each room at different times of day before settling on a direction. Morning, midday and evening light can each tell a different story. Artificial lighting matters too. Warm globes may add a yellow cast, while cooler LEDs can make some whites appear sharper or slightly blue.

This does not mean every room needs a different colour. In fact, a connected palette usually makes a home feel more considered. It simply means the same colour needs to be tested in the setting where it will be used.

Test real samples on the wall

A small paint chip is useful for narrowing options, but it is not enough for a final decision. Use sample pots on larger boards or apply them directly to a prepared section of wall. Move the boards around the room and view them beside skirting boards, flooring, curtains, cabinetry and furniture.

Paint two or three likely choices rather than ten. Too many samples can make a decision harder, especially when the variations are slight. Give the samples a few days, view them in changing conditions, then choose the colour that continues to feel right rather than the one that makes the strongest first impression.

Use a paint colour consultation guide to build a whole-property palette

The most successful interiors usually have a clear thread running through them. That does not require every wall to be the same white or neutral. It means colours have been chosen to work together from room to room.

Start by identifying the fixed elements you are not replacing. These may include timber floors, stone benchtops, tiles, roofing, brickwork, kitchen cabinetry or built-in joinery. Their undertones are a more reliable starting point than a colour trend. For example, a cool grey tile and a creamy white wall can clash even when both colours look appealing on their own.

For many properties, one main wall colour, one or two complementary feature colours and a consistent trim colour provide enough variety without making the space feel disjointed. Neutral does not have to mean plain. Soft warm whites, light greiges, muted greens and earthy tones can add character while remaining flexible for future furniture or décor changes.

A feature wall can work well in a bedroom, dining area, reception space or behind a display, but it should have a purpose. Use it to define a zone, draw attention to a quality architectural detail or create a calmer backdrop. A feature colour chosen only because it is fashionable can date quickly.

Choose whites with care

White is often treated as the easy option, yet it is one of the hardest colours to select. Most whites have an underlying warmth or coolness. Some lean creamy, others grey, green, blue or pink. Against a crisp white ceiling, a warmer wall white can look noticeably yellow. Beside timber, however, that same colour may feel balanced and inviting.

Consider the age and style of the building as well. A modern home with clean lines may suit a fresher, more restrained white. An older home with warm timber features or traditional detailing can often carry a softer, warmer tone. There is no single best white for every property.

Ceilings, doors, skirtings and architraves also deserve attention. Keeping trim and wall colours close together can make rooms appear larger and calmer. Using contrast can highlight details, but it will also draw attention to every line and junction, so preparation and a clean finish become even more important.

Match the finish to the room and surface

Colour is only half the decision. The paint finish affects durability, light reflection and how easily marks can be cleaned. A low-sheen finish is commonly chosen for interior walls because it offers a soft appearance with better washability than a flat finish. Flat paints can give a refined look but may be less forgiving in busy family areas.

For doors, trims and other high-touch surfaces, a more durable enamel-style finish is often a sensible choice. Kitchens, bathrooms, hallways and commercial spaces need products suited to moisture, traffic and regular cleaning. A good colour choice can still disappoint if the finish is not right for the surface.

Walls with dents, patched areas or uneven plaster may need extra preparation before painting. Dark colours and higher-sheen products tend to show imperfections more clearly, particularly under downlights or side lighting. In these cases, it may be worth addressing plaster repairs first or selecting a finish that is more forgiving.

Think about how the space is used

A family room, rental property, beachside home and professional office all have different practical demands. In a high-traffic hallway, an overly pale colour may show scuffs sooner than a mid-tone neutral. In a compact bedroom, a darker colour can feel cosy, but it may also make the room feel smaller if there is limited natural light.

For commercial premises, colour should support the experience you want customers and staff to have. A reception area may need to feel welcoming and professional. A retail or hospitality setting may call for stronger brand-led tones, balanced with durable finishes that can handle regular cleaning. External colours should complement the building materials and streetscape while standing up to intense sun, weather and salt air where relevant.

Resale is another consideration, but it should not force every home into a bland palette. If you are renovating to sell, broadly appealing neutrals are often the safest choice. If you are staying long term, it is reasonable to choose colours that reflect how you live, provided they work with the home and are applied properly.

Avoid common colour selection mistakes

One common mistake is choosing a colour under shop lighting and committing before testing it at home. Another is matching a wall colour to a photo on a mobile screen, where brightness settings and photography can distort the result. Paint names can be misleading too. Always judge the actual sample rather than relying on a name such as “white”, “stone” or “grey”.

It also helps to avoid making colour decisions before key renovation items are selected. If new flooring, benchtops or tiles are still undecided, choose those first where possible. Paint is comparatively flexible and can be adjusted to suit permanent finishes.

Finally, do not overlook exterior colour changes. Large outside surfaces read much lighter in direct sunlight than they do on a small swatch. Test samples on multiple elevations, particularly where the home receives different levels of sun and shade.

When professional colour advice makes sense

A colour consultation is particularly useful when you are repainting several rooms, renovating an older property, selecting exterior colours, or trying to bring new finishes together with existing ones. It can also save time when different household members have competing preferences and need a clear, practical recommendation.

At Jag Painting Solutions, colour guidance is considered alongside the condition of the surfaces, lighting, preparation requirements and the finish needed for the space. That approach helps turn a colour idea into a result that looks right on the wall and performs well day to day.

Before booking your painting project, gather a few images of colours you are drawn to, note the finishes you are keeping, and consider how each room needs to function. With samples viewed in the right light and experienced advice where needed, the final choice can feel confident long before the first coat is applied.

Categories
Uncategorized

Brush Painting vs Spray Painting for Your Property

A freshly painted wall can look simple from across the room, but the application method has a major effect on the final result. In the choice between brush painting vs spray painting, there is no single best option for every home, renovation or commercial property. The right method depends on the surface, the coating, the level of preparation required and the finish you expect.

Professional painters often use more than one method on the same project. Spraying may be ideal for broad, open surfaces, while brushes and rollers are needed for detailed areas, cutting in and working around occupied spaces. The aim is not to use the fastest tool. It is to achieve an even, durable finish while protecting your property throughout the job.

Brush Painting vs Spray Painting: The Main Difference

Brush painting applies coating directly to the surface with a brush. It gives the painter close control over where paint goes, how much is applied and how the coating is worked into edges, joins and detailed profiles. In most interior projects, brushing is used alongside rolling, with rollers covering larger wall and ceiling areas efficiently.

Spray painting uses specialist equipment to atomise the coating into a fine mist. When carried out correctly, it can produce a smooth, consistent finish over large or detailed surfaces. It is commonly used for exterior areas, new builds, vacant properties, doors, trims, ceilings, fencing and commercial work where conditions allow.

Neither method removes the need for proper preparation. Cleaning, sanding, patching, plaster repairs, priming and masking are what allow the finished coating to perform well. A poor surface sprayed quickly is still a poor surface.

When Brush and Roller Painting Is the Better Choice

Brush and roller work is often the practical choice for occupied homes. It allows painters to work carefully around furniture, floors, cabinetry, fixtures and personal belongings without the extensive containment required for spraying. It is particularly useful for room-by-room interior repainting where the household needs to keep using parts of the home.

This method also provides excellent control on surfaces with lots of edges or interruptions. Think skirting boards, window frames, door jambs, cornices, detailed timberwork and small repair areas. A quality brush helps a tradesman cut clean lines where walls meet ceilings, trims or feature colours.

For many standard internal walls, a professionally rolled finish is highly even and durable. The slight texture left by a roller is normal and can help disguise minor imperfections in older walls. It is not a lesser finish when the correct roller nap, paint system and technique are used.

Brush and roller painting can also be more efficient for smaller jobs. The set-up is simpler, less masking is required and there is less risk of fine overspray travelling into spaces that are not being painted. This matters in homes where care, cleanliness and minimal disruption are priorities.

Where Spray Painting Makes Sense

Spraying comes into its own on large, open or highly detailed surfaces. A well-prepared exterior fence, broad ceiling, warehouse wall or bank of doors can be coated much faster than with a brush alone. On new plasterboard or newly built interiors, spraying can provide an exceptionally uniform appearance when the site is empty and properly protected.

Spray application is also valuable on intricate profiles. Louvered doors, ornate mouldings, metal balustrades and textured surfaces can be difficult and time-consuming to coat by hand. A spray gun can reach angles and recesses more consistently, reducing brush marks and missed sections.

The finish can be particularly smooth on doors, cabinetry and trims when the coating and equipment are suited to the substrate. That said, the surface must be sanded and prepared to the same standard. Spraying will not hide dents, poor plastering, flaking paint or uneven repairs. In fact, a smooth sprayed coating can make surface defects more noticeable under natural light.

Exterior spraying can be highly effective on the Gold Coast, but weather conditions must be considered. Wind can carry overspray, while excessive heat, humidity or incoming rain can affect application and drying. Experienced painters plan exterior work around the forecast, site access and nearby vehicles, windows, gardens and neighbouring properties.

The Trade-Off: Preparation, Protection and Cost

Spraying may apply paint quickly, but it is not automatically the faster or cheaper choice from start to finish. Before spraying begins, nearby surfaces must be carefully masked and covered. Windows, floors, roofs, gardens, fittings and any areas not receiving paint need protection from overspray.

For a small room filled with furniture, that preparation can take longer than the actual spraying. In those situations, brush and roller application may offer better value and less disruption. Conversely, on an empty home or large commercial space with clear access, the efficiency gained from spraying can outweigh the additional set-up.

Cost is also influenced by the condition of the existing surface. Peeling paint, water damage, cracks and uneven plaster need to be addressed before any topcoat is applied. If a painter gives a price based only on how paint will be applied, rather than the condition of the substrate, important work may be overlooked.

A detailed quote should make clear what preparation, repairs, priming, protection and coating system are included. This gives you a more realistic comparison than simply asking whether spraying costs less than brushing.

Finish Quality Depends on More Than the Tool

It is easy to assume spray painting always looks better because it can create a smooth finish. In reality, quality comes from the whole process: surface preparation, product selection, correct application rates, drying times and the painter’s attention to detail.

A brush can leave visible marks if used poorly, but a skilled painter can achieve a clean finish with minimal brush texture on trims and detailed work. A spray gun can create an even coating, but poor technique can cause runs, dry spray, uneven coverage or paint where it should not be.

The type of coating matters too. Some paints are designed for brushing and rolling, while others perform best when sprayed or require particular thinning and equipment settings. Different substrates such as timber, masonry, metal and plasterboard need compatible primers and topcoats to support adhesion and long-term durability.

Why a Combined Approach Often Delivers the Best Result

Many professional projects use spraying, brushing and rolling together. A painter may spray ceilings or broad exterior sections, then back-roll the coating to work it into porous surfaces and ensure consistent coverage. Doors may be sprayed for smoothness, while frames and surrounding walls are carefully brushed or rolled.

Cutting in by brush remains essential on many jobs, particularly where precision is needed. Even on a sprayed project, detailed finishing work often separates a tidy result from one that looks rushed.

For occupied homes, the combined approach can be tailored to the room and your schedule. High-traffic areas might be completed in stages, while empty rooms or exterior spaces can be prepared for more efficient spray application. The method should suit the property, not force the property to suit the method.

Choosing the Right Method for Your Project

If you are repainting a lived-in home with established furniture and a mix of walls, trims and repairs, brush and roller painting will often be the sensible starting point. If you are finishing a vacant renovation, refreshing a large exterior area or coating detailed joinery, spraying may offer real advantages.

Before work begins, ask how the painter plans to protect surrounding areas, manage dust and overspray, prepare damaged surfaces and check the final finish. These questions reveal far more about workmanship than the equipment alone.

At Jag Painting Solutions, the focus is on recommending the application method that will give your property a clean, lasting result, not simply the method that looks quickest on the day. A clear site assessment and free quote can help you make the decision with confidence before the first surface is prepared.

Categories
Uncategorized

Coastal Painting for Gold Coast Properties

A Gold Coast exterior can look freshly painted one season and tired the next if the coating system has not been chosen for coastal conditions. Coastal painting is not simply about selecting an appealing colour. It is about preparing surfaces properly, using suitable products and applying them carefully enough to stand up to salt air, strong UV exposure, humidity and regular rain.

For homeowners, renovators and commercial property managers, that extra attention makes a practical difference. A quality finish protects the building, improves presentation and can reduce the frequency of major maintenance work. The right approach depends on the age of the property, its position, the surface material and how exposed it is to the elements.

Why coastal properties need a different approach

Living near the water brings obvious benefits, but paintwork is exposed to harsher conditions than it would be further inland. Salt particles settle on walls, window trims, fences, gutters and metalwork. Moisture can work its way into small cracks, while intense sunlight gradually breaks down poorly suited coatings.

On a sheltered property, these effects may appear slowly. On an elevated home, a beachfront building or a property exposed to prevailing winds, they can show up much sooner as chalking, fading, peeling, rust stains or blistered paint. North- and west-facing elevations often receive the greatest sun exposure, so they may need closer inspection even when the rest of the building still looks sound.

The issue is not always the paint itself. Paint commonly fails because the surface beneath it was dirty, damp, loose or poorly repaired before the new coating went on. Applying a premium product over an unprepared surface will not deliver a premium result.

Coastal painting starts with surface preparation

Preparation is where a long-lasting paint job is won or lost. Before painting begins, surfaces should be assessed for flaking coatings, cracks, water damage, mould, salt residue, corrosion and failed sealant. Each issue needs the right remedy rather than a quick cover-up.

Exterior walls often need a thorough wash to remove dirt, salt and chalky residue. Any loose or unstable paint should be scraped and sanded back to a sound edge. Cracks and gaps around trims, windows and joins need appropriate filling or flexible sealant so water cannot get behind the coating.

Timber needs particular care. Exposed boards, eaves, decks and trims can expand and contract with changes in heat and moisture. Bare or weathered timber may require sanding, spot priming and repairs before topcoats are applied. If rot is present, painting over it only delays a more expensive problem.

Metal surfaces present a different challenge. Rust must be removed and treated properly, then coated with a suitable primer before finishing coats are applied. This is especially relevant for gates, railings, balustrades, garage doors and steel elements near the coast. A few rust spots can spread quickly if they are ignored.

Plaster repairs also deserve careful attention. Fine cracks in rendered walls or internal plaster may point to normal movement, but larger or recurring cracks should be assessed before painting. A smooth, consistent finish depends on getting these repairs right first.

Clean, dry and sound matters more than speed

A good painting schedule allows for weather and drying time. Painting onto a damp surface can lead to adhesion problems, blistering and early failure. Similarly, applying exterior paint in extreme heat or direct sun can cause it to dry too quickly, making it harder to achieve an even finish.

There is always a balance between completing a project efficiently and allowing each stage to cure properly. An experienced painter plans around the forecast, the aspect of the building and the requirements of the coating system rather than rushing work simply to finish sooner.

Choosing colours and coatings for the coast

Colour has a major effect on the appearance of a home, but it also has practical consequences. Dark colours absorb more heat, which can place extra stress on certain exterior materials. Lighter colours generally reflect more heat and can help a façade feel cooler, though they may show dirt or salt residue more readily in high-traffic or exposed areas.

There is no single best colour palette for every coastal property. Soft whites, warm neutrals, muted greens, pale blues and modern greys can all work well when they suit the architecture, surrounding landscape and neighbouring homes. The most successful choices usually consider fixed elements such as roofing, stonework, paving, window frames and fencing, not just a paint swatch viewed indoors.

For exteriors, the coating system needs to be suited to the substrate and environment. Masonry, timber, rendered walls and metal all require compatible preparation and primers. Quality exterior paints are formulated to handle UV exposure and weathering, but their performance relies on correct application and sufficient coverage.

Interior colour selection is also worth considering carefully. Coastal homes often have strong natural light that changes throughout the day. A white that looks crisp in a showroom may appear cool or harsh in a bright room, while a deeper neutral may feel heavier than expected in a smaller space. Testing sample colours on several walls and viewing them morning, afternoon and evening can prevent disappointment.

Common signs your exterior is due for attention

Paintwork does not need to be completely peeling before it needs maintenance. Early action can protect the surface and make the preparation process more straightforward. Keep an eye out for these signs:

  • Powdery residue that comes off on your hand when you touch painted walls
  • Fading or patchy colour, particularly on sun-facing areas
  • Fine cracks, peeling edges or bubbling paint
  • Rust marks around screws, gutters, railings or metal fixtures
  • Mould growth, water staining or deteriorating sealant around windows and doors

These signs do not always mean a full repaint is required. Sometimes a targeted repair and repaint of affected areas is appropriate. However, if the coating is failing across several elevations or the existing paint has reached the end of its life, a complete exterior repaint can provide better protection and a more consistent result.

Do not overlook the smaller exterior elements

A freshly painted façade can still look unfinished if eaves, fascias, gutters, fences, gates and retaining walls are neglected. These elements often take the hardest wear because they are exposed, frequently touched or close to garden moisture.

Fences can benefit from a finish that suits both the property and the maintenance level you are prepared to commit to. Dark colours may create a modern backdrop for planting, while lighter tones can make smaller yards feel more open. The trade-off is that very dark fence colours can show marks and sun fading more easily over time.

For commercial properties, presentation is just as practical as it is visual. Well-maintained paintwork gives customers, tenants and staff confidence that the premises are cared for. Retail fronts, offices, body corporate common areas and rental properties all benefit from a planned approach that considers access, operating hours, surface condition and minimal disruption.

How to get a finish that lasts

The best coastal painting results come from clear planning and careful workmanship. Start with an honest assessment of the building, including areas that are difficult to see from ground level. Decide whether the project is primarily maintenance, a renovation update or preparation for sale, as this can influence the scope and colour choices.

It is also sensible to discuss the condition of existing coatings before committing to a colour. A professional painter can identify whether surfaces need washing, repairs, priming, plastering or more extensive preparation. This avoids the frustration of receiving a finish that looks good initially but does not hold up as expected.

At Jag Painting Solutions, the focus is on treating each property with care, from preparation and colour guidance through to the final finish. For Gold Coast and Tweed properties facing salt, sun and wet weather, experienced tradesmanship is not an extra. It is what helps the paintwork continue doing its job.

A well-planned repaint can refresh the way a property feels while giving its exterior the protection it needs. If you are noticing early signs of wear or planning a larger renovation, arranging a professional inspection and quote is a sensible first step before small issues become larger repairs.

Categories
Uncategorized

How Long Does Interior Paint Last in Your Home?

Freshly painted walls can make a room feel cleaner, brighter and more considered. But how long does interior paint last once daily life takes over? The honest answer depends on the room, the paint system and the preparation underneath it. A professionally painted living room may look great for seven to 10 years, while a busy hallway, bathroom or kitchen can need attention much sooner.

Paint does not always fail because it is old. Marks, moisture, poor adhesion and surface movement can all shorten its life. Knowing what to look for helps you plan maintenance before a tired finish becomes a bigger repair job.

How long does interior paint last by room?

There is no single repainting schedule for an entire home. Each room deals with different levels of traffic, humidity, sunlight and cleaning.

Bedrooms, formal living areas and low-traffic rooms commonly hold a quality finish for seven to 10 years. If they are well ventilated, carefully cleaned and not exposed to heavy wear, they may last longer. Ceilings can often go even further, although smoke residue, cooking vapour and water stains may change that.

Living rooms and dining areas generally need repainting every five to seven years. These spaces are used regularly, and walls tend to collect scuffs from furniture, fingerprints and everyday activity. A washable paint finish can make a meaningful difference here, especially in family homes.

Hallways, stairwells, entry areas and children’s rooms usually show wear first. Expect a repaint every three to five years, or sooner if there are persistent scuff marks, chips or grubby patches that no longer clean off evenly.

Kitchens, bathrooms and laundries face a different challenge: moisture. Steam, condensation, grease and regular cleaning put more pressure on the coating. In many homes, these areas benefit from repainting every three to five years. The right preparation, ventilation and moisture-resistant paint are essential if you want the finish to last.

What affects how long interior paint lasts?

The quality of the paint matters, but it is only one part of the job. A premium coating applied over an unprepared wall will not perform as well as it should. Professional results begin with assessing the surface, repairing defects and selecting a product suited to the room.

Surface preparation

Paint needs a clean, sound surface to bond properly. Dust, grease, residue, flaky old paint and untreated stains can all lead to peeling, patchiness or early failure. Walls may need washing, sanding, filling and spot priming before the first coat goes on.

Plaster repairs deserve particular care. If cracks, dents or damaged areas are rushed, they often become visible again once light hits the finished wall. Proper patching and sanding create the smooth base that gives paint its best chance of lasting.

The paint finish you choose

Different sheen levels suit different areas. Flat or low-sheen paint gives walls a soft, modern appearance and helps disguise minor surface imperfections. It is a popular choice for living areas and bedrooms, although some flat finishes are less forgiving when scrubbed.

Washable low-sheen, satin and semi-gloss finishes are often more practical in high-touch spaces. They are easier to wipe down and better suited to kitchens, bathrooms, doors, skirting boards and trims. The trade-off is that higher-sheen finishes reveal more surface imperfections, so careful preparation becomes even more important.

Daily wear and cleaning habits

A wall beside a dining table or in a narrow corridor will not age like one in a spare bedroom. Shoes, bags, pets, prams, furniture and little hands can leave marks that gradually dull the finish.

Gentle cleaning can extend paint life. Use a soft cloth or sponge with mild detergent, avoid harsh abrasives, and test cleaning products in an inconspicuous spot first. Repeated scrubbing in one area can burnish the surface, leaving a shiny patch even when the paint itself is still intact.

Moisture, ventilation and coastal conditions

On the Gold Coast and in Tweed, humidity can make good ventilation especially valuable. Bathrooms and laundries need exhaust fans that vent effectively, while kitchens benefit from rangehood use and regular cleaning of cooking residue.

If moisture is trapped behind paint, it can cause bubbling, peeling and mould growth. Painting over a damp surface may hide the issue briefly, but it will not solve it. The source of moisture, whether it is a leaking pipe, failed waterproofing, roof leak or condensation problem, should be addressed before repainting.

Sunlight and heat

Interior walls can still receive a surprising amount of UV exposure through large windows and glass doors. Strong sunlight can fade darker colours over time, particularly on feature walls. Heat can also affect the finish near windows and in enclosed rooms.

Window coverings and sensible colour selection can reduce obvious fading. When repainting a sun-exposed room, a professional colour consultation can help you choose a tone and finish that will continue to look balanced as light changes throughout the day.

Signs it is time to repaint interior walls

You do not need to wait until paint is peeling to arrange a repaint. Some changes are cosmetic, while others point to a preparation or moisture issue that should be investigated.

Look closely at walls in natural light. If the colour appears faded, uneven or permanently marked after cleaning, a new coat may be worthwhile. Scuffs around switches, doors and hallways are common signs of ordinary wear.

Cracking, flaking, bubbling or peeling needs more attention. These issues can be caused by poor adhesion, moisture, movement in the wall or painting over an unsuitable surface. A professional painter will assess the cause rather than simply apply another coat over the top.

Stains are another reason to act early. Water marks, nicotine residue, mould staining and grease can bleed through fresh paint unless they are properly treated and sealed. If there is a recurring stain, the underlying cause needs fixing first.

Can you extend the life of interior paint?

Yes, and the biggest gains are often made before the paint is applied. Choose a coating designed for the room, prepare the surface thoroughly and allow adequate drying time between coats. Rushing a paint job to get a room back in use quickly can compromise the finish.

After painting, keep humidity under control and deal with spills or marks promptly. Protect walls when moving furniture, use door stops where handles hit plaster, and touch up minor chips before they collect dirt or expose the surface beneath.

Keep a labelled tin of leftover paint where possible, noting the room, colour and finish. Small touch-ups are easiest when done with the original product. Be aware that even matching paint can look different after several years of fading, so larger damaged areas may need a full wall repaint for an even result.

When a touch-up is enough and when to repaint

A small isolated mark, chip or nail hole can often be repaired and touched up successfully. This is most likely to blend in when the paint is relatively new, the original product is available and the wall has not faded or been heavily cleaned.

A full repaint is usually the better option when marks cover a broad area, the finish looks uneven, or the existing colour has changed over time. It is also the right call when you are preparing a property for sale, completing a renovation or updating a room that no longer suits the rest of the home.

For bathrooms, kitchens and any wall showing peeling or mould, avoid treating repainting as a cosmetic fix. A careful assessment of the surface and moisture conditions will deliver a better result and prevent the same issue returning.

A well-finished interior should continue to look good between major repaints, not become another item on the maintenance list. When your walls are showing their age, Jag Painting Solutions can assess the condition, repair the surface where needed and provide a clear quote for a finish built to suit your home.

Categories
Uncategorized

Commercial Painters Tweed Heads Can Rely On

A commercial paint job is rarely just about changing a colour. For a shopfront, office, strata property or hospitality venue, the finish affects how customers see the business, how tenants feel in the space and how well the building stands up to daily wear. Choosing commercial painters Tweed Heads property owners can depend on means choosing a team that plans the work properly, protects the site and delivers a finish built to last.

A professional result starts well before the first coat goes on. It comes from clear communication, thorough surface preparation and practical decisions that suit the building, the budget and the way the space is used.

What commercial painting should achieve

Commercial painting needs to look good, but appearance is only part of the job. High-traffic areas, exterior walls exposed to coastal weather and surfaces around kitchens, corridors or entryways all need coatings that suit their conditions.

The right paint system can make routine cleaning easier, reduce the visible impact of scuffs and help protect surfaces from moisture, UV exposure and general deterioration. This is particularly relevant in Tweed Heads and surrounding coastal areas, where sun, rain and salt air can be hard on exterior finishes.

For business owners, a well-managed painting project should also limit disruption. That may mean staging the job across sections of a property, working around trading hours where practical, or keeping walkways and access points tidy throughout the work. The best approach depends on the site. A small office can often be completed in a short window, while a busy retail or strata property may need a more carefully staged programme.

Commercial painters Tweed Heads businesses need

When comparing commercial painters in Tweed Heads, look beyond the quoted price. A low figure can become expensive if preparation is rushed, unsuitable products are used or the job needs to be redone earlier than expected.

An experienced commercial painter should take the time to inspect the surfaces and identify issues before work begins. Peeling paint, water staining, cracking, damaged plaster, mould or failing sealant should not be painted over and forgotten. These problems need the right treatment first, otherwise they can affect the appearance and life of the new coating.

Clear scope matters as well. Before approving a quote, you should understand which areas are included, what preparation is required, how many coats will be applied and whether minor plaster repairs or patching are part of the work. This avoids uncertainty once the project is under way.

A dependable team will also communicate about timing, access and site protection. Commercial premises often have staff, customers, tenants, stock and equipment to consider. Careful masking, covering and clean-up are not extras. They are part of doing the job professionally.

Preparation is where the finish is won

Fresh paint cannot hide every surface issue. It may improve the look temporarily, but poor preparation often shows through as uneven texture, visible patching, flaking or inconsistent sheen.

Proper preparation can include washing down surfaces, scraping loose paint, sanding, filling cracks, repairing damaged plaster and applying the appropriate primers. On exterior work, it may also involve treating mould or addressing weathered timber and metal before coatings are applied.

The preparation required will vary. A recently built office with sound walls may only need minor patching and cleaning. An older commercial property with repeated maintenance work may need more extensive repairs to achieve an even result. A good painter explains this difference rather than applying the same process to every building.

Product choice should suit the space

Paint selection should be based on use, exposure and the finish you want to maintain. Durable low-sheen coatings can be a practical choice for many internal commercial walls because they offer a clean look while being easier to maintain than flatter finishes. Higher-gloss coatings may suit doors, trims and selected hard-wearing surfaces, although they can highlight imperfections if the preparation is not right.

Exterior products need to cope with sun and wet weather. Metal, masonry, timber and previously painted surfaces may each require a different primer or coating system. This is one reason a site inspection is valuable. The right product is not always the most expensive one, but it should be appropriate for the substrate and expected conditions.

Colour selection also deserves more thought than many people expect. Brand colours can strengthen recognition, while neutral tones can make an office, reception area or retail space feel brighter and more welcoming. Strong feature colours can work well in the right setting, but they need to complement lighting, flooring and existing fixtures. Colour consultation is useful when several decision-makers are involved or when a property needs a coordinated finish across multiple areas.

Planning around your business operations

Painting can be disruptive if it is not organised well. Strong paint odours, drying times, wet surfaces and equipment all need to be managed around staff and visitors. A professional contractor will discuss these details early so there are no surprises on the day.

For an occupied property, the work may be completed one area at a time. Furniture can be moved or covered, access can be maintained where possible and work zones can be kept clearly separated from customers or tenants. If work must occur after hours or during quieter periods, this should be agreed in advance and reflected in the project plan.

The same consideration applies to exterior painting. Shopfronts, entrances, car parks and shared pathways need sensible planning. Safety, public access and protection of surrounding surfaces all matter, especially where the building remains open during the work.

Questions worth asking before you accept a quote

A quote should give you confidence, not leave you guessing. Ask how the painter will prepare the surfaces, what products are proposed and whether the work includes repairs to minor cracks or damaged plaster. It is also sensible to ask how the team will protect floors, furniture, landscaping, signage and nearby vehicles.

Discuss the expected timeframe and whether the property can remain operational during the job. If there are tenants, staff or customers on site, explain any access restrictions, noise concerns or sensitive areas upfront. The more detail shared early, the smoother the project is likely to run.

You should also confirm who will be carrying out the work and how the site will be left at the end of each day. Professional tradesmen understand that presentation matters while the job is in progress, not only when the final coat is dry.

A finish that supports your property

Commercial painting is an investment in the condition and presentation of your property. A clean, consistent finish can improve first impressions, support a professional workplace and help keep maintenance issues from becoming more noticeable. For landlords and property managers, it can also make a space more appealing between tenancies or as part of planned upkeep.

Jag Painting Solutions provides commercial painting, plastering and colour guidance for businesses and property owners across the Gold Coast and Tweed. The focus is on careful workmanship, respectful service and clear communication from the first inspection through to the final clean-up.

Whether you are refreshing a customer-facing space, maintaining a rental property or preparing premises for a new tenant, the right painting team will make the process easier. Start with a detailed quote and a practical conversation about the condition of your surfaces, your operating needs and the result you want the property to deliver.