

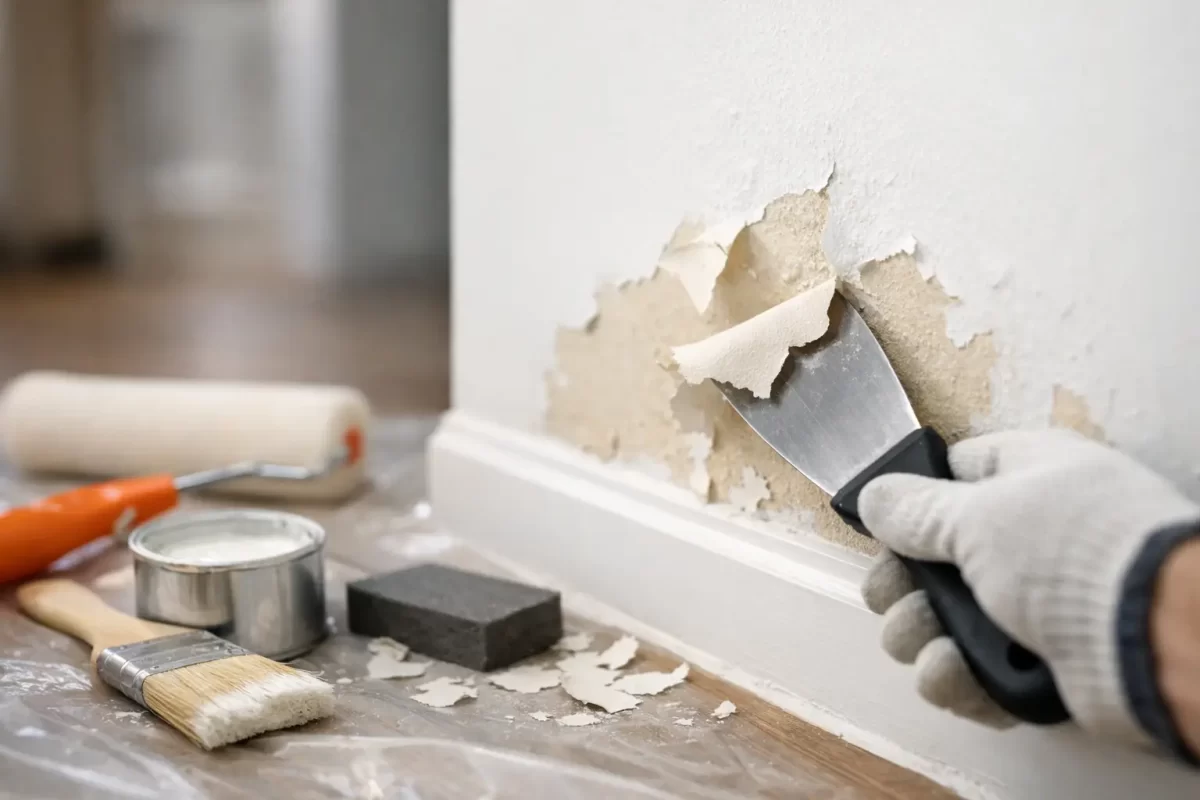
Paint rarely starts peeling without a reason. A few lifted edges near a bathroom window may be caused by steam, while broad sheets coming away from a wall can point to a preparation problem, water damage or incompatible paint coats. Knowing how to fix peeling interior paint properly means dealing with that cause first. Otherwise, a fresh coat may look good briefly, then fail in exactly the same place.
For small, dry and stable areas, a careful repair can be a practical DIY job. If the peeling is widespread, the wall feels damp, plaster is soft or staining keeps returning, it is worth having the surface assessed before repainting. A quality finish depends as much on the condition of the surface as the paint itself.
Find out why the paint is peeling
Before reaching for a scraper, inspect the damaged area and the room around it. Paint needs a clean, dry, sound surface to bond well. When one of those conditions is missing, adhesion suffers.
Moisture is one of the most common causes in Gold Coast homes, particularly in bathrooms, laundries, kitchens and rooms with limited ventilation. Look for bubbling paint, brown water marks, mould, a musty smell, swollen plasterboard or peeling concentrated around windows, pipes and ceilings. A leaking roof, plumbing issue or failed shower waterproofing needs to be repaired and fully dried before any painting starts.
Poor preparation is another frequent culprit. Paint applied over dust, grease, soap residue, mould, glossy old enamel or loose chalky paint may not grip the wall. In older properties, several layers of paint can also lose their bond to one another over time. The newest coat is not always the problem – sometimes it is simply exposing a weak layer underneath.
Temperature and humidity matter too. Painting in a closed, steamy room, or applying coats before the previous coat has dried properly, can compromise the finish. In some cases, using the wrong primer between different paint types is the issue. Water-based paint applied directly over a very glossy oil-based coating, for example, may peel if the surface was not sanded and primed correctly.
How to fix peeling interior paint step by step
A sound repair is not about hiding the peeled patch. It is about removing every unstable edge and rebuilding the surface so the new paint has something reliable to hold on to.
Protect the room and check for hazards
Move furniture away from the work area and cover floors with drop sheets. Wear safety glasses, gloves and a P2 dust mask when scraping or sanding. Keep the room ventilated, but avoid creating a strong draught that blows dust through the home.
If the property was built before the 1970s, take extra care with old paint. Some older coatings may contain lead. Do not dry sand, use a heat gun or create unnecessary dust until you have received appropriate advice or had the paint tested. This is a situation where engaging a professional is the safer option.
Remove all loose paint
Use a paint scraper or broad filling knife to gently lift peeling paint away from the wall. Continue until you reach firmly bonded paint that does not lift when lightly scraped. It can be tempting to stop once the obvious flakes are gone, but weak paint left at the perimeter will create a visible failure later.
For larger areas, work patiently rather than aggressively. Gouging plasterboard paper or digging into plaster creates more repair work. Vacuum up dust and paint fragments as you go, then wipe the area clean with a damp cloth and allow it to dry.
Treat the underlying problem
This is the step that determines whether the repair lasts. Fix leaks, improve exhaust ventilation, remove mould safely and allow damp walls to dry completely. In wet areas, confirm that the exhaust fan is working effectively and run it during showers and for a period afterwards.
If grease or residue is likely, wash the surface with a suitable sugar soap solution, then rinse as directed and let it dry. For mould, use an appropriate mould treatment and follow the product instructions. Do not simply paint over mould – it can continue to affect the coating and may indicate a ventilation or moisture issue that needs attention.
Sand and feather the edges
Once the surface is dry and stable, sand the edges of the remaining paint so the transition into the bare patch feels smooth. This process is called feathering. Fine to medium sandpaper is usually suitable for small repairs, while a sanding block helps keep the surface even.
Run your hand across the area after sanding. If you can feel a sharp ridge, it will often remain visible after painting, especially in side light from a window or downlight. Wipe away sanding dust with a clean, slightly damp microfibre cloth and let the surface dry.
Fill damaged areas and sand again
Use a quality interior wall filler for shallow chips, dents and uneven sections. Press it into the damaged area with a filling knife, keeping the repair slightly proud of the wall if needed. Once dry, sand it smooth and check it under good lighting.
Deep damage, cracking around joints, water-affected plasterboard or recurring ceiling issues may require plastering repairs rather than filler alone. Painting over a failing substrate only delays a more noticeable repair.
Prime exposed patches
Primer is particularly important where bare plaster, repaired filler, stained areas or previously glossy paint are exposed. The right primer seals porous areas, improves adhesion and helps the finish coat dry evenly. Skipping it can leave dull patches, known as flashing, or cause the repair to stand out against the surrounding wall.
Choose a primer suited to the surface and the problem. A stain-blocking primer may be needed for old water marks after the leak has been repaired. For glossy surfaces, use an adhesion primer after thorough cleaning and sanding. In bathrooms and laundries, select products appropriate for humid interior environments.
Repaint with compatible quality paint
Apply at least two thin, even finish coats, allowing the recommended drying time between coats. Use a brush to cut in around the repair and a roller over the broader wall area for an even texture. Painting only the patch can work when the existing paint is very fresh and the colour is an exact match, but it often creates a noticeable difference in sheen.
For the most consistent result, repaint the full wall from corner to corner. This is especially worthwhile with darker colours, low-sheen paints and walls exposed to natural light. In kitchens, bathrooms and laundries, a quality washable interior paint designed for higher-moisture areas will generally perform better than a standard wall paint.
When a peeling paint repair needs professional help
Small areas of peeling caused by minor knocks or an isolated preparation issue are usually manageable. The trade-off is time: proper drying, sanding, priming and repainting cannot be rushed if you want the repair to last.
Call an experienced painter or plasterer when peeling covers several walls, the ceiling is affected, water damage is visible, mould keeps returning, or the surface underneath is soft and crumbling. These signs can indicate an issue beyond the paint itself. A professional can identify the extent of the damage, prepare the surface correctly and match the coating system to the room.
For homeowners and renovators on the Gold Coast and in Tweed, Jag Painting Solutions can assist with interior painting, plaster repairs and surface preparation where a lasting finish matters. A clear assessment before work begins helps avoid spending money on a repaint that is likely to fail.
After the repair, give the paint time to cure before heavy cleaning or placing furniture hard against the wall. Keep wet areas ventilated, address leaks early and clean marks with a soft cloth rather than abrasive products. A little care after painting protects the workmanship and keeps your interior looking finished, not patched.


