

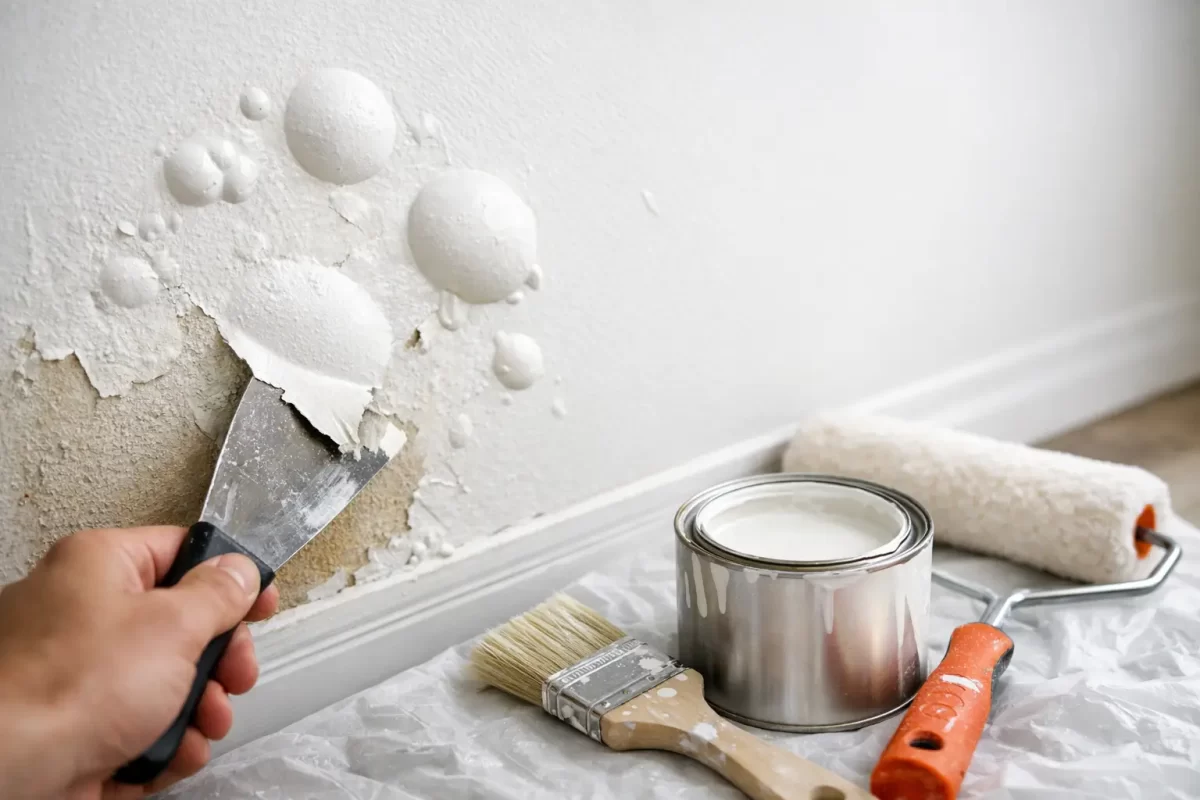
A wall can look perfectly finished one week and develop raised blisters the next. If you are wondering what causes paint to bubble, the short answer is that the paint has lost its grip on the surface beneath it. The more useful answer is finding out why it happened before repainting, because a fresh coat applied over the same issue will usually bubble again.
Paint bubbling can occur on interior walls, ceilings, timber trim, exterior cladding, rendered surfaces and metalwork. On the Gold Coast, humidity, driving rain and strong sun can all play a part, but the cause is not always weather. Moisture, poor preparation and unsuitable products are the usual culprits.
What causes paint to bubble on walls and ceilings?
A paint bubble, also called a blister, forms when part of the coating lifts away from the surface. Air, water vapour or liquid moisture becomes trapped beneath the paint film, creating pressure that pushes it outwards. In other cases, the paint simply cannot bond properly because the surface was dusty, greasy, chalky or coated with an incompatible product.
The position, size and timing of the bubbles offer useful clues. Bubbles that appear soon after painting are often linked to application conditions or surface preparation. Bubbling that develops months later, especially in one area, is more likely to point to a moisture problem.
Moisture behind the paint
Moisture is the most common reason paint blisters. It can come from a roof leak, leaking pipe, failed shower waterproofing, overflowing gutter, cracked external render or water entering around windows and doors. Even a small leak can affect a larger section of wall or ceiling as water travels through plasterboard, timber framing or masonry.
Bathrooms, laundries and kitchens are particularly vulnerable because of steam and condensation. A poorly ventilated bathroom may not have a plumbing leak at all. Repeated hot showers can leave moisture sitting on cold ceiling and wall surfaces, gradually weakening the paint system.
On exterior surfaces, rainwater can enter through unsealed gaps, deteriorated caulking, cracked paint or damaged flashing. The paint is then blamed for a building-maintenance issue it cannot solve on its own. Repainting before the source of water is repaired only hides the problem temporarily.
Painting over a damp surface
A surface can feel dry to the touch while still holding too much moisture for painting. Fresh plaster, patched areas, masonry and timber all need adequate drying time. After heavy rain or a water leak, this can take longer than expected, particularly in humid conditions.
When paint is applied too soon, moisture tries to escape as the coating dries. It can become trapped under the paint film and form bubbles. This is why experienced painters allow for drying conditions rather than relying only on the clock.
Poor cleaning and surface preparation
Paint needs a clean, sound surface to adhere properly. Dust from sanding, greasy fingerprints, cooking residue, soap scum, mould, old wallpaper paste and chalky exterior paint can all prevent a reliable bond.
A common example is repainting a kitchen wall without properly cleaning it first. The wall may look clean, but airborne cooking oils can sit on the surface. The new paint adheres unevenly and may lift or blister over time. Exterior paint can fail in a similar way where old coatings have weathered into a powdery, chalky finish.
Loose or flaking paint must also be removed. Applying new paint over failing layers does not strengthen them. It merely adds another layer that can lift when the weak paint beneath it lets go.
Heat and direct sun
Exterior paint applied to a very hot surface can skin over too quickly. The outer layer dries before solvents or water vapour beneath it have had time to escape, which can cause blisters. Dark-coloured surfaces, metal gates and west-facing walls are especially prone to overheating in strong afternoon sun.
Heat is not always the sole cause. It often exposes an existing preparation or moisture issue. Still, choosing the right time of day and following the paint manufacturer’s temperature guidance makes a real difference to the final finish.
Incorrect paint or incompatible coatings
Not every paint product is suitable for every surface or previous coating. For example, applying certain water-based coatings over an unsuitably prepared glossy or oil-based surface can lead to adhesion failure. The same applies when exterior paints are used where a specialist bathroom, masonry, metal or timber system is required.
Primer is not an optional extra when a surface needs one. It helps seal porous materials, improves adhesion and creates a stable base for the finish coats. Bare plaster patches, repaired render, stained areas, raw timber and previously glossy surfaces commonly need specific preparation and priming.
How to tell if bubbling paint is a moisture problem
Do not assume every bubble is caused by water, but look beyond the paint before you scrape anything back. Moisture-related bubbling is often accompanied by staining, a musty smell, mould, soft plasterboard, swollen timber or paint that feels damp underneath.
The location matters as well. A bubble beneath a bathroom, near a window, below rooflines or around external doors deserves closer investigation. If it is on a ceiling after rain, arrange for the roof, guttering or plumbing above to be checked promptly.
These signs are worth treating as a repair issue first:
- Brown or yellow water marks around the affected area.
- Bubbling that keeps returning after touch-ups.
- Soft, crumbling or sagging plasterboard.
- Mould growth, peeling caulking or a persistent damp smell.
- Bubbles concentrated around windows, showers, pipes or exterior cracks.
Where there is active water entry, stop the source before repainting. Depending on the cause, that may mean repairing a leak, improving bathroom extraction, resealing a window, replacing damaged caulking or addressing cracks in an exterior surface.
Can bubbling paint be repaired without repainting the whole room?
Sometimes, yes. If the issue is small, localised and the moisture source has been fixed, the affected area can often be repaired and blended into the surrounding paintwork. The result depends on the age of the existing paint, the wall colour, the level of sheen and whether the surface has faded over time.
Start by allowing the area to dry fully. Then scrape away every loose or blistered edge until you reach firmly adhered paint. Sand the transition smooth, repair any damaged plaster or render, and clean away all dust. Apply the appropriate primer before repainting the repaired section.
For a flat wall colour, a careful touch-up may be enough. With darker colours, satin finishes or walls exposed to sunlight, patch painting can leave a visible difference in sheen or colour. In those situations, repainting the full wall is often the cleaner result.
Ceilings can be more complicated. If water has damaged plasterboard or created staining, simply applying ceiling paint may not hold or may allow the stain to bleed back through. A proper repair may require damaged material to be replaced, the surface sealed, then the ceiling repainted for an even finish.
How to prevent paint from bubbling
Good painting is mostly decided before the top coat goes on. Surfaces should be clean, dry, sound and properly prepared for the paint system being used. That means removing loose coatings, filling and sanding defects, treating mould where needed, cleaning contaminants and using the correct primer.
It also means working with the conditions. Avoid painting exterior surfaces in direct harsh sun, during rain, or when humidity is likely to interfere with drying. Give fresh plaster, repairs and cleaned surfaces enough time to dry. Inside, use ventilation in wet areas and deal with water leaks early rather than waiting for visible damage.
For older properties, be cautious when sanding unknown existing coatings. If there is any chance the paint may be very old or contain hazardous materials, seek professional advice before creating dust.
When it is worth calling a professional painter
A few small bubbles after a DIY touch-up may be manageable. Repeated bubbling, widespread failure, water staining or damage to plaster and timber needs a more careful assessment. The visible paint issue may be only one part of the problem.
A professional painter can identify whether the coating has failed because of moisture, preparation, product selection or application conditions, then prepare the surface correctly for a lasting finish. Jag Painting Solutions helps Gold Coast and Tweed property owners restore damaged walls, ceilings and exterior surfaces with careful preparation and quality workmanship.
Paint bubbles are frustrating, but they are also an early warning sign. Address what is happening beneath the paint, give the surface time to dry, and the next finish has a far better chance of looking right for years to come.


