

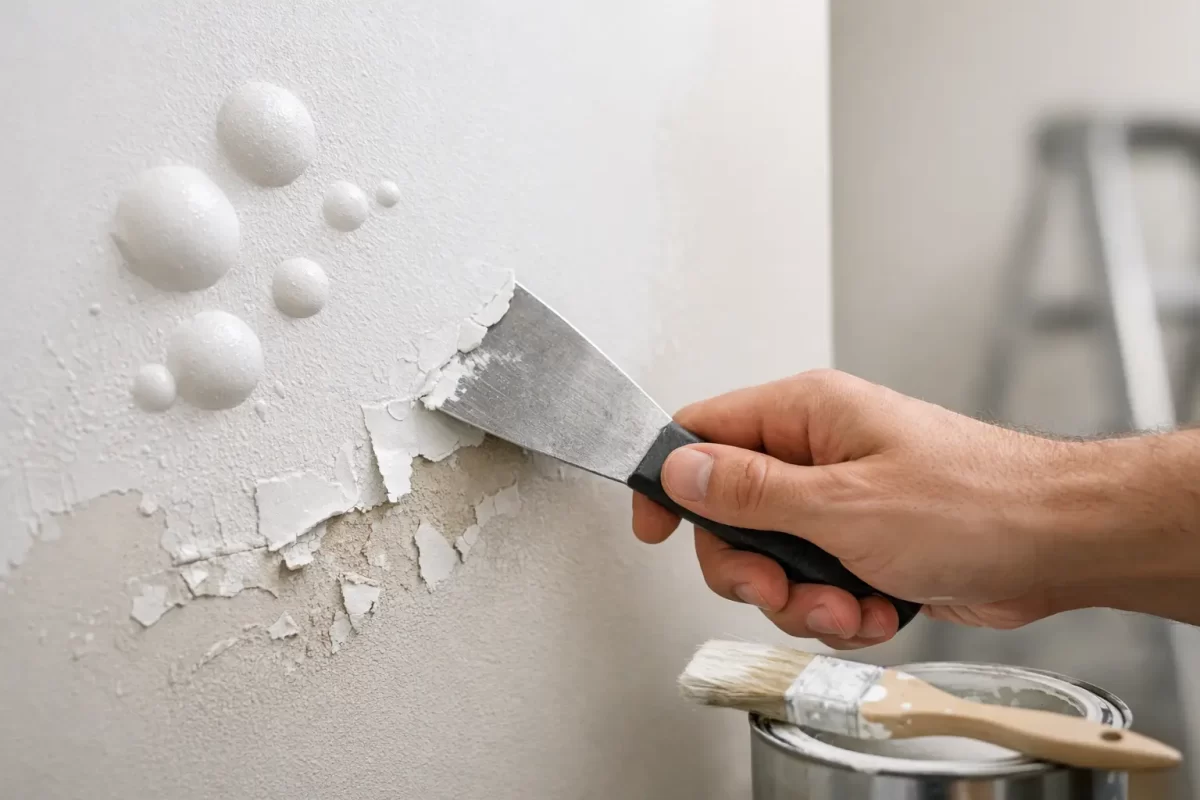
A wall can look freshly painted in the morning, then develop raised blisters by the afternoon. It is frustrating, particularly after investing in a renovation or repaint. Understanding why paint bubbles appear is the first step towards fixing the problem properly rather than simply painting over it and hoping it stays hidden.
Paint bubbles, also called blistering, occur when the paint film lifts away from the surface beneath it. Sometimes the cause is minor and isolated. Other times, bubbling is a warning that moisture, poor surface preparation or an underlying building issue needs attention first. The right repair depends on finding the cause before a brush or roller comes back out.
Why paint bubbles appear on walls and ceilings
Paint is designed to bond tightly to a clean, dry and stable surface. When something interferes with that bond, air, moisture or vapour can become trapped beneath the coating. As pressure builds, the paint lifts and forms a bubble.
On interior walls, moisture is often the main culprit. A slow plumbing leak, water entering around a window, condensation in a bathroom or poor ventilation can all allow water into plasterboard, timber or masonry. The paint may be the first visible sign, but it is rarely the whole problem.
On exterior surfaces, strong Gold Coast sun and heat can contribute to blistering, particularly when paint is applied in unsuitable conditions or to a hot surface. Heat can cause solvents or moisture beneath a newly applied coating to expand before the paint has cured correctly. The result may be small bubbles across an area or larger blisters where the coating has lost adhesion.
Poor preparation is another common cause. Painting over dust, grease, chalky old paint, loose material or a glossy surface without appropriate sanding and priming makes it difficult for the new coat to grip. The finish can initially look acceptable, then fail as the paint dries or weathers.
The common causes of paint blistering
Moisture behind the paint
If bubbles feel soft, appear near ceilings, skirting boards, windows or plumbing fixtures, or are accompanied by staining, moisture should be investigated first. Leaking roofs, damaged flashing, cracked exterior render, failed sealant and plumbing leaks can all introduce water where it does not belong.
Do not scrape, patch and repaint before the source is resolved. New paint applied over damp material is likely to blister again, and hidden moisture can lead to mould, damaged plasterboard or timber deterioration. A professional painter can identify visible coating failure, but a plumber, roofer or building specialist may also be needed where the water source is not clear.
Painting onto a damp surface
A surface does not need to look wet to hold enough moisture to cause a problem. Fresh plaster, repaired areas, washed exterior walls and water-affected timber all need sufficient drying time before primer and paint are applied.
This is especially relevant after heavy rain or high humidity. On the Gold Coast, changing weather conditions can affect drying times significantly. Experienced tradespeople assess the substrate and conditions, not just the clock, before beginning a coating system.
Heat and direct sunlight
Exterior paint applied in direct sun can skin over too quickly while solvents or moisture remain underneath. Dark-coloured surfaces and metal areas can become particularly hot, increasing the risk of blistering. Very hot conditions also make it harder to maintain a consistent wet edge and even finish.
The answer is not simply to wait for any dry day. Paint products have recommended application temperatures and conditions. Planning the work around shade, weather and the type of surface helps the coating cure as intended.
Inadequate cleaning, sanding or priming
A quality paint finish begins well before the first top coat. Surfaces may need washing, scraping, sanding, filling, sealing or priming to create a sound base. Skipping these steps can leave contaminants or weak layers between the new paint and the wall.
This is common in kitchens, where airborne grease can settle on walls and ceilings, and on older exterior surfaces with chalky or flaking paint. It can also happen when a water-based paint is applied over an incompatible coating without the correct preparation or primer.
Too many coats or the wrong coating system
Applying heavy coats, recoating too soon or using unsuitable products can trap solvents and slow the curing process. Paint may feel dry on the surface while still soft beneath. If another coat is added too early, the system can lose adhesion and develop bubbles or wrinkling.
Not every surface needs the same product. Plasterboard, timber, metal, masonry and previously painted surfaces each have different requirements. Matching the preparation and coating system to the substrate is one of the biggest differences between a finish that looks good briefly and one that lasts.
How to tell whether paint bubbles are serious
A few small bubbles after a DIY touch-up may be limited to that repair and can sometimes be fixed with proper preparation. Widespread blistering, recurring bubbles or bubbles with water stains deserve closer attention.
Pressing on the affected area can offer a clue. A dry, brittle bubble may point to poor adhesion or heat exposure. A soft bubble, damp plasterboard or stained ceiling may indicate moisture. Peeling paint, a musty smell, mould growth or a change in the wall’s texture are stronger signs that the issue goes beyond the paint itself.
It is also worth considering where the bubbling appears. Localised bubbling below a window may suggest water entry. Blistering in a bathroom ceiling can be linked to steam and insufficient ventilation. Bubbles on an exterior wall after rain may indicate a crack, failed sealant or water getting behind the coating.
How paint bubbles should be repaired
The repair process should start only once the affected area is dry and the underlying cause has been addressed. Rushing this stage is the most common reason a repair fails again.
First, loose and bubbled paint needs to be removed back to a firm edge. The surrounding surface is then checked for soft plaster, damaged timber, cracks, stains or signs of contamination. Depending on the condition, the area may require patching, sanding, sealing or a stain-blocking primer before repainting.
For water-damaged plasterboard, replacement may be more reliable than repeated patching, particularly if the board has softened, swollen or developed mould. On exterior timber, any rot or severe deterioration needs repair before painting can protect the surface again.
Once the substrate is sound, clean and fully dry, a suitable primer creates a stable base for the top coats. The paint should then be applied at the recommended coverage rate, with proper drying time between coats. This method takes longer than a quick cover-up, but it is what protects the finish and avoids paying twice for the same area.
Can you paint over bubbling paint?
Painting over bubbles is rarely a lasting fix. The new coat may disguise the raised area temporarily, but it cannot restore adhesion beneath the old paint. As the failed layer continues to lift, the fresh paint is likely to crack, peel or blister as well.
There are limited cases where a tiny, dry bubble can be sanded smooth and touched up after the surface has been properly prepared. However, if the bubble is linked to moisture, active movement, loose paint or a larger area of failure, it needs a more thorough repair.
Preventing bubbles in your next paint job
Good preparation and sensible timing prevent most paint blistering. Walls should be clean, dry and sound before painting begins. Repairs need time to cure, glossy areas need appropriate abrasion or priming, and exterior work should be scheduled around suitable weather rather than squeezed into the first available dry hour.
Ventilation also matters in bathrooms, laundries and kitchens. Exhaust fans that vent effectively, prompt attention to leaks and regular checks around windows and wet areas all help limit the moisture that can damage painted surfaces.
For a renovation, commercial refresh or repaint of an older property, professional assessment can save considerable trouble. Jag Painting Solutions approaches surface preparation as part of the job, not an optional extra, so the finished result has the best chance of performing well over time.
If bubbles have appeared in your paintwork, treat them as useful information. Addressing the reason behind the failure before repainting will protect your property, improve the final appearance and give your new finish the durability it deserves.


