

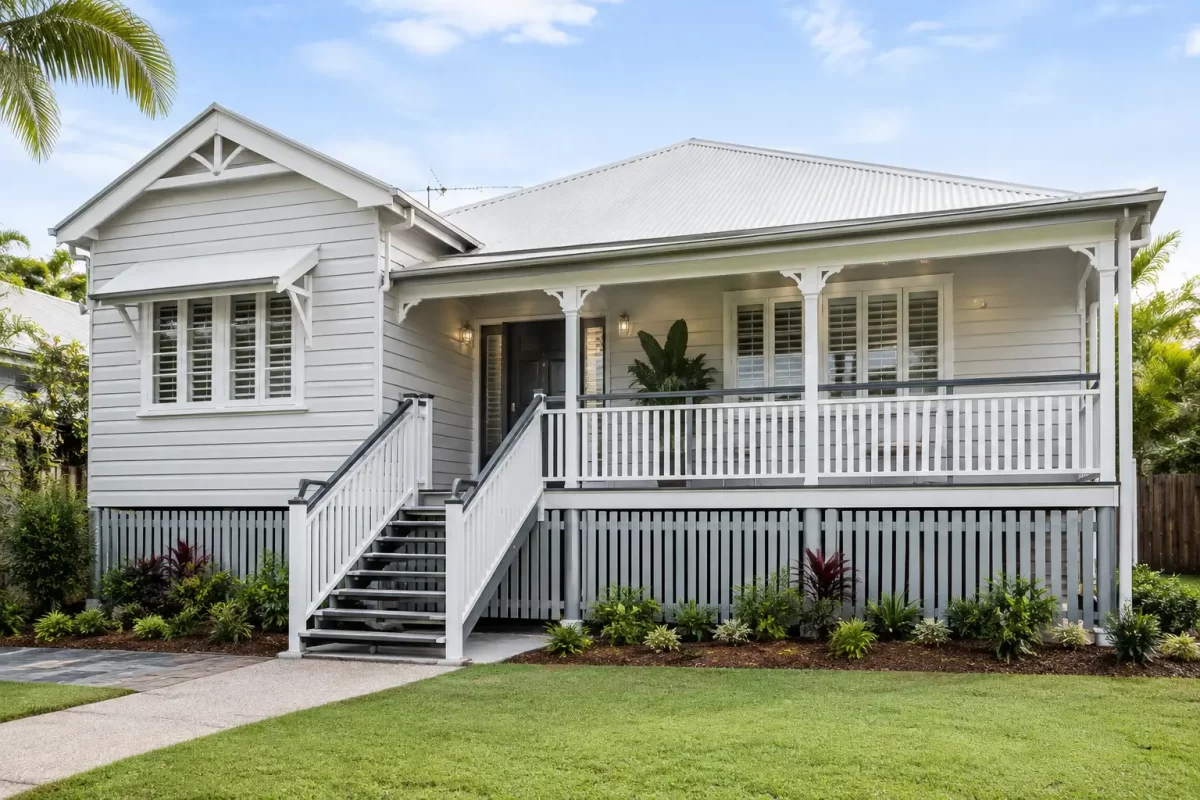
A Queenslander can look tired long before it is beyond saving. Peeling paint on the weatherboards, dark staining beneath eaves and cracked trim are not just cosmetic issues – they can allow moisture into the timber. This Queenslander repaint example shows how a careful exterior repaint can restore the home’s character while giving its surfaces the protection they need.
This is the kind of project where preparation decides the outcome. A fresh coat applied over failing paint may look acceptable briefly, but it will not address loose timber, open joints or the causes of paint breakdown. A professional repaint should leave the home looking sharp from the street and ready to handle Queensland conditions for years to come.
The Queenslander repaint example: assessing the home first
Picture a classic elevated Queenslander with timber weatherboards, a verandah, decorative timber fretwork and a corrugated roof. The existing paintwork is a faded cream with a darker green trim. On the sunny side, paint has become chalky and thin. Around several window sills and the lower weatherboards, there are small areas of bubbling and exposed timber.
Before choosing colours or opening a tin of paint, the first job is to inspect every surface. This means checking the weatherboards for movement, testing suspect timber for softness, looking closely at previous patch repairs, and identifying any gaps where water may be entering. Fascias, soffits, balustrades, posts, external doors and window frames all need the same attention.
Not every weatherboard with flaking paint needs replacing. Sometimes the issue is limited to surface failure and can be properly prepared. If timber is split, rotten or no longer sound, however, replacement or repair should happen before painting begins. Paint is a protective finish, not a repair for damaged building materials.
Understanding why the old coating failed
Queenslander homes often have sections that weather very differently. Northern and western elevations can take a beating from sun and rain, while sheltered areas may hold moisture longer and develop mould. Older homes can also carry several generations of paint, with incompatible coatings or poor past preparation hidden below the top layer.
In this example, the most exposed weatherboards needed more extensive sanding and spot priming than the shaded side of the house. The verandah handrails had worn from daily use, while the decorative fretwork required patient hand preparation rather than aggressive sanding that could damage the detail.
A proper inspection also helps set a realistic quote and timeline. If substantial timber repairs, lead-safe work practices or difficult access are involved, they should be identified from the start rather than added halfway through the job.
Preparation is where a quality repaint begins
The repaint starts with protecting the property. Verandah floors, garden beds, windows and adjacent surfaces are covered as needed, while the work area is kept tidy throughout. Respect for the home matters just as much as the finished paintwork, particularly when people are living on site during the project.
The exterior is then washed to remove dirt, chalking, cobwebs, mould and loose contaminants. This step is easily underestimated. Paint needs a clean, stable surface to bond to, and applying new coatings over powdery or dirty paint can shorten the life of the system.
After drying, loose and flaking paint is scraped back. Sound painted areas are sanded to create an even surface and provide a suitable key for the new coating. Bare timber is feathered at the edges so repaired areas do not stand out once painted.
In this Queenslander repaint example, a few degraded sections of weatherboard were repaired before paint preparation continued. Open gaps at selected joins and around trim were sealed with a paintable exterior gap filler. The aim is not to seal every moving joint indiscriminately, but to close areas where water and draughts can enter while allowing the building to perform as intended.
Bare timber, repaired areas and stains need an appropriate primer before topcoats are applied. Primer is chosen for the substrate and the issue being addressed. For example, tannin-rich timber and water stains may need a stain-blocking product, while previously painted surfaces may require a suitable undercoat to ensure adhesion and consistent colour.
Choosing colours that suit the home
The best colour scheme is not always an exact copy of what was there before. Queenslanders can carry bold heritage colours beautifully, but a scheme still needs to suit the home’s proportions, surrounding properties and the owner’s taste.
For this example, the faded cream weatherboards were updated to a soft warm white. The trim was finished in a muted charcoal, giving the windows, posts and fretwork definition without making the facade feel heavy. A restrained accent colour on the front door added personality and drew attention to the entry.
Lighter main colours are a practical choice for many Gold Coast and Tweed homes because they reflect more heat and can make a detailed timber facade feel open. Dark trim can be very effective, though it tends to show dust, salt residue and imperfections more readily. It also absorbs more heat, so the condition of the timber and the suitability of the paint system should be considered.
Colour consultation is particularly useful when the house has heritage features but the owner wants a cleaner, more current look. Sample colours should be viewed outside at different times of day. A shade that appears crisp in the morning can look much warmer or darker in afternoon light.
Applying the paint system with care
Once repairs and preparation are complete, painting can begin. Large weatherboard areas may be sprayed for an even finish, then back-brushed or back-rolled where required to work the coating into the timber profile. Detailed areas such as fretwork, windows, balustrades and posts are generally brushed for control and clean edges.
The right application method depends on the surface, access and desired finish. Spraying can be efficient on broad areas, but it requires careful masking and weather awareness. Brush and roller work may take longer, yet it can offer greater precision around detailed timber and occupied homes.
Quality exterior systems are applied in the manufacturer’s recommended number of coats, with suitable drying time between them. Rushing coats because rain is forecast or because the job needs to finish early is not good practice. Weather conditions affect adhesion, drying and the appearance of the final finish.
For this example, the painting sequence was organised around the forecast and the home’s most exposed elevations. Work began on protected areas where possible, then moved to the weatherboards and trim as conditions allowed. That approach helps maintain a consistent finish rather than treating the job as a race against the clock.
The details people notice
A Queenslander’s appeal sits in its details. Straight lines along weatherboards, clean cut-ins at window frames and neatly finished posts make the whole property feel well cared for. Missed edges, paint on glass and heavy brush marks are especially noticeable on a traditional home because there is so much joinery to inspect.
The final stage includes a close check of all painted surfaces, touch-ups where required and removal of masking and protective coverings. Rubbish is cleared, and the work area is left presentable. A homeowner should not have to spend the weekend cleaning up after a painting crew.
What changes the cost and scope?
No two Queenslander repaints are identical. A compact cottage with sound timber and straightforward access will need a different scope from a large elevated home with ageing verandahs, extensive fretwork and multiple areas of repair.
The main variables are the condition of existing coatings, the amount of timber repair required, house height and access, the complexity of architectural details, and the selected paint system. Colour changes can also affect the process. Moving from a dark colour to a much lighter one may require additional coats for even coverage.
A detailed site inspection is the best way to avoid a vague estimate. It allows the painter to explain what is included, identify any repair work that should be completed first and recommend a finish suited to the home rather than simply pricing the visible square metres.
For homeowners planning a repaint, the most useful next step is to address early signs of failure before exposed timber becomes a larger repair. A careful assessment and well-prepared paint system can protect the features that make a Queenslander worth preserving – and make coming home feel good again.


