Categories
Uncategorized

Why Paint Bubbles Appear and How to Fix Them

A wall can look freshly painted in the morning, then develop raised blisters by the afternoon. It is frustrating, particularly after investing in a renovation or repaint. Understanding why paint bubbles appear is the first step towards fixing the problem properly rather than simply painting over it and hoping it stays hidden.

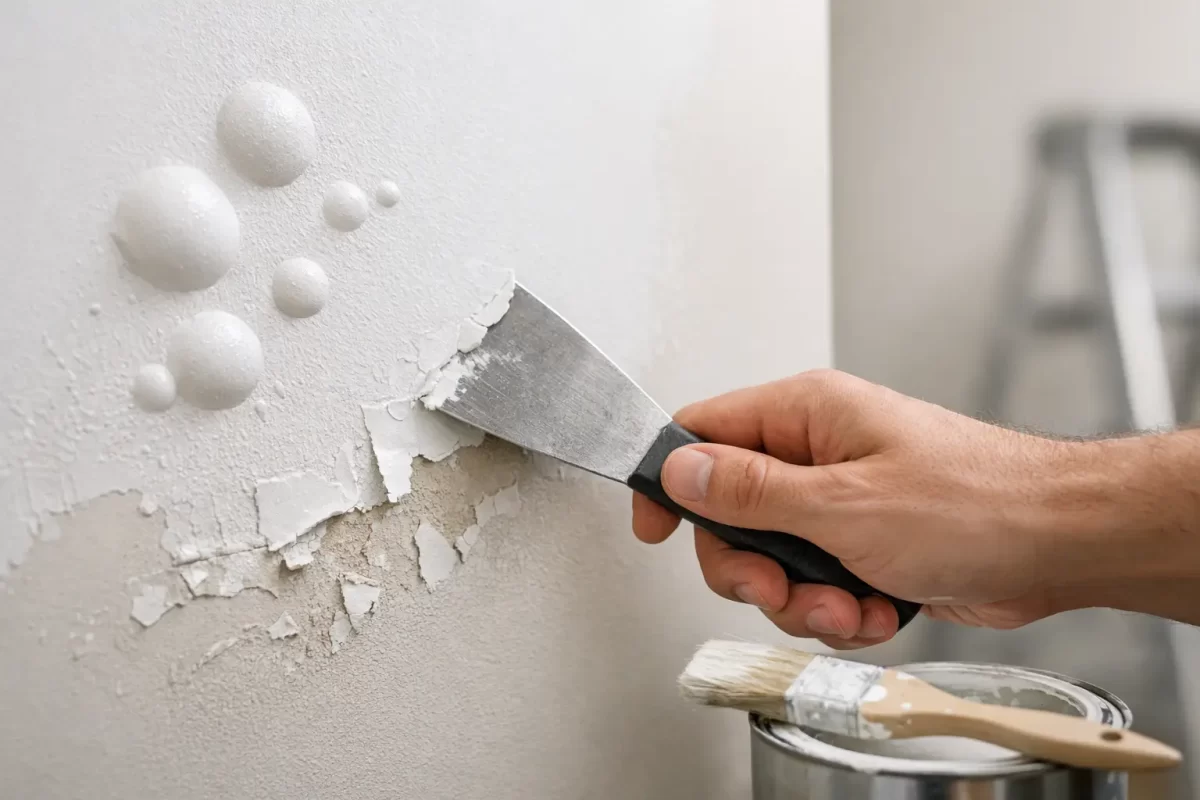
Paint bubbles, also called blistering, occur when the paint film lifts away from the surface beneath it. Sometimes the cause is minor and isolated. Other times, bubbling is a warning that moisture, poor surface preparation or an underlying building issue needs attention first. The right repair depends on finding the cause before a brush or roller comes back out.

Why paint bubbles appear on walls and ceilings

Paint is designed to bond tightly to a clean, dry and stable surface. When something interferes with that bond, air, moisture or vapour can become trapped beneath the coating. As pressure builds, the paint lifts and forms a bubble.

On interior walls, moisture is often the main culprit. A slow plumbing leak, water entering around a window, condensation in a bathroom or poor ventilation can all allow water into plasterboard, timber or masonry. The paint may be the first visible sign, but it is rarely the whole problem.

On exterior surfaces, strong Gold Coast sun and heat can contribute to blistering, particularly when paint is applied in unsuitable conditions or to a hot surface. Heat can cause solvents or moisture beneath a newly applied coating to expand before the paint has cured correctly. The result may be small bubbles across an area or larger blisters where the coating has lost adhesion.

Poor preparation is another common cause. Painting over dust, grease, chalky old paint, loose material or a glossy surface without appropriate sanding and priming makes it difficult for the new coat to grip. The finish can initially look acceptable, then fail as the paint dries or weathers.

The common causes of paint blistering

Moisture behind the paint

If bubbles feel soft, appear near ceilings, skirting boards, windows or plumbing fixtures, or are accompanied by staining, moisture should be investigated first. Leaking roofs, damaged flashing, cracked exterior render, failed sealant and plumbing leaks can all introduce water where it does not belong.

Do not scrape, patch and repaint before the source is resolved. New paint applied over damp material is likely to blister again, and hidden moisture can lead to mould, damaged plasterboard or timber deterioration. A professional painter can identify visible coating failure, but a plumber, roofer or building specialist may also be needed where the water source is not clear.

Painting onto a damp surface

A surface does not need to look wet to hold enough moisture to cause a problem. Fresh plaster, repaired areas, washed exterior walls and water-affected timber all need sufficient drying time before primer and paint are applied.

This is especially relevant after heavy rain or high humidity. On the Gold Coast, changing weather conditions can affect drying times significantly. Experienced tradespeople assess the substrate and conditions, not just the clock, before beginning a coating system.

Heat and direct sunlight

Exterior paint applied in direct sun can skin over too quickly while solvents or moisture remain underneath. Dark-coloured surfaces and metal areas can become particularly hot, increasing the risk of blistering. Very hot conditions also make it harder to maintain a consistent wet edge and even finish.

The answer is not simply to wait for any dry day. Paint products have recommended application temperatures and conditions. Planning the work around shade, weather and the type of surface helps the coating cure as intended.

Inadequate cleaning, sanding or priming

A quality paint finish begins well before the first top coat. Surfaces may need washing, scraping, sanding, filling, sealing or priming to create a sound base. Skipping these steps can leave contaminants or weak layers between the new paint and the wall.

This is common in kitchens, where airborne grease can settle on walls and ceilings, and on older exterior surfaces with chalky or flaking paint. It can also happen when a water-based paint is applied over an incompatible coating without the correct preparation or primer.

Too many coats or the wrong coating system

Applying heavy coats, recoating too soon or using unsuitable products can trap solvents and slow the curing process. Paint may feel dry on the surface while still soft beneath. If another coat is added too early, the system can lose adhesion and develop bubbles or wrinkling.

Not every surface needs the same product. Plasterboard, timber, metal, masonry and previously painted surfaces each have different requirements. Matching the preparation and coating system to the substrate is one of the biggest differences between a finish that looks good briefly and one that lasts.

How to tell whether paint bubbles are serious

A few small bubbles after a DIY touch-up may be limited to that repair and can sometimes be fixed with proper preparation. Widespread blistering, recurring bubbles or bubbles with water stains deserve closer attention.

Pressing on the affected area can offer a clue. A dry, brittle bubble may point to poor adhesion or heat exposure. A soft bubble, damp plasterboard or stained ceiling may indicate moisture. Peeling paint, a musty smell, mould growth or a change in the wall’s texture are stronger signs that the issue goes beyond the paint itself.

It is also worth considering where the bubbling appears. Localised bubbling below a window may suggest water entry. Blistering in a bathroom ceiling can be linked to steam and insufficient ventilation. Bubbles on an exterior wall after rain may indicate a crack, failed sealant or water getting behind the coating.

How paint bubbles should be repaired

The repair process should start only once the affected area is dry and the underlying cause has been addressed. Rushing this stage is the most common reason a repair fails again.

First, loose and bubbled paint needs to be removed back to a firm edge. The surrounding surface is then checked for soft plaster, damaged timber, cracks, stains or signs of contamination. Depending on the condition, the area may require patching, sanding, sealing or a stain-blocking primer before repainting.

For water-damaged plasterboard, replacement may be more reliable than repeated patching, particularly if the board has softened, swollen or developed mould. On exterior timber, any rot or severe deterioration needs repair before painting can protect the surface again.

Once the substrate is sound, clean and fully dry, a suitable primer creates a stable base for the top coats. The paint should then be applied at the recommended coverage rate, with proper drying time between coats. This method takes longer than a quick cover-up, but it is what protects the finish and avoids paying twice for the same area.

Can you paint over bubbling paint?

Painting over bubbles is rarely a lasting fix. The new coat may disguise the raised area temporarily, but it cannot restore adhesion beneath the old paint. As the failed layer continues to lift, the fresh paint is likely to crack, peel or blister as well.

There are limited cases where a tiny, dry bubble can be sanded smooth and touched up after the surface has been properly prepared. However, if the bubble is linked to moisture, active movement, loose paint or a larger area of failure, it needs a more thorough repair.

Preventing bubbles in your next paint job

Good preparation and sensible timing prevent most paint blistering. Walls should be clean, dry and sound before painting begins. Repairs need time to cure, glossy areas need appropriate abrasion or priming, and exterior work should be scheduled around suitable weather rather than squeezed into the first available dry hour.

Ventilation also matters in bathrooms, laundries and kitchens. Exhaust fans that vent effectively, prompt attention to leaks and regular checks around windows and wet areas all help limit the moisture that can damage painted surfaces.

For a renovation, commercial refresh or repaint of an older property, professional assessment can save considerable trouble. Jag Painting Solutions approaches surface preparation as part of the job, not an optional extra, so the finished result has the best chance of performing well over time.

If bubbles have appeared in your paintwork, treat them as useful information. Addressing the reason behind the failure before repainting will protect your property, improve the final appearance and give your new finish the durability it deserves.

Categories
Uncategorized

Surface Preparation for Repainting Guide

A fresh coat of paint cannot hide a surface that is dirty, loose, damp or damaged for long. It may look acceptable on the day, then begin peeling, blistering or showing uneven patches within months. This surface preparation for repainting guide explains the work that gives a paint job its clean appearance and lasting performance.

For homeowners, renovators and business owners, preparation is often the difference between a quick cosmetic refresh and a finish that properly protects the property. The right approach depends on the surface, its condition, the room or exposure level, and the coating already in place.

Why preparation matters before repainting

Paint needs a sound, clean and stable surface to bond to. If there is chalky old paint, cooking grease, mould, dust, flaking coatings or moisture behind a wall, applying more paint simply covers the problem temporarily.

Good preparation also affects the final look. Small dents, plaster joins and sanding scratches become more noticeable once light hits a newly painted wall, particularly with low-sheen or semi-gloss finishes. On exterior surfaces, preparation helps coatings withstand the Gold Coast’s sun, humidity, salt air in coastal areas and heavy summer rain.

There is a practical balance to strike. Not every wall needs to be stripped back completely, and over-preparing a sound surface can add unnecessary time and cost. An experienced painter assesses what is there, identifies the cause of any failure, and prepares only as far as required for a reliable result.

Start with a close inspection

Before washing or sanding, inspect each area in good natural light where possible. Look for peeling paint, hairline cracks, rust stains, water marks, mould, powdery residue, bubbling, dents, movement around plasterboard joints, and gaps at trims or windows.

The condition of the existing coating is a useful guide. Run a hand over the surface. If it leaves a dusty film, it may be chalking and needs thorough cleaning and suitable sealing. Press lightly on suspicious paint edges. If paint lifts easily, loose material must be removed until the remaining coating is firmly bonded.

Water staining deserves extra attention. A stain on a ceiling or wall is not just a painting issue if the source is still active. Roof leaks, plumbing faults, failed waterproofing or condensation should be resolved first. Painting over moisture can lead to fresh damage and a wasted repaint.

For commercial properties, inspection should also consider traffic and use. Scuffs around corridors, greasy kitchen-adjacent walls, hand marks near doors and damaged skirting boards may need different cleaning and repair methods than a lightly used office wall.

Clean the surface properly

Cleaning is not an optional quick wipe. Paint struggles to adhere to contaminants that may be invisible, including household oils, sunscreen residue, smoke film and airborne grime.

Interior walls are commonly washed with a suitable sugar soap solution or mild cleaning product, following the manufacturer’s directions. Pay close attention to kitchens, bathrooms, laundries, entry areas and walls near switches. Rinse where required, then allow the surface to dry fully before proceeding.

Exterior cleaning removes dust, cobwebs, dirt, mould and loose chalking paint. Pressure washing can be effective, but it must be used carefully. Excessive pressure can force water into cladding, eaves or wall cavities, damage timber fibres, or lift paint that was otherwise sound. Soft washing and hand cleaning are sometimes the better choice, especially around older surfaces and detailed trim.

Mould should be treated, not merely painted over. Use an appropriate mould treatment, rinse as directed and allow time for complete drying. If mould keeps returning, investigate the underlying ventilation, drainage or moisture problem rather than relying on a mould-resistant paint alone.

Remove failed paint and create a sound edge

Loose, cracked and flaking paint has to come off. Scrapers, sanding tools and careful hand preparation are used to remove failed sections without damaging the surface beneath. The goal is not to make every old coating disappear. It is to leave a stable base with no weak edges that can continue lifting under the new system.

Once loose paint is removed, feather the surrounding edges by sanding. This softens the transition from bare areas to intact paint so the repaired section does not show as a ridge through the final coats. On weatherboards, doors and trims, this step makes a noticeable difference to the finished appearance.

Older homes may contain lead-based paint. If a property was built before the mid-1970s or its paint history is uncertain, avoid dry sanding or creating dust until the coating has been assessed. Lead paint requires controlled preparation methods to protect occupants, workers and neighbouring properties.

Repair cracks, holes and surface defects

A quality repaint includes repairing the defects that paint will highlight. Small nail holes and minor dents can be filled, sanded smooth and spot-primed. Wider cracks need closer assessment because the right repair depends on why they formed.

Hairline cracking in plaster may be a minor surface issue. Repeated cracking at plasterboard joints, around doors or near windows can indicate movement, poor previous repairs or moisture. Flexible compounds, joint repairs or plastering work may be needed before painting. Simply filling a moving crack with a rigid product often leads to the same line returning.

Timber requires its own preparation. Check for rot, open joints, failed putty, split boards and exposed end grain. Decayed timber should be repaired or replaced before coating. Painting over soft, wet or damaged timber does not restore its strength, and the finish will fail prematurely.

Metal surfaces should be checked for rust. Remove loose corrosion, prepare the affected area to a sound surface and apply a compatible rust-inhibiting primer. The primer matters because ordinary wall paint is not designed to stop corrosion.

Sand for adhesion and an even finish

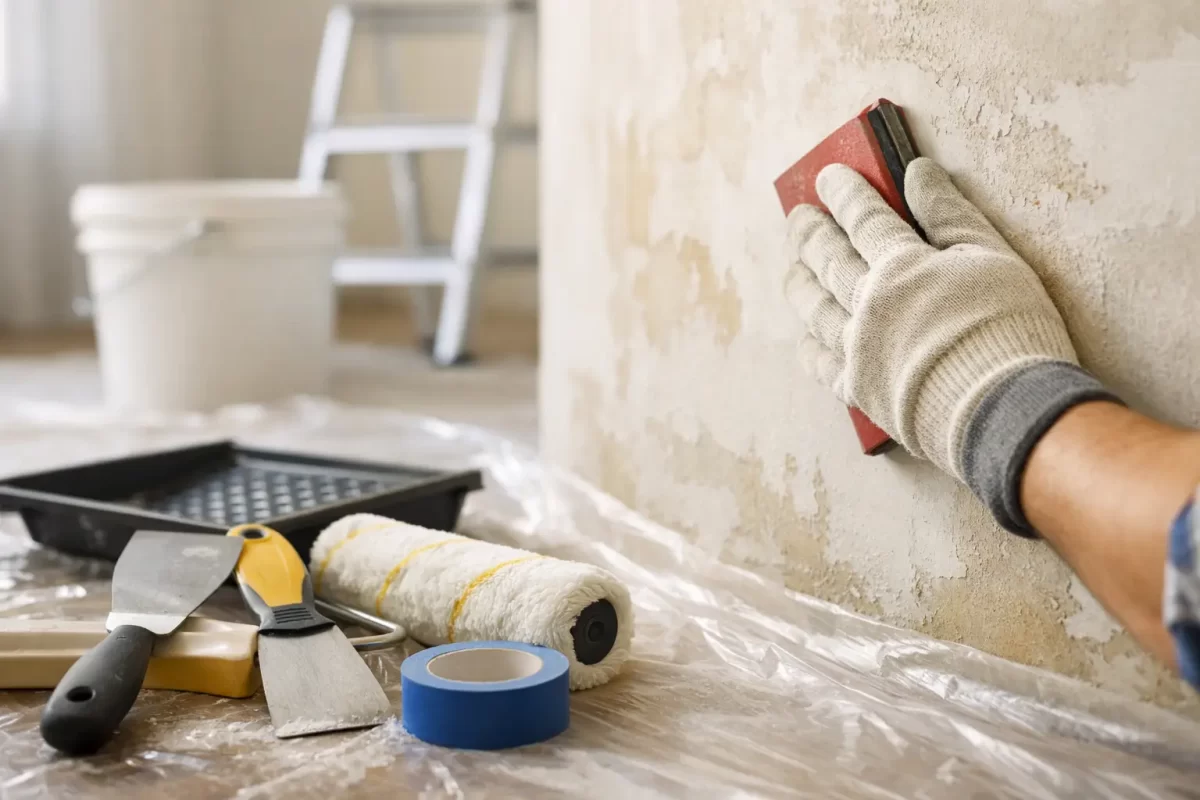
Sanding does two jobs: it smooths repaired areas and gives glossy or hard existing coatings enough texture for the next coat to grip. The aim is a clean, even key, not deep scratches or aggressive removal of sound paint.

A previously painted wall with a flat finish may only need light sanding around repairs. Glossy enamel on doors, skirting boards or metalwork usually needs more thorough abrasion and a suitable primer. Sanding dust must then be removed completely with vacuuming, wiping or dusting methods suited to the surface. Dust left behind can create a rough finish and reduce adhesion.

This is one area where patience pays off. A wall can look smooth before painting but still reveal sanding marks after the first coat, especially when sunlight comes through a window at an angle.

Prime bare areas and problem surfaces

Primer is not automatically required on every repaint, but it is essential in the right places. Bare plaster, exposed timber, repaired patches, stained areas, rust-treated metal and surfaces with adhesion concerns all benefit from a compatible primer or sealer.

Spot-priming small repairs is often enough for a sound interior wall. Full priming may be the better option when changing from a very dark colour to a light one, coating a porous surface, repainting a heavily repaired room or dealing with widespread chalking. It can improve colour consistency and reduce the number of finish coats required.

Stains from water, nicotine, tannin or rust may bleed through ordinary paint. A stain-blocking primer is designed to isolate these marks, but it should only be applied after the original cause has been addressed.

Always use products that work together. Mixing incompatible primers and topcoats can cause adhesion issues, wrinkling or poor durability. The chosen system should also suit the setting, whether it is a humid bathroom, sun-exposed exterior wall, rental property hallway or commercial workspace.

Allow for drying conditions

Preparation is not complete until the surface is dry, clean and ready to coat. This matters greatly in humid weather. A wall that feels dry on the surface may still hold moisture after washing, rain or a leak. Painting too soon can trap moisture and lead to blistering or peeling.

Exterior work should be planned around weather conditions, including rain, temperature and humidity. Interior areas may need ventilation, fans or time between cleaning, filling, priming and painting. Rushing these stages can compromise work that otherwise looks well prepared.

For a repaint that feels properly finished, preparation deserves the same care as the final coat. If your Gold Coast or Tweed property has peeling paint, damaged plaster, staining or exterior wear, Jag Painting Solutions can assess the surface and provide a clear, obligation-free quote before work begins.

Categories
Uncategorized

Painting Quote Checklist: What a Proper Quote Includes

A painting quote should do more than give you a final dollar figure. It should show what will happen in your home, office or investment property before a brush comes out. This painting quote checklist helps you compare proposals properly, avoid costly assumptions and choose a painter who understands the standard you expect.

The cheapest quote can be good value, but only when the scope, preparation and materials are genuinely comparable. A lower price often reflects work that has not been included, rather than a more efficient way of delivering the same finish.

Start with a clear scope of work

A proper quote identifies exactly which areas will be painted. That may include internal walls, ceilings, cornices, skirting boards, doors, window frames, exterior cladding, eaves, fences or rendered surfaces. It should also state what is excluded.

Vague wording such as “paint house” leaves too much open to interpretation. Ask whether wardrobes, stairwells, high ceilings, garages, decks, feature walls and difficult-access areas are included. For commercial work, clarify whether the quote covers common areas, offices, shopfronts, storage rooms or after-hours access.

The quote should name the rooms or elevations where practical. This gives both you and the painter a shared reference point once the job is underway. If plans are being used, make sure the proposal reflects the latest version rather than an early renovation concept.

Use this painting quote checklist for preparation

Preparation is where professional painting work is won or lost. Fresh paint will not hide unstable surfaces, poor patching, water damage or cracking. A quote should make clear how the painter intends to prepare each surface before applying paint.

For interior work, this may include cleaning, filling nail holes and minor dents, sanding, sealing stains, setting plaster repairs and caulking gaps around trims. Exterior preparation can involve washing down surfaces, scraping loose paint, sanding weathered timber, treating mould, priming exposed areas and addressing minor surface defects.

Ask how larger issues will be handled. Extensive plaster damage, rotten timber, rust, water ingress and failing render may sit outside a standard painting allowance. That is reasonable, provided the quote identifies the condition and explains how additional repairs would be priced and approved.

Be careful with a quote that simply says “prepare as required”. It may be suitable for a small, straightforward refresh, but it is not enough detail for a property with visible cracking, peeling coatings or patch repairs. The best approach depends on the age and condition of the building, so the painter should inspect the surface rather than make broad assumptions.

Check the paint system, not only the brand

Paint brand matters, but the specified paint system matters more. A useful quote states the product range or finish level, the number of coats and where primers or sealers will be used. It should distinguish between ceilings, walls, trims, doors and external surfaces, as each area can require a different product and sheen.

For example, internal ceilings are commonly finished in a low-sheen or flat coating, while walls may use washable low sheen and timber trims often need a harder-wearing semi-gloss or gloss finish. Exterior systems need to suit the substrate and local conditions, particularly on Gold Coast properties exposed to strong sun, salt air, humidity and heavy rain.

Confirm whether the price allows for a colour change. Moving from a dark wall to a light colour, or choosing bright whites over deep tones, can require extra coats to achieve even coverage. The same applies to strong feature colours. A transparent quote will flag this possibility before the work begins.

Colour selection should be part of the conversation

A colour schedule should identify the selected colours and finishes, or state when final choices need to be confirmed. If you are unsure, ask whether colour consultation or practical guidance is available. The colour that looks right on a small sample card can appear much cooler, darker or brighter across a full room.

For commercial spaces, consider lighting, branding, customer flow and how the finish will stand up to regular cleaning. For homes, look at existing flooring, tiles, cabinetry and natural light before settling on a scheme.

Confirm labour, access and protection measures

A professional painting quote should explain how the team will protect your property. Floors, furniture, benchtops, windows, gardens and nearby surfaces need appropriate coverings or masking. If furniture must be moved, establish whether this is included or whether you need to clear rooms before work starts.

Access can affect both cost and timing. High ceilings, stairwells, steep blocks, roof access, elevated external walls and restricted commercial sites may require ladders, scaffolding, mobile platforms or safety equipment. These items should be accounted for rather than appearing as an unexpected variation later.

Also ask about site care. You want to know who will be on site, how work areas will be kept tidy each day, where materials will be stored and how rubbish will be removed. Respect for the property is not an extra. It is part of a well-run painting project.

Compare timing realistically

A quote should give an estimated start window and likely duration, while recognising that weather can affect exterior painting. Drying times between coats, plaster repairs and the scope of preparation also influence the schedule.

If the work needs to fit around tenants, business hours, a renovation program or a move-in date, raise this before accepting the quote. A painter can then plan access, staging and labour accordingly. Rushing coatings before they have cured, however, is not a sensible trade-off for an earlier finish date.

For occupied homes, it is helpful to discuss whether the project can be completed room by room. That can make the process easier for families, particularly when bedrooms, kitchens or living areas are involved.

Understand the price and approval process

The price should state whether GST is included and whether it is a fixed quote or an estimate subject to final site conditions. It should also outline the deposit, progress payment or completion payment arrangements.

Ask how variations are handled. If hidden damage is found once preparation begins, you should receive a clear explanation and price before extra work proceeds. This protects both parties: you stay in control of the budget, and the painter is not expected to absorb work that could not reasonably be seen at the initial inspection.

A quote that is noticeably lower than the others deserves a closer look, not an automatic rejection. It may be based on a different paint product, fewer coats, limited preparation or exclusions that are not immediately obvious. Compare line by line rather than relying on the total alone.

Look for workmanship confidence and accountability

Before making a decision, check that the contractor can clearly explain their workmanship standards, insurance arrangements and approach to defects or touch-ups. A reputable painter should be comfortable discussing the work, answering practical questions and putting the agreed scope in writing.

Testimonials and repeat clients can also be useful indicators, especially for renovation work where coordination, communication and care around the home matter as much as the final coat. You are inviting a trade team into your property, so reliability and professionalism carry real value.

Questions worth asking before you accept

You do not need a long interrogation. A few direct questions will usually reveal whether the quote is thorough: What preparation is included? How many coats are allowed for? Which products and finishes will be used? What is excluded? How will extra repairs be approved? When can the work start, and how long is it expected to take?

If the answers match the written quote, you have a much stronger basis for choosing with confidence.

A detailed quote is not paperwork for paperwork’s sake. It is the first sign that your painter has considered the condition of the surfaces, the finish you want and the care your property deserves. For Gold Coast and Tweed projects, Jag Painting Solutions can provide a clear, obligation-free quote built around the actual work required.

Categories
Uncategorized

Gold Coast Repaint Examples for Every Property

A repaint is rarely just about changing a wall colour. The best Gold Coast repaint examples show what happens when the right preparation, paint system and finish are matched to the building, its condition and the way it is used. A crisp coastal exterior, a renovated family home or a refreshed shopfront can look completely different after professional surface preparation and careful application.

For homeowners and business owners, looking at repaint styles is useful because it helps turn a broad idea – “we need to freshen it up” – into practical decisions. The aim is not to copy another property exactly. It is to understand which approach suits your own surfaces, light, location and budget.

Gold Coast repaint examples worth considering

1. Coastal exterior refreshes

Many Gold Coast exteriors face strong UV exposure, driving rain, humidity and salt in the air. A repaint for a beachside home often starts with dealing with the damage those conditions cause: chalking paint, faded colour, surface corrosion, timber movement, mould and fine cracking.

A popular approach is a clean white or warm off-white exterior, balanced with charcoal, deep blue or muted green on trims, entry doors and feature cladding. It looks sharp without fighting the coastal setting. Pure bright white can be effective, but it may feel harsh in full sun and can show dirt more quickly. A softer white is often a more forgiving choice.

The result depends heavily on preparation. Exterior repainting is not simply a case of applying new paint over old. Surfaces may need washing, scraping, sanding, gap filling, spot priming and repairs before the top coats go on. On metalwork, appropriate treatment and priming are particularly important where corrosion has started.

2. Dark-to-light brick transformations

Older brick homes can feel heavy or dated, particularly when paired with dark roof tiles, timber trims or small windows. Painting brick can dramatically change the street appeal, making the home look brighter, more current and more connected to a renovation.

Light neutrals, warm greys and creamy whites are common choices. They work well with timber features, black window frames and modern landscaping. The trade-off is that painted brick becomes a finish that needs maintaining over time. It is also essential to use a suitable coating system and prepare the brick properly, rather than treating it like an internal plaster wall.

For homes with good-quality face brick that is in excellent condition, leaving some brick exposed can retain character. A partial repaint of gables, rendered sections, eaves and trims may deliver the updated look without coating every external surface.

3. Interior repaints for renovated family homes

An interior repaint is often the point at which a renovation starts to feel finished. New flooring, cabinetry and lighting can still look disconnected if the walls, ceilings, doors and trims are tired, patched or painted in mismatched tones.

A practical example is an open-plan living area painted in a soft neutral, with a clean ceiling white and slightly deeper colour on doors or a feature wall. This gives rooms definition while keeping the space light. In homes with plenty of natural light, warmer whites can reduce the clinical feel that cooler shades sometimes create.

Finish selection matters as much as colour. Flat or low-sheen paint is often preferred for ceilings and walls because it gives a refined appearance. However, it can be less forgiving on high-contact areas. A washable low-sheen option is usually a sensible choice for busy hallways, children’s rooms and living spaces. Semi-gloss or gloss finishes on doors, skirtings and architraves are durable and easy to clean, although higher sheen will highlight dents and uneven preparation.

4. Plaster repair and repaint after water damage

Water stains, bubbling paint and cracking plaster are common reasons people call a painter, but paint alone will not fix the underlying issue. Before repainting, the source of moisture needs to be resolved and the affected materials must be fully dry.

A proper repair may involve removing loose material, patching damaged plaster, setting joints, sanding, sealing stains and priming before repainting the area. If only one section is painted, colour variation can be noticeable, especially on older walls that have faded with sunlight. Repainting the full wall, or sometimes the entire room, generally gives the cleanest result.

This is one of the clearest examples of why workmanship matters. A patch that has not been levelled and sanded properly will still show through fresh paint, particularly in light colours or under downlights.

5. Character homes with updated colour schemes

Queenslanders, cottages and older homes often have details worth retaining: timber VJ walls, decorative ceilings, fretwork, verandah posts and original doors. The goal of a repaint is usually to freshen these features without stripping the property of its personality.

For interiors, a restrained palette can let the timberwork and architecture do the work. Soft whites, dusty greens, warm greys and gentle blue tones can suit these spaces well. A bolder colour on a front door or internal feature wall adds interest without making every room feel busy.

Older homes do need closer inspection before work begins. Previous paint layers may be unstable, timber may have weathered, and walls may have movement cracks that need the right repair approach. There is a balance between achieving a neat modern finish and respecting the slight variations that come with an older property.

6. Commercial repaint examples that improve presentation

For a retail space, office, café or strata common area, a repaint can improve presentation without the disruption and cost of a full refit. Neutral walls, freshly painted ceilings and clean trims make premises feel cared for. For customer-facing businesses, this directly affects first impressions.

Commercial work needs to be planned around operating hours, access, safety and the surfaces involved. A busy tenancy may need painting completed in stages, after hours or over a weekend. High-traffic corridors and entry areas also need coatings that are durable and practical to clean.

Colour can support the business environment, but it should not overpower it. Soft neutrals tend to work across a wide range of spaces, while brand colours are often better reserved for selected walls, signage zones or details. A full room in a strong colour can look impressive in a sample, but may become tiring or make a compact space feel smaller.

What makes a repaint look professionally finished?

The difference between an average repaint and a high-quality finish is usually visible in the details. Straight cut-in lines, smooth patched areas, even coverage and clean edges around fittings all matter. So does protecting floors, furniture, landscaping and nearby surfaces while the work is being completed.

Preparation takes time, which is why it should be clearly included in the scope of work. If a quote appears unusually low, ask what surface repairs, sanding, primers and number of coats are included. It may be suitable for a straightforward refresh, but it may not allow for the work needed on weathered timber, stained ceilings, damaged plaster or failing exterior paint.

Colour consultation is also valuable when several surfaces need to work together. The same paint colour can look very different between a shaded hallway, a sunny living area and an exterior wall facing the afternoon sun. Testing sample colours on the actual property before committing is a sensible step.

Planning your own repaint

Start by identifying the outcome you want. It may be improved street appeal before selling, a long-overdue exterior maintenance repaint, a cleaner interior after renovations, or a professional look for a commercial space. From there, assess the current condition of the surfaces and decide whether repairs should be handled at the same time.

Photographs and repaint examples are a useful starting point, but an on-site assessment provides the clearest direction. An experienced painter can identify surface issues, explain coating options and help narrow down colours that fit the property. Jag Painting Solutions provides this practical, start-to-finish support for residential and commercial projects across the Gold Coast and Tweed.

A considered repaint should make the property easier to enjoy, maintain and present with confidence. When the preparation is right and the finish suits the space, the change is felt every time you arrive home, welcome a customer or walk through the door.

Categories
Uncategorized

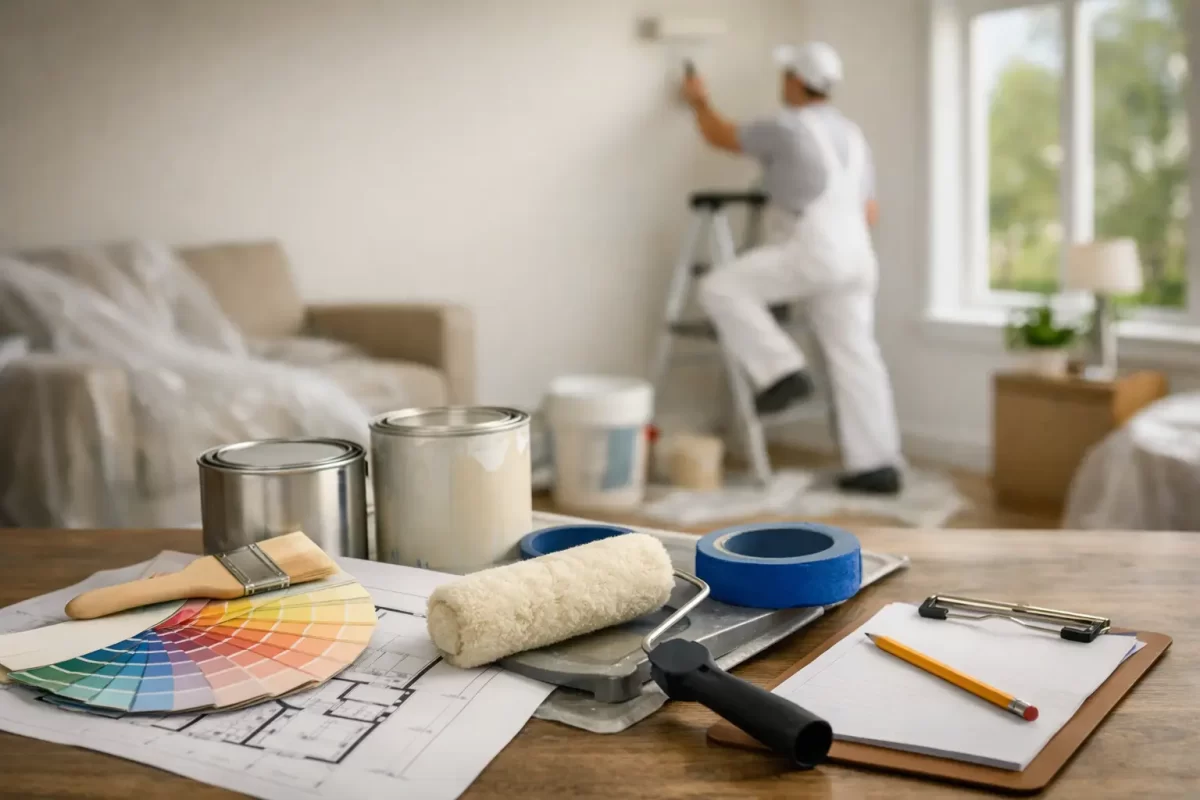
Residential Painting Project Planning Guide

A fresh coat of paint can make a tired room feel new, lift street appeal and protect exposed surfaces. But the finish is decided well before the first brush touches a wall. This residential painting project planning guide helps homeowners set clear expectations, avoid preventable delays and organise a painting job that looks right for years, not just on day one.

Whether you are refreshing one bedroom, preparing a property for sale or repainting an entire home, good planning gives your painter the information needed to quote accurately and deliver a consistent result.

Start with the result you want

Before discussing paint brands or colour cards, decide what the project needs to achieve. You may want a cleaner, more modern interior, better protection for weathered exterior timber, or a coordinated finish after plaster repairs or renovations. Those goals influence the preparation required, the coating system and the timing of the work.

Walk through the property and make notes room by room. Be specific about what is included and what is not. For example, repainting walls only is a very different scope from walls, ceilings, doors, trims, window frames and built-in cabinetry. The same applies outside, where eaves, fascias, fences, decks and rendered walls may each need a different approach.

A useful scope should cover these areas:

  • Rooms and exterior surfaces to be painted
  • Ceilings, walls, trims, doors and other fixtures included
  • Cracks, dents, peeling paint or water damage needing repair
  • Any plastering or patching required before painting
  • Access issues, such as high walls, stairwells or tight side paths
  • The preferred completion date and any fixed events around it

Photos are helpful when requesting a quote, particularly for exterior work or areas with obvious damage. They give a painter a clearer starting point, although an on-site inspection is still the best way to assess surface condition, access and preparation needs.

Plan surface repairs before choosing paint

Painting does not hide every problem. In fact, fresh paint can make uneven plastering, poor previous repairs and rough patches more noticeable, especially under strong natural light. Preparation is where much of the workmanship sits.

Look closely at walls in the morning or late afternoon, when angled light reveals imperfections. Mark cracks, nail pops, dents and stains with low-tack tape so they can be assessed during the quote. If you have had a leak, do not assume stain-blocking paint alone will fix it. The moisture source must be resolved first, then the affected area allowed to dry properly before repair and coating.

Exterior surfaces deserve the same attention. Flaking paint, chalky render, mildew and failing sealant need treatment before new paint is applied. On the Gold Coast and in Tweed, sun, humidity and coastal exposure can be demanding on exterior finishes. The right preparation and suitable exterior coating matter more than simply applying another layer over a worn surface.

There is a trade-off to consider here. A quick repaint may suit a short-term presentation goal, while a long-term renovation usually calls for more detailed repairs, sanding, priming and sealing. A professional painter should explain the difference clearly, including how each option is likely to perform.

Choose colours in the actual space

A colour that looks warm and calm on a small sample card can appear much cooler, darker or brighter across a full wall. Light direction, existing flooring, cabinetry, window coverings and surrounding exterior materials all change how colour reads.

Start by considering fixed features you are keeping. Timber floors, stone benchtops, tiles, roofing and brickwork often provide the best cues for a workable palette. Then think about the mood and practical use of each space. Lighter colours can help smaller rooms feel more open, while deeper tones can create definition in larger rooms or selected feature areas.

Test sample colours on larger boards or small painted sections and view them at different times of day. Do not choose under showroom lighting alone. For exterior colours, check samples in direct sun and shade, as bright Queensland light can make a colour look substantially lighter than expected.

Sheen level is just as important as colour. Low-sheen finishes are popular for interior walls because they provide a soft appearance while remaining reasonably practical to clean. Higher sheen paints can be more durable for trims and doors, but they also highlight surface imperfections. Ceilings generally need a flat finish to reduce reflected light and help conceal minor unevenness.

If choosing colours feels uncertain, arrange colour consultation before work begins. It is far easier to make confident decisions at the planning stage than to change direction once multiple rooms have been coated.

Build a realistic schedule around the work

Painting is not simply a one-day job of rolling colour onto walls. Cleaning, repairs, sanding, priming, drying and recoating all take time. The size of the home matters, but so do the existing surfaces and the level of detail required.

Ask your painter how the work will be staged. A well-organised interior project may be completed room by room so parts of the home remain usable. For a full renovation, it can be more efficient to schedule painting after messy building work, electrical changes and major carpentry are complete, but before final furniture is moved in.

Exterior schedules need flexibility for weather. Rain, high humidity and very hot conditions can affect drying and application. Rushing work between unsuitable weather windows can compromise the finish, so allow contingency time rather than booking removalists, tenants or an event immediately after the planned completion date.

Also consider the order of trades. Plastering should be completed and dry before painting starts. New timber may need filling, sanding and priming. Flooring and cabinetry installation can affect wall access. Clear coordination prevents one trade from damaging another’s finished work.

Prepare your home for a respectful, efficient job

A professional team will protect floors, furniture and nearby surfaces, but homeowners can make the process smoother by clearing smaller items before work begins. Remove artwork, fragile décor, wall-mounted accessories where practical and personal belongings from work areas. Shift furniture towards the centre of the room or into another space if agreed with your painter.

Talk through access arrangements before the start date. Confirm where vehicles can park, which entry will be used, whether pets need to be secured and how the team should manage alarms or gates. If anyone works from home, discuss noise, room access and the best times for sanding or other disruptive preparation.

For exterior work, clear pot plants, outdoor furniture and children’s equipment away from walls where possible. Trim vegetation that is pressing against painted surfaces. This gives painters safe access and helps the finished coating perform properly by reducing trapped moisture and abrasion.

Compare quotes on preparation, not price alone

A lower price can be appealing, but it is only meaningful when you understand what is included. Two quotes for the same home can differ because one allows for extensive preparation and premium products while another assumes minimal repairs and fewer coats.

Ask for a clear written scope that identifies surfaces, preparation, coating system and exclusions. If there are areas of concern, such as extensive cracking or timber rot, ask whether they are included in the price or subject to further assessment. This avoids surprises once work is underway.

It is also reasonable to ask who will complete the work, how the site will be protected, and how touch-ups or concerns will be handled at completion. Dependable painters communicate early if they uncover an issue that changes the scope. That conversation is a sign of care, not inconvenience.

Jag Painting Solutions approaches painting as a complete finishing service, with attention to surface preparation, plaster repairs and colour guidance as well as the final coat. For homeowners, that coordinated approach can reduce the risk of gaps between trades and inconsistent finishes.

Confirm the final details before work starts

A short pre-start conversation helps everyone begin on the same page. Confirm the selected colours and sheen levels, the rooms or surfaces included, access times, parking, protection requirements and expected project duration. If you are supplying paint yourself, confirm the exact product, quantity and tint details in writing to avoid mistakes.

Keep one person as the main contact where possible. Questions can then be answered quickly, particularly if a hidden repair or colour decision arises during the job. At the end, inspect the work in good natural light with your painter and note any agreed touch-ups before equipment is packed away.

The best painting projects feel organised because the important decisions were made early. Take the time to define the scope, inspect the surfaces and choose colours in your own light, then work with experienced tradespeople who treat your home with the care it deserves.