Categories
Uncategorized

Plaster Wall Repair: When a Patch Is Not Enough

A wall can look fine from across the room, yet show every repair line once fresh paint goes on. Proper plaster wall repair is about more than filling a hole. It is about restoring a flat, stable surface that blends into the surrounding wall and gives the final paint finish the clean result your property deserves.

For homeowners, renovators and commercial property managers, the difference is easy to see. A rushed patch can leave raised edges, visible joins, cracking or a change in texture. A well-prepared repair disappears into the wall, whether it sits in a hallway, living area, office or rental property.

What causes plaster wall damage?

Plaster walls and plasterboard-lined walls deal with plenty over time. Everyday knocks from furniture, door handles and busy family life can leave dents, holes and chips. Renovations often create openings where old lights, shelves, air-conditioning units or wall fixtures have been removed.

Cracks are a separate issue and should not all be treated the same way. Fine hairline cracks can come from normal seasonal movement, settling, or minor movement around doors and windows. Wider cracks, recurring cracks or cracks that run diagonally may point to movement in the building or a problem beneath the surface. Filling these without assessing the cause can make the wall look better briefly, but it will not necessarily keep the crack from returning.

On the Gold Coast, moisture also deserves attention. Water leaks, condensation and high humidity can affect plaster, jointing compounds and paint systems. Bubbling paint, staining, soft areas or mould are signs to investigate before repair work begins. The source of moisture must be fixed first. Repairing and painting over damp material simply traps the problem behind a fresh finish.

When plaster wall repair needs more than filler

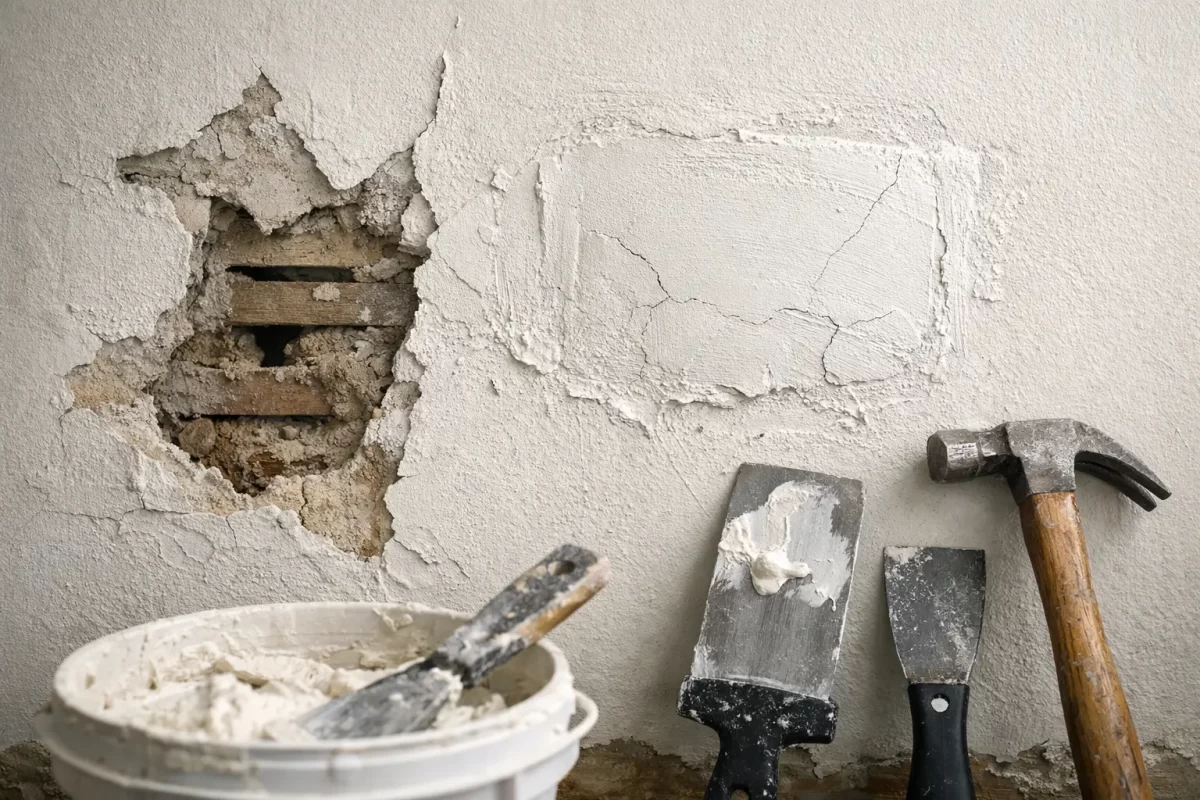
Small nail holes and shallow dents can often be repaired with a suitable patching compound, sanding and touch-up painting. Larger damage needs a more careful approach. A hole from a door handle, a damaged corner, loose tape on a plasterboard joint or a cracked ceiling line may require reinforcing tape, a new section of board, corner bead replacement or several coats of compound.

The surrounding condition matters just as much as the visible damage. If plaster is loose, chalky or blown, it needs to be removed back to a sound edge. If a crack has movement behind it, flexible materials or reinforcement may be needed. If the wall has a heavy texture, recreating that texture is part of the repair rather than an optional extra.

This is where a quick DIY repair can become frustrating. It may look acceptable before painting, then stand out when afternoon light hits the wall. Gloss and low-sheen finishes, in particular, can highlight uneven sanding and patch edges. Even flat paint can reveal a repair if the surface preparation has been rushed.

The repair should match the wall, not just cover the damage

A quality repair starts with checking what the wall is made from and why it failed. Older solid plaster walls, modern plasterboard systems and previously renovated walls each respond differently. The right materials and method depend on the depth of damage, the condition of the substrate and the finish required.

For example, a repaired plasterboard joint needs correct taping and feathering so it does not form a ridge. A damaged external corner needs to be straight and durable, particularly in a high-traffic space. A water-affected section may need to be cut out and replaced rather than skimmed over. Taking these steps gives the paint a stable base and prevents avoidable call-backs later.

The professional plaster wall repair process

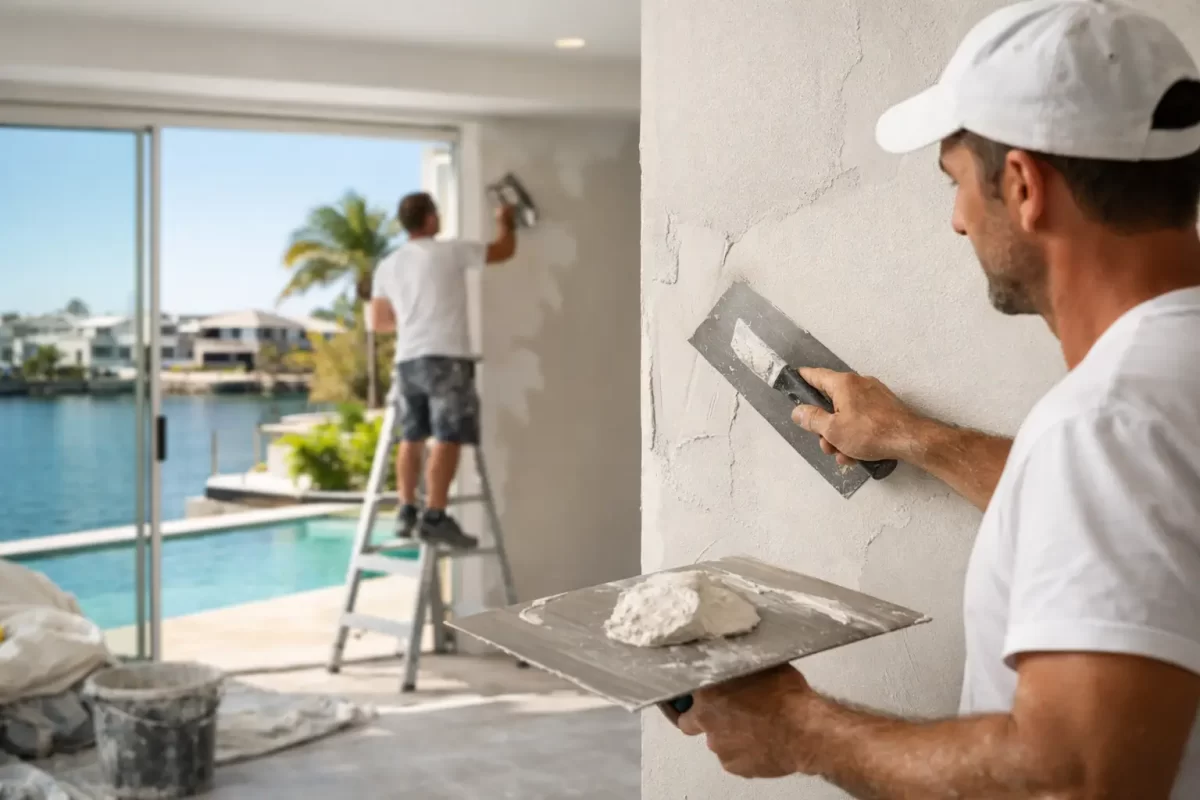
Good repairs are built in stages. First, the damaged area is inspected and any loose or unsound material is removed. The surface is then cleaned and prepared so the repair compound can bond properly.

Where needed, a hole or crack is reinforced with backing material, tape or a replacement piece of plasterboard. Compound is applied in controlled layers, allowing appropriate drying time between coats. Each coat is spread wider than the one before it. This gradual feathering is what helps the repair merge with the existing wall rather than leaving a noticeable patch.

Once dry, the area is sanded carefully to create a smooth and level finish. This stage takes patience. Sanding too aggressively can expose tape or create hollows, while insufficient sanding leaves edges that appear under paint. Dust is removed before primer is applied, particularly over fresh compound or repaired areas with stains.

Painting is the final part of the job, not an afterthought. A suitable primer helps even out porosity between the old painted wall and the new repair. From there, the wall can be repainted to achieve consistent colour and sheen. In some cases, a small touch-up is enough. In others, repainting the full wall is the best way to avoid a visible colour or sheen difference.

Why repaired walls can flash through paint

“Flashing” is the term often used when a repaired area reflects light differently from the rest of the wall. It can happen when patching compound absorbs paint at a different rate, when primer has been missed, or when a touch-up coat has a slightly different sheen.

This is especially common on walls with strong natural light, downlights or feature lighting. The wall may look even during the day and reveal every imperfection at night. Darker colours and higher-sheen paints can also make poor preparation more obvious.

The practical answer is to prepare the full area properly and choose the painting approach based on the wall’s condition. If the original paint is aged, sun-faded or unknown, colour matching a small section may not deliver an invisible result. Repainting the complete wall provides a more uniform finish and is often the better value option.

Choosing between a minor repair and a larger restoration

Not every damaged wall needs extensive work. A localised repair makes sense when the damage is small, the surrounding surface is sound and the existing paint can be matched successfully. It is a sensible option for minor pre-sale maintenance, rental property upkeep or small accidental damage.

A broader repair and repaint is usually worthwhile when there are multiple patches, repeated cracking, peeling paint, water stains or a tired finish across the room. Renovation projects also benefit from treating wall repairs and painting as one coordinated scope. It avoids the common problem of having a neatly patched wall that still looks inconsistent once the room is finished.

Commercial spaces need similar consideration. Reception areas, retail walls and offices are part of how customers and staff experience a business. Scuffed, cracked or poorly patched walls can make an otherwise well-run space feel neglected. Planned repairs and repainting help maintain a clean, professional presentation with less disruption than waiting for damage to build up.

When to call an experienced plasterer and painter

It is sensible to seek professional advice when cracks keep returning, the wall feels soft or hollow, water damage is visible, or you need the repair to blend into a high-visibility painted surface. The same applies if you are preparing a property for sale, completing a renovation or refreshing a commercial premises where finish quality matters.

An experienced team can assess the damage, explain what is causing it where possible, and recommend a repair scope that suits the wall and your budget. At Jag Painting Solutions, plaster repairs and painting are considered together, so the repaired surface is prepared for the finish it will receive rather than treated as a separate, rushed task.

A smooth wall changes how an entire room feels. If damaged plaster is distracting from your home or business, arranging a clear assessment and quote is a practical first step towards a finish you will be happy to live or work with.

Categories
Uncategorized

Interior Painting Cost Guide for Gold Coast Homes

A freshly painted interior can make a tired home feel properly cared for, but the cheapest quote is not always the most affordable outcome. This interior painting cost guide explains what you are paying for, what can change the final figure, and how to compare quotes with confidence before work begins.

For Gold Coast homeowners and renovators, professional interior painting is usually priced around the size and condition of the space, rather than a simple per-room rate. A small, empty bedroom in good condition is very different from a living area with high ceilings, repaired plaster, detailed trim and furniture to protect.

What does interior painting usually cost?

There is no reliable one-price answer for every property. As a broad starting point, professional interior painting may range from several hundred dollars for a straightforward single room to many thousands for a full home repaint. The scope makes the difference.

A painter may price by square metre, by room, by day, or as a fixed project quote. Fixed quotes are often easiest for homeowners to understand because they should set out the agreed preparation, paint system, number of coats and included areas. They also provide greater clarity when the job involves several rooms, ceilings, doors, skirting boards or plaster repairs.

When comparing estimates, be cautious of figures that seem dramatically lower than the others. They may allow less time for preparation, use a lower-grade paint, exclude ceilings or timberwork, or assume the walls are in better condition than they are. A quality finish depends on the work done before the first coat goes on.

The main factors behind an interior painting quote

Room size, layout and ceiling height

Larger rooms require more paint and labour, but the floor area alone does not tell the full story. Wall height, the number of windows and doors, stairwells, built-in cabinetry and awkward corners all affect the time required.

High ceilings and voids need suitable access equipment and additional care. Painting a compact bedroom with standard ceilings is generally more straightforward than painting an open-plan living space with raked ceilings or a stairwell that is difficult to reach safely.

Surface preparation and repairs

Preparation is where a professional painting job earns its value. Walls may need washing, sanding, filling, gap sealing, spot priming or more substantial plaster repairs before they are ready to paint.

Small nail holes are routine. Water staining, peeling paint, cracking, dents, failed cornice joins and damaged plaster are different matters. If the underlying surface is not properly repaired and sealed, new paint will not hide the problem for long.

A clear quote should explain whether minor filling is included and how larger repairs will be handled. This avoids a frustrating surprise once furniture has been moved and the real condition of the walls is visible.

The paint selected

Paint quality has a direct impact on coverage, durability, washability and appearance. Premium interior paints generally cost more upfront, but can offer better coverage and a finish that stands up more effectively in busy family areas, hallways, kitchens and rental properties.

The chosen sheen also matters. Flat or low-sheen finishes are popular for walls because they give a soft appearance and help disguise minor surface variation. Semi-gloss or gloss is commonly used on doors, frames and skirting boards because it is hard-wearing and easier to clean. Different surfaces often require different products, primers and application methods.

A good painter can guide you through colour and finish choices based on how each room is used, the available natural light and the condition of the substrate. Choosing the right system is more useful than simply choosing the most expensive tin on the shelf.

How many coats are needed

Most interior repaints require at least two finish coats for an even, durable result. However, more coats may be needed when changing from a dark colour to a light one, painting over strong reds or blues, covering stains, or applying a new colour to unpainted plaster.

Primer is not always required across every wall, but it is essential in particular situations. Fresh plaster, repaired areas, water marks and significant colour changes may all need appropriate priming. A quote based on one quick coat can look attractive, but it is unlikely to deliver the coverage and consistency most homeowners expect.

Occupied homes and access

An empty property is normally faster to paint than a furnished home. In an occupied house, painters need to move carefully around belongings, protect floors and furniture, work around family routines and leave each area tidy at the end of the day.

This care is worthwhile. It helps protect your home while the work is underway, but it does add labour time. If possible, clearing smaller items, pictures and fragile belongings before the team arrives can make the process more efficient. Your painter should still cover fixed furniture and flooring as part of proper site protection.

Doors, trims and detailed work

Walls are only part of an interior repaint. Ceilings, cornices, skirting boards, doors, window frames and built-in shelving all add detail and labour. Timberwork can require cleaning, sanding, undercoating and multiple enamel coats to achieve a smooth, durable finish.

These items should be clearly separated or identified in your quote. It is common for homeowners to assume that “painting a room” includes the ceiling and all trim, while the painter has allowed for walls only. Getting this confirmed in writing prevents misunderstandings.

A practical interior painting cost guide for comparing quotes

A professional quote should make it easy to see what is included. Before accepting one, check that it covers the same scope as the other quotes you have received. The price is only meaningful when the work being offered is genuinely comparable.

Look for clear details on the areas to be painted, surface preparation, repairs, paint brand or quality level, number of coats, and whether ceilings, doors and trims are included. It should also state who supplies the paint, how the home will be protected, and whether rubbish removal and final clean-up are part of the job.

Ask how unforeseen issues will be managed. For example, hidden water damage or loose plaster may not be visible at the quoting stage. A dependable contractor will explain the likely next step, seek approval for additional work where required, and communicate early rather than presenting an unexplained extra charge at the end.

It is also reasonable to ask about timing. A rushed project can affect both the finish and your experience of the work. Proper drying time between coats, especially in humid conditions, is part of achieving a finish that lasts.

Where spending more can make sense

Not every room needs the same level of investment. A spare room being prepared for sale may need a clean, neutral refresh, while a main living area or family hallway may justify a more durable paint and thorough repair work.

Spending more is often sensible when the surface condition is poor, the room receives heavy use, or you are making a major colour change. It can also be worthwhile for feature walls, detailed timberwork and rooms where strong lighting will show every imperfection.

On the other hand, you may be able to reduce costs by painting rooms at the same time, keeping the existing colour family, clearing access before the job starts, and limiting unnecessary changes once work is booked. The goal is not to cut preparation or paint quality where they matter, but to plan the project efficiently.

Getting an accurate quote for your property

The most accurate estimate comes from an on-site inspection. Photos can help with an early discussion, but they do not always show uneven walls, old repairs, access restrictions or the condition of existing paintwork.

During a quote visit, point out any concerns such as cracks, stains, peeling areas and previous leaks. Discuss which rooms are priorities, whether you want ceilings and trims included, and whether you need help narrowing down colours. The more clearly the scope is agreed, the more reliable the price will be.

Jag Painting Solutions approaches interior work as a complete finishing service, with careful preparation, professional application and respect for the home throughout the project. A detailed quote gives you a sound basis for deciding what is right for your property, rather than leaving the result to assumptions.

The best next step is to walk through your home with an experienced painter and talk openly about the finish you want, the condition of the surfaces and your budget. A clear scope and a well-prepared surface will do more for the final result than a bargain price ever can.

Categories
Uncategorized

How to Fix Peeling Interior Paint Properly

Paint rarely starts peeling without a reason. A few lifted edges near a bathroom window may be caused by steam, while broad sheets coming away from a wall can point to a preparation problem, water damage or incompatible paint coats. Knowing how to fix peeling interior paint properly means dealing with that cause first. Otherwise, a fresh coat may look good briefly, then fail in exactly the same place.

For small, dry and stable areas, a careful repair can be a practical DIY job. If the peeling is widespread, the wall feels damp, plaster is soft or staining keeps returning, it is worth having the surface assessed before repainting. A quality finish depends as much on the condition of the surface as the paint itself.

Find out why the paint is peeling

Before reaching for a scraper, inspect the damaged area and the room around it. Paint needs a clean, dry, sound surface to bond well. When one of those conditions is missing, adhesion suffers.

Moisture is one of the most common causes in Gold Coast homes, particularly in bathrooms, laundries, kitchens and rooms with limited ventilation. Look for bubbling paint, brown water marks, mould, a musty smell, swollen plasterboard or peeling concentrated around windows, pipes and ceilings. A leaking roof, plumbing issue or failed shower waterproofing needs to be repaired and fully dried before any painting starts.

Poor preparation is another frequent culprit. Paint applied over dust, grease, soap residue, mould, glossy old enamel or loose chalky paint may not grip the wall. In older properties, several layers of paint can also lose their bond to one another over time. The newest coat is not always the problem – sometimes it is simply exposing a weak layer underneath.

Temperature and humidity matter too. Painting in a closed, steamy room, or applying coats before the previous coat has dried properly, can compromise the finish. In some cases, using the wrong primer between different paint types is the issue. Water-based paint applied directly over a very glossy oil-based coating, for example, may peel if the surface was not sanded and primed correctly.

How to fix peeling interior paint step by step

A sound repair is not about hiding the peeled patch. It is about removing every unstable edge and rebuilding the surface so the new paint has something reliable to hold on to.

Protect the room and check for hazards

Move furniture away from the work area and cover floors with drop sheets. Wear safety glasses, gloves and a P2 dust mask when scraping or sanding. Keep the room ventilated, but avoid creating a strong draught that blows dust through the home.

If the property was built before the 1970s, take extra care with old paint. Some older coatings may contain lead. Do not dry sand, use a heat gun or create unnecessary dust until you have received appropriate advice or had the paint tested. This is a situation where engaging a professional is the safer option.

Remove all loose paint

Use a paint scraper or broad filling knife to gently lift peeling paint away from the wall. Continue until you reach firmly bonded paint that does not lift when lightly scraped. It can be tempting to stop once the obvious flakes are gone, but weak paint left at the perimeter will create a visible failure later.

For larger areas, work patiently rather than aggressively. Gouging plasterboard paper or digging into plaster creates more repair work. Vacuum up dust and paint fragments as you go, then wipe the area clean with a damp cloth and allow it to dry.

Treat the underlying problem

This is the step that determines whether the repair lasts. Fix leaks, improve exhaust ventilation, remove mould safely and allow damp walls to dry completely. In wet areas, confirm that the exhaust fan is working effectively and run it during showers and for a period afterwards.

If grease or residue is likely, wash the surface with a suitable sugar soap solution, then rinse as directed and let it dry. For mould, use an appropriate mould treatment and follow the product instructions. Do not simply paint over mould – it can continue to affect the coating and may indicate a ventilation or moisture issue that needs attention.

Sand and feather the edges

Once the surface is dry and stable, sand the edges of the remaining paint so the transition into the bare patch feels smooth. This process is called feathering. Fine to medium sandpaper is usually suitable for small repairs, while a sanding block helps keep the surface even.

Run your hand across the area after sanding. If you can feel a sharp ridge, it will often remain visible after painting, especially in side light from a window or downlight. Wipe away sanding dust with a clean, slightly damp microfibre cloth and let the surface dry.

Fill damaged areas and sand again

Use a quality interior wall filler for shallow chips, dents and uneven sections. Press it into the damaged area with a filling knife, keeping the repair slightly proud of the wall if needed. Once dry, sand it smooth and check it under good lighting.

Deep damage, cracking around joints, water-affected plasterboard or recurring ceiling issues may require plastering repairs rather than filler alone. Painting over a failing substrate only delays a more noticeable repair.

Prime exposed patches

Primer is particularly important where bare plaster, repaired filler, stained areas or previously glossy paint are exposed. The right primer seals porous areas, improves adhesion and helps the finish coat dry evenly. Skipping it can leave dull patches, known as flashing, or cause the repair to stand out against the surrounding wall.

Choose a primer suited to the surface and the problem. A stain-blocking primer may be needed for old water marks after the leak has been repaired. For glossy surfaces, use an adhesion primer after thorough cleaning and sanding. In bathrooms and laundries, select products appropriate for humid interior environments.

Repaint with compatible quality paint

Apply at least two thin, even finish coats, allowing the recommended drying time between coats. Use a brush to cut in around the repair and a roller over the broader wall area for an even texture. Painting only the patch can work when the existing paint is very fresh and the colour is an exact match, but it often creates a noticeable difference in sheen.

For the most consistent result, repaint the full wall from corner to corner. This is especially worthwhile with darker colours, low-sheen paints and walls exposed to natural light. In kitchens, bathrooms and laundries, a quality washable interior paint designed for higher-moisture areas will generally perform better than a standard wall paint.

When a peeling paint repair needs professional help

Small areas of peeling caused by minor knocks or an isolated preparation issue are usually manageable. The trade-off is time: proper drying, sanding, priming and repainting cannot be rushed if you want the repair to last.

Call an experienced painter or plasterer when peeling covers several walls, the ceiling is affected, water damage is visible, mould keeps returning, or the surface underneath is soft and crumbling. These signs can indicate an issue beyond the paint itself. A professional can identify the extent of the damage, prepare the surface correctly and match the coating system to the room.

For homeowners and renovators on the Gold Coast and in Tweed, Jag Painting Solutions can assist with interior painting, plaster repairs and surface preparation where a lasting finish matters. A clear assessment before work begins helps avoid spending money on a repaint that is likely to fail.

After the repair, give the paint time to cure before heavy cleaning or placing furniture hard against the wall. Keep wet areas ventilated, address leaks early and clean marks with a soft cloth rather than abrasive products. A little care after painting protects the workmanship and keeps your interior looking finished, not patched.

Categories
Uncategorized

How Much Does House Painting Cost on the Gold Coast?

A fresh coat of paint can make a tired home feel properly cared for again, but the price can vary far more than most property owners expect. If you are asking how much does house painting cost, the useful answer is not one flat figure. The right cost depends on the size of the job, the condition of the surfaces, the paint system required and how much preparation is needed before a brush or roller comes out.

For Gold Coast homes, a professional painting quote should account for the work that protects the finish as well as the work you can see. Quality preparation, careful masking, repairs and clean-up all take time, but they are what separate a finish that lasts from one that starts peeling, cracking or looking patchy too soon.

Typical house painting costs

As a broad guide, professional residential painting can range from a few thousand dollars for a smaller, straightforward repaint to well over $15,000 for a larger home with detailed preparation, exterior access challenges or extensive repair work. An interior repaint for a standard home may sit around $5,000 to $12,000, while exterior painting can range from approximately $6,000 to $20,000 or more.

These are indicative figures, not fixed prices. A compact single-level unit with sound walls and a simple colour scheme is a very different project from a two-storey house with weathered timber, high gables, rendered walls and multiple colours.

| Project type | Indicative professional cost range | | — | — | | Small unit or townhouse interior repaint | $3,000 to $7,000 | | Standard house interior repaint | $5,000 to $12,000 | | Single-storey exterior repaint | $6,000 to $12,000 | | Large or two-storey exterior repaint | $10,000 to $20,000+ |

The most reliable way to budget is to arrange an on-site quote. A painter needs to inspect the existing surfaces, measure the areas and understand the finish you want before providing a price that is fair and accurate.

What changes the cost of house painting?

Preparation and surface repairs

Preparation is usually the biggest variable in a painting quote. Walls and ceilings may need washing, sanding, filling, patching, gap sealing or stain blocking before they can be painted. On an exterior, peeling paint, cracked render, rust, timber rot and mould need to be properly addressed rather than painted over.

A house in good condition may only need light preparation between coats. A renovation property or older home can require plaster repairs, patching and more extensive sanding. This adds to the upfront cost, but it gives the new paint a stable surface to bond to and produces a much cleaner result.

Interior or exterior work

Interior painting is often easier to access, but it can still involve detailed cutting-in around cornices, cabinetry, windows, doors and stairwells. Rooms filled with furniture also require protection and careful movement through the home.

Exterior painting is exposed to the Gold Coast climate. Salt air near the coast, strong sun, heavy rain and humidity can all affect existing coatings. Exterior work may require pressure cleaning, mould treatment, primers and paint products designed for the surface and local conditions. Weather can also affect the project schedule, particularly when rain or high humidity prevents paint from drying correctly.

Size, height and access

Painters generally price according to the area to be painted, but square metres are only one part of the equation. High ceilings, stairwells, sloping blocks and double-storey exteriors take more time and may require ladders, scaffolding or specialised access equipment.

A large open-plan room can be quicker to paint than several small bedrooms with lots of doors, windows and built-in furniture. Likewise, a single-level brick home is usually more straightforward than a multi-level property with detailed eaves, balustrades and difficult-to-reach elevations.

The paint system and number of colours

Good-quality paint costs more than entry-level products, but it generally provides better coverage, durability and washability. The best product also depends on the surface. Ceilings, internal walls, timber trim, metalwork, render and weatherboards all have different requirements.

The number of colours matters as well. A simple repaint using one wall colour and one trim colour is more efficient than a scheme with feature walls, contrasting doors, ceiling colours and detailed exterior elements. Colour consultation can help you make those decisions before work starts, reducing the risk of expensive changes midway through the job.

Occupied homes and project timing

Painting an occupied home requires extra care. Furniture needs to be covered or moved, floors protected and work areas kept tidy so the household can continue functioning. A professional team will plan the job room by room where practical and keep communication clear about access, drying times and any areas that need to remain clear.

If a property is vacant, the work may be more efficient. On the other hand, a tight renovation schedule can increase pressure on trades and require more coordination with plasterers, electricians, flooring installers or cabinetmakers. Painting should happen at the right stage of the build to avoid damage to the finished surfaces.

What should a professional painting quote include?

A low figure is not always a lower-cost job. Before comparing quotes, make sure you are comparing the same scope of work. One contractor may allow for a full preparation and premium paint system, while another may be pricing only a quick repaint over existing problems.

A clear quote should set out the areas being painted, surface preparation, repair allowances, the number of coats, paint products or quality level, access requirements and any exclusions. It should also explain whether doors, trims, ceilings, eaves, fences or feature walls are included.

Ask how mould, peeling paint and damaged plaster will be handled if they are discovered during the work. These items can be difficult to assess fully until surfaces are cleaned or prepared. A good painter will explain the issue, discuss the options and seek approval before carrying out additional work.

Where it pays to invest

There are sensible ways to manage a painting budget. Keeping the existing colour scheme, painting selected rooms first and completing minor furniture removal before the team arrives can help keep costs under control. However, skipping repairs, using unsuitable paint or reducing the number of required coats often creates a false saving.

High-traffic internal walls benefit from durable, washable paint. External surfaces need a coating system that can stand up to sun and moisture. Timber elements may need regular maintenance to prevent deterioration. Spending appropriately on preparation and products can extend the time between repainting and protect the value of your property.

For homes being prepared for sale, painting the most visible areas can make a real difference. Entry spaces, living rooms, kitchens, hallways and street-facing exteriors often have the strongest impact. A colour consultation can also help choose shades that feel current and work with the home’s fixed finishes, rather than relying on a colour that looked good in another property.

Getting an accurate painting price

When requesting a quote, share the property type, the rooms or exterior areas involved, your preferred timing and any known issues such as water stains, cracking or flaking paint. Photos can provide an early indication, but an on-site inspection is the best way to assess surface condition and access.

At Jag Painting Solutions, the focus is on providing a clear scope, quality workmanship and respectful service from preparation through to the final clean-up. Whether you are refreshing one room, renovating a family home or maintaining a commercial property, a detailed quote helps you decide with confidence rather than guessing from a square-metre rate.

The right painting budget is one that allows the job to be prepared properly, completed with suitable products and finished to a standard you will be happy to live with. Arrange a free quote before setting your project budget, and you will have a clearer picture of both the cost and the result you can expect.

Categories
Uncategorized

How to Choose Interior Painters Well

A fresh interior paint job can make a home feel cleaner, brighter and far more finished – but only if the work is done properly. If you are wondering how to choose interior painters, the real question is not just who can paint a wall. It is who can prepare surfaces properly, communicate clearly, respect your home and deliver a finish that still looks good well after the job is done.

How to choose interior painters without guesswork

Most painting problems are not caused by the paint itself. They come from rushed preparation, patchy repairs, poor communication or a lack of care on site. That is why choosing on price alone can become expensive later.

A good interior painter should be able to explain their process in plain language. They should tell you what needs repairing, how they protect floors and furniture, what sort of preparation is included, how many coats are likely to be needed and what finish will suit each room. If they cannot explain the job clearly before it starts, there is a fair chance the project will be harder than it needs to be once work is underway.

This is especially important in lived-in homes, renovation projects and commercial spaces that need to stay presentable. The best contractors are not just applying paint. They are managing the condition of the surfaces, the appearance of the final result and the overall experience for the client.

Start with workmanship, not the quote total

It is natural to compare pricing first, but interior painting is one of those trades where the cheapest quote can hide the biggest compromises. One painter may include surface repairs, sanding, gap filling and proper protection. Another may quote quickly, leave preparation vague and rely on the fact that most clients do not know what has been left out.

When you compare painters, ask what is actually included. Does the quote cover plaster repairs? Are cracks, dents and flaking areas being treated properly? Will trims, doors, skirtings and ceilings be included if needed, or is it walls only? Is the paint brand and finish specified?

A lower price is not always a bad sign. A painter may run an efficient operation or have a straightforward job in front of them. But if one quote is much cheaper than the others, that usually means something has been missed, reduced or assumed.

Check how they assess the surfaces

Interior painting is only as good as the surface underneath. Walls with old patching, water marks, peeling paint, dents, settlement cracks or uneven texture need more than a quick coat rolled over the top.

When a painter inspects your property, pay attention to what they notice. Do they point out issues you had not considered? Do they discuss plaster repairs, sanding or stain blocking where needed? Do they talk about the likely result honestly, especially in older homes where perfect uniformity may require more work?

This is one of the clearest signs of experience. Skilled painters understand that preparation is where the finish is won or lost. They also know that every room is different. Bathrooms, kitchens, hallways and open-plan living areas each place different demands on paint and surface durability.

Ask about process, timing and how they work in your space

A professional result matters, but so does the way the work is carried out. Interior painting can be disruptive if it is poorly planned. That is why it helps to choose painters who are organised and respectful in occupied homes and active businesses.

Ask how they protect floors, furniture and fixtures. Ask whether they remove wall plates, patch minor damage and clean up at the end of each day. Find out how long the work is expected to take and whether the timeline allows for drying, repairs and second coats rather than just best-case conditions.

You also want to know who will actually be on site. Some businesses quote the work and then pass it to others with little supervision. That does not always lead to poor results, but it can make communication harder. A reliable painting contractor should be clear about who is responsible for the work and how updates will be handled during the project.

Reviews matter, but look for the right details

Testimonials and reviews can be useful, but not all feedback tells you much about painting quality. Look for comments about punctuality, cleanliness, surface preparation, communication and whether the finish held up over time.

If several clients mention that the team respected their home, kept the site tidy and delivered exactly what was promised, that is a strong sign. If reviews only say things like great price or nice guys, you still do not know much about the standard of work.

Repeat clients are another good signal. Homeowners, renovators and property managers tend to return to tradespeople who are consistent, easy to deal with and dependable under pressure. That kind of trust is usually earned over multiple projects, not one good day.

Make sure the quote is detailed enough to protect you

One of the simplest ways to avoid disappointment is to insist on a written quote that is specific. A vague quote leaves too much room for confusion once the job begins.

A solid painting quote should outline the areas included, the preparation allowed for, the paint system being used, the number of coats where relevant and any exclusions. If there are assumptions – such as furniture being moved before arrival or extensive wall repairs being charged separately – those should be clear from the start.

This protects both sides. You know what you are paying for, and the contractor has a clear scope of work to deliver against. It also makes comparing quotes far more meaningful because you are not judging one broad estimate against another that includes much more detail and labour.

Colour advice is more valuable than many people expect

Choosing colours can be harder than choosing a painter. Light changes throughout the day, existing flooring affects undertones and what looks warm in a sample card can feel too dark once it covers an entire wall.

That is why guidance matters. Painters who understand interior finishes can often help you avoid expensive colour mistakes, especially if your project involves multiple rooms, renovations or a full home refresh. They should be able to discuss sheen levels as well as colour itself, because the wrong finish can highlight surface imperfections or become harder to maintain in busy areas.

This does not mean the painter should pressure you into a certain style. Good advice is practical and collaborative. The aim is to help you get a result that suits the space, not just a colour that looks good in isolation.

How to choose interior painters for renovations and older homes

If your property is being renovated or has older walls and ceilings, the standard questions become even more important. Renovation work often involves trades overlapping, patched plaster, changed cornices, repaired framing or surfaces that have been painted many times before.

In those cases, painters need a sharper eye and more flexible planning. They should understand how to bring patched areas in line with surrounding surfaces and when additional preparation is worth the cost. Sometimes a premium finish requires more labour than the client first expected. A trustworthy contractor will tell you that early rather than rushing through and hoping you will not notice.

For property owners on the Gold Coast and in Tweed, humidity can also affect drying times and scheduling, particularly in occupied homes where ventilation needs to be managed carefully. Local experience helps because it shapes more realistic advice around timing, product choice and finish performance.

Watch for warning signs before you commit

You can often spot future problems well before the first drop sheet goes down. Be cautious if a painter gives a price without inspecting the work properly, avoids written detail, cannot explain preparation clearly or seems hard to reach during the quoting stage.

The early communication usually reflects the job experience to come. If getting a quote feels vague, delayed or rushed, project updates and problem-solving may be no better once work starts. On the other hand, painters who ask good questions, provide clear answers and set realistic expectations tend to run smoother jobs.

A professional contractor should also be comfortable discussing practical concerns such as access, furniture movement, repair work and finish expectations. These are not awkward questions. They are part of doing the work properly.

Choose the team you trust in your home

Interior painting is not just a visual upgrade. It is work being carried out inside your living space, around your furniture, your family or your staff. That makes trust a major part of the decision.

The right painter should give you confidence that they will turn up when they say they will, treat the property with care and stand behind the quality of the finish. Skill matters, but so does professionalism. A clean, respectful and well-managed job is often what clients remember most.

If you are comparing contractors, look beyond the sales pitch. Choose the team that communicates well, explains the process honestly and shows real pride in the details. That is usually where the best finish starts.

Categories
Uncategorized

How to Choose Exterior Paint Colours for Your Home

A fresh exterior paint job can make a well-loved home feel completely renewed, but the wrong colour can look very different once it covers every wall. Knowing how to choose exterior paint colours means looking beyond a small paint card and considering the home’s style, fixed features, natural light and local conditions.

For Gold Coast and Tweed property owners, the decision also needs to stand up to strong sun, coastal weather and the way a colour changes throughout the day. A considered colour scheme helps your home look polished now and continues to feel right years after the painters have packed up.

Start with the features you are not changing

The easiest place to begin is with the elements that will remain in place after painting. Roof tiles or Colorbond roofing, brickwork, stone, driveway pavers, timber decking, windows and guttering all influence which paint colours will work.

Look at the undertone rather than simply calling a feature grey, white or brown. A grey roof may lean blue, green or warm charcoal. Cream brick can carry yellow, pink or beige undertones. Choosing a wall colour with a conflicting undertone is one of the main reasons an exterior can feel slightly off, even when each colour looked good on its own.

If your roof is a deep charcoal, for example, soft whites, pale greys and muted greige shades often create a clean, balanced result. A warm terracotta roof may suit warmer whites, sandy neutrals, sage greens or grounded earth tones. You do not need to match every fixed material exactly. The aim is to make the colours look intentional together.

Consider the style and era of the home

Your home’s architecture should guide the direction of the palette. A modern coastal home can carry crisp whites, soft grey-green, pale stone and darker trims with confidence. Queenslanders and character homes often suit warmer heritage-inspired colours, balanced with lighter trims that bring out decorative timberwork.

For brick homes, painting can update the whole street appeal, but it is worth considering how much contrast the building can handle. A single soft neutral across the brickwork and trims can feel calm and contemporary. Strongly contrasting trim colours can highlight doors, eaves and architectural lines, though too many separate colours may make a smaller façade appear busy.

Commercial properties need the same level of care. A scheme should reflect the business while still fitting the building and its surroundings. Clean neutrals with a controlled accent colour usually present more professionally than a selection of bright shades competing for attention.

How to choose exterior paint colours in Gold Coast light

Colour samples are useful, but they are only a starting point. Bright Queensland sunlight can make colours appear lighter, sharper and more intense than they do under indoor lighting. A white that seems soft in a showroom may look stark on a north-facing wall, while a dark charcoal can appear almost black in full sun.

Always test sample pots on large sections of the actual exterior. Paint boards can help, but testing directly on the wall gives you a better view of the texture, aspect and neighbouring surfaces. Check the samples in the morning, at midday and late afternoon before making a final call.

As a general rule, choose a shade slightly softer or more muted than your first instinct. This is particularly relevant for white, black, blue and green tones. Exterior light brings out more colour than most people expect.

Dark colours have a practical trade-off as well. They can create a striking modern look and make lighter features stand out, but they absorb more heat and may show dust, salt residue or surface imperfections more readily. On broad exposed walls, lighter colours are often more forgiving and better suited to the local climate.

Build the scheme from main colour to accents

A clear exterior scheme usually has three layers: a main wall colour, a trim colour and one or two accents. The main colour covers the largest area, so it should be the most adaptable and easiest to live with. Trim colours are used on eaves, fascias, window frames or gutters, depending on the home. Accent colours add personality through the front door, shutters, feature cladding or entry details.

Start by selecting the main colour. Warm white, soft grey, stone, taupe, muted green and pale blue-grey are popular because they work with many roof and landscaping combinations. Once that is set, choose a trim colour that either blends quietly or creates deliberate definition.

A white-on-white scheme, for instance, can look refined if the wall and trim whites have compatible undertones. Pairing a warm creamy wall white with a cool blue-white trim can make both shades look dirty or mismatched. When in doubt, keep the undertones consistent.

Your front door is a good place to use a stronger colour without committing the whole house to it. Navy, deep green, charcoal, black and earthy red can all work well, depending on the home. Test this colour too, particularly if the entry is in direct sun.

Let the surroundings inform the decision

The best exterior colours do not need to copy the landscape, but they should sit comfortably within it. Coastal homes often suit colours drawn from sand, stone, weathered timber, foliage and the softer tones of the ocean. Leafy properties can handle warmer whites and natural neutrals that prevent the house from disappearing into the greenery.

Also take notice of nearby homes, especially in closely built streets, townhouse complexes or estates with design guidelines. Your property does not need to match the neighbours, but a colour that clashes heavily with the streetscape may affect its overall appeal. If you live in a body corporate property or heritage area, check any colour restrictions before buying paint.

Landscaping is part of the finished picture. A dark exterior can make pale paths and lush planting stand out, while a light façade often gives gardens and timber features more visual weight. Think about the colour of your fence, letterbox, garage door and outdoor entertaining area so the final result feels connected rather than pieced together.

Do not overlook sheen and surface preparation

Paint colour is only half the decision. Sheen level changes the way colour reads and how the surface performs. Low-sheen finishes are popular for exterior walls because they offer a subtle appearance and help disguise minor surface variation. Semi-gloss or gloss is often used for doors, trims and metalwork, where a tougher, more defined finish is wanted.

The condition of the surface matters just as much. Faded paint, chalky residue, peeling coatings, cracked render and exposed timber can all affect adhesion and the final appearance. A quality exterior job begins with thorough washing, repairs, sanding, priming where needed and careful protection of surrounding areas.

This preparation is especially important near the coast, where salt air and moisture place extra pressure on exterior coatings. Choosing a suitable premium paint system and applying it correctly gives the colour a better chance of lasting as intended.

Get confidence before committing

Exterior painting is a significant investment, and colour uncertainty is common. A professional colour consultation can save time, sample costs and the disappointment of a colour that looks wrong once it is applied across the home. An experienced painter can assess the existing surfaces, identify undertones in your roof and masonry, and suggest colours that suit the building’s aspect and condition.

It also helps to discuss practical details early, such as whether gutters will be painted, if existing window frames are included, and how feature areas will be treated. Clear decisions before work begins keep the project moving smoothly and help achieve a consistent finish.

At Jag Painting Solutions, we guide homeowners through colour choices as part of a well-planned exterior painting project, with care taken to protect the property and prepare every surface properly.

The right colour scheme should feel considered rather than risky. Take time to view samples in changing light, work with the features already on your property and choose colours you will be pleased to come home to every day.

Categories
Uncategorized

How to Choose a Painter on the Gold Coast

A paint job can look fresh on day one and still be a poor job. That usually shows up later – patchy coverage in afternoon light, cracking around repaired areas, peeling on sun-beaten walls, or edges that never looked quite straight. If you are hiring a painter on the Gold Coast, the real question is not just who can apply paint. It is who can prepare the surface properly, give sound advice, and deliver a finish that holds up.

For homeowners, renovators and business owners, that difference matters. Painting affects presentation, maintenance, value and how a space feels to live or work in. Done well, it lifts the whole property. Done poorly, it becomes another job to redo sooner than expected.

What a good painter on the Gold Coast should actually offer

A reliable painting contractor should bring more to the project than brushes and rollers. The best results come from a full-service approach that starts before the first coat goes on. That includes assessing the condition of the surfaces, identifying repairs, recommending suitable products, and setting clear expectations around timing and access.

This is especially relevant on the Gold Coast, where homes and commercial buildings deal with strong sun, moisture, salt in coastal areas, and everyday wear. Exterior surfaces can break down faster if preparation is rushed or if the wrong system is used. Interior work has its own challenges, particularly in lived-in homes where cleanliness, protection and careful scheduling make a big difference to the experience.

A capable painter should also be able to handle related finishing work where needed. Plaster repairs, patching and surface levelling are often part of achieving a clean final result. If those issues are skipped or handed off without coordination, the finish usually suffers.

Preparation is where quality starts

Most people notice the final colour, but tradespeople notice the prep. That is where the standard of the job is set. Sanding, cleaning, filling, sealing and repairing are not extras. They are part of the work.

If a wall has dents, old flaking paint, moisture marks or movement cracks, covering it with fresh paint will not solve the problem. It may improve the look briefly, but the defects tend to come back through. The same applies outside. Timber trim, render, eaves and weathered surfaces need proper attention before topcoats are applied.

There is no single formula for every property. A newer home needing a refresh will usually require a different level of prep than an older house under renovation. Commercial spaces can also vary. A shopfront repaint, for example, may need fast turnaround and careful staging, while an office interior may need after-hours work to reduce disruption.

Interior painting is about more than neat walls

Inside the home or workplace, the finish has to stand up to close inspection. People see these surfaces every day, often in changing light. That means consistency matters. So do straight lines, smooth repairs and the right sheen level for the room.

Choosing the colour is only part of the decision. The right painter should help you think through how the finish will work in the space. A bright white can feel crisp in one room and harsh in another. Darker colours can add depth, but they often show imperfections more easily if the preparation is not thorough. Low-sheen, satin and semi-gloss finishes each have practical benefits depending on traffic, moisture and the type of surface.

This is where practical colour guidance becomes valuable. Many clients know the feel they want but are less certain about undertones, light reflection or how one room should connect with the next. Good advice can prevent expensive second-guessing.

Exterior painting needs a long-term view

Exterior painting is not just about street appeal, though that matters. It is also part of protecting the building envelope. Sun exposure, rain and coastal conditions can all shorten the life of a finish if the system is not suited to the substrate and environment.

A proper exterior job should consider the age and condition of the building, the materials being painted, and how exposed each elevation is. North- and west-facing walls often take more punishment. Timber requires different treatment from rendered masonry or previously coated metal. In some cases, more extensive preparation is needed to stop deterioration from continuing under the new paint.

This is one area where the cheapest quote can become the most expensive. If prep is cut back to save time, the coating may fail early. Repainting too soon costs more than getting it done properly in the first place.

Commercial work has different pressures

For business owners and property managers, painting is often tied to image, tenancy, maintenance schedules and downtime. A contractor working on a commercial site needs to understand that the finish matters, but so does the process.

Clear communication is essential. Start dates, staging, site access, protection of surrounding areas and daily clean-up all affect how smoothly the job runs. In active workplaces, flexibility can matter just as much as technical skill. Some projects need to be completed in sections. Others need work outside trading hours.

There is also less room for surprises. A professional painting team should be able to assess likely issues early and explain any limitations before the job starts. That helps owners make decisions with confidence and keeps the project moving.

Signs you are dealing with the right team

Trust is built in the smaller details. A quality contractor usually asks the right questions before quoting. They want to know the condition of the surfaces, what outcome you are after, whether there are repairs involved, and how the space is used. That tells you they are thinking beyond square metres.

It also shows in how they treat your property. Homes should be protected properly. Furniture, floors and fixtures should be covered where required, and the site should be left tidy at the end of the day. For many clients, this is not a bonus. It is part of professional service.

You should also expect straightforward communication. That means realistic timeframes, clear scope, and honest advice if something needs more work than first expected. Not every issue can be predicted before work begins, particularly in older properties, but it should never feel like you are being kept in the dark.

Why quotes can vary so much

It is common to receive different prices for what sounds like the same painting job. Usually, the gap comes down to scope, preparation, product quality and labour time.

One quote may include plaster repairs, thorough sanding, premium coatings and careful protection of the site. Another may cover only basic application over existing surfaces. On paper they can look similar, but the finished result and lifespan may be very different.

That does not mean the highest quote is always the right one. It does mean you should understand exactly what is included. Ask whether surface repairs are part of the price, how many coats are planned, what products are being used, and whether clean-up and protection are covered. A good contractor will explain this clearly.

Choosing a painter on the Gold Coast with confidence

If you are comparing providers, it helps to focus on workmanship, communication and care rather than price alone. Look for a team that can manage both the visible finish and the less visible parts of the job – preparation, repairs, product selection and project coordination.

For many clients, the best experience comes from working with painters who understand the whole finishing process. That might include interior and exterior painting, plastering, and support with colour decisions so the result feels considered rather than rushed. A business like Jag Painting Solutions is built around that kind of service, where quality work and respectful treatment of the property go together.

The right painter should leave you feeling certain about what is happening, how the work will be carried out, and what standard you can expect at the end. That confidence matters just as much as the paint itself.

A well-finished space changes how a property looks, but it also changes how it feels to own, manage or walk into each day. If you are planning to repaint, choose the team that takes the time to get the surface, the process and the finish right from the start.

Categories
Uncategorized

How to Prepare Home for Painters Properly

When painters arrive at a home that is clear, accessible and ready to go, the job usually runs faster, cleaner and with fewer interruptions. If you are wondering how to prepare home for painters, the good news is that a bit of planning before the first drop sheet goes down can make a real difference to both the finish and the overall experience.

Good preparation is not about doing the painter’s job for them. A professional team should still handle surface preparation, patching, sanding, masking and protecting work areas as part of the service. What matters on your side is making the space easy to access, protecting the things that are personal or fragile, and removing avoidable delays.

How to prepare home for painters before work starts

The best place to begin is with the rooms being painted. Furniture should be moved out where possible. If larger pieces cannot leave the room, shift them into the centre with enough space around the walls for ladders, sanding tools and safe movement. This gives painters room to work properly and reduces the risk of accidental bumps or dust settling into upholstered items.

Wall décor should also come down before the team arrives. Remove artwork, mirrors, clocks, shelves and anything else fixed to the wall unless you have agreed otherwise with your painter. It is also worth taking down curtain rods, hooks and lightweight fittings if they sit in the immediate work zone. Even when trades are careful, the less clutter on the walls, the smoother the job tends to be.

Smaller items matter too. Clear bedside tables, bookshelves, benchtops and console tables. Lamps, photo frames, plants and breakables are easy to overlook, but they create extra handling and can be damaged if they are left in busy work areas. Pack them away in a spare room, garage or another part of the property that will not be affected.

Protecting floors, valuables and everyday items

Professional painters will normally use drop sheets and protective coverings, but homeowners should still think about what is especially valuable or difficult to replace. If a rug is delicate, roll it up and store it elsewhere. If a room contains electronics, paperwork or sentimental items, move them before work begins rather than trusting that they will stay dust-free in place.

Paint preparation can involve sanding, scraping and patching, and that creates fine dust even with careful containment. Clothes in open wardrobes, pantry items on exposed shelving and toiletries in open bathroom storage can all collect dust if they are left uncovered. In some rooms, simply closing cupboard doors is enough. In others, especially during larger interior works, it is better to remove the contents or cover them.

Flooring needs a practical approach. Timber, tile and vinyl can usually be protected effectively by the painting team, but loose items on the floor should be removed first. That includes floor lamps, baskets, pet beds, children’s toys and anything else that creates obstacles. A clear floor is safer for everyone and helps the painters work efficiently from start to finish.

What to do with walls, nails and damaged surfaces

One question comes up often when discussing how to prepare home for painters: should you remove nails, screws and wall anchors yourself? In most cases, yes, if you no longer need them. Take out what you can and let the painter know which fittings must go back into the same spots later. If there are picture hooks or mounting points you want to keep, mention that before the quote or before work starts.

It is usually best not to start patching holes yourself unless you are confident in the result. DIY filling often looks fine before paint goes on, but once the light hits the finished wall, uneven sanding or shrinkage becomes obvious. A professional painter or plasterer can prepare those areas so the repairs blend properly with the surrounding surface.

If you have noticed peeling paint, water stains, cracks or mould, raise it early. These issues can affect the scope of work and sometimes point to a bigger problem beneath the surface. Water damage, for example, may need to dry fully or be repaired before painting. The earlier these details are discussed, the less chance there is of delays once the project has started.

Access matters more than people expect

A quality finish depends on workmanship, but it also depends on practical access. Make sure painters can get to the property easily, know where to park, and can move tools and materials in without difficulty. For exterior projects, unlock side gates and clear pathways around the house. Trim back plants where needed if they are pressing hard against walls, eaves or fences.

Inside the home, think about which areas need to stay open. If the team is painting hallways, stairwells or entry points, discuss how people will move through the house during the day. In some homes, families can remain in place with only minor adjustments. In others, especially with large interior jobs, it may be easier to stay elsewhere for part of the work. It depends on the scope, the drying times and how comfortable you are with limited room access.

Pets should be planned for as well. Even calm animals can become stressed around strangers, ladders and open doors. Keeping pets in a secure, separate area helps avoid escapes and interruptions. It also makes the site safer for the painting crew.

Cleaning and communication before the first day

Your home does not need to be spotless before painters arrive, but it should be reasonably tidy. Excess dust, grease and general clutter can slow down setup and make surface preparation harder in kitchens, bathrooms and high-use living areas. A basic clean is usually enough, particularly on surfaces near the work zone.

It also helps to confirm practical details in advance. Check which rooms are included, whether ceilings, trims, doors or walls are part of the scope, and if any plaster repairs are scheduled. If colour consultation has been part of the service, make sure final colour choices are locked in before the start date. Last-minute changes can affect timing, product ordering and the flow of the job.

This is also the time to mention anything the crew should know about the property. New flooring, freshly renovated bathrooms, alarm systems, difficult access points or areas that need extra care should be pointed out early. A dependable painting team will appreciate clear communication because it helps them protect the home properly and deliver the right result.

Preparing kitchens, bathrooms and exterior areas

Some parts of the home need a little extra attention. In kitchens, clear benchtops and remove small appliances so there is space to work around splashbacks, walls and trims. In bathrooms, put away toiletries, towels and bath mats. These spaces are often compact, so even a few everyday items can get in the way quickly.

For exterior painting, preparation often extends beyond the walls themselves. Move outdoor furniture, potted plants, barbecues and vehicles away from the immediate work area. If painters need access to garages, driveways or side paths, keep them clear. On the Gold Coast and in Tweed, weather can also affect exterior schedules, so some flexibility may be needed if rain or humidity delays progress.

If you live in a unit or managed property, check whether building access, parking or notice requirements apply. A little admin upfront can prevent frustration on the day.

What not to worry about

Homeowners sometimes feel they need to tape edges, cover everything in plastic or wash every wall before the painter arrives. In most cases, that is unnecessary. A professional crew should take care of masking, covering surfaces and preparing walls correctly as part of the job. Over-preparing can waste your time and occasionally create more work if coverings need to be redone.

The goal is not perfection before the painters begin. The goal is a home that is ready for skilled tradesmen to do their work safely, efficiently and with proper attention to detail. That means clear rooms, easy access, good communication and sensible protection for your belongings.

If you are not sure what to move or what to leave, ask before the start date. A good painting contractor will tell you exactly what helps and what they will handle themselves. That kind of clarity makes the project easier for everyone and usually leads to a better result on the walls.

A well-prepared home sets the tone for the whole job. When the space is ready and expectations are clear, painters can focus on what matters most – delivering a clean, lasting finish that looks right and feels worth the investment.

Categories
Uncategorized

Residential Versus Commercial Painting

A fresh coat of paint can make two properties look equally sharp, but the work behind them can be completely different. Residential versus commercial painting is not just about whether the job is on a house or a business premises. It affects planning, product choice, site access, scheduling, safety requirements and the level of coordination needed to get the result right.

If you are comparing quotes or planning a project, understanding those differences helps you ask better questions and choose the right team for the work. It can also save you from delays, cost surprises and a finish that does not suit the space.

What residential versus commercial painting really means

Residential painting covers homes, townhouses, units and other living spaces. The focus is usually on presentation, comfort and long-term wear in day-to-day family life. That might mean repainting interiors, refreshing exteriors, repairing plaster before painting or getting support with colour selection so the final look suits the home.

Commercial painting applies to offices, retail spaces, strata common areas, hospitality venues, warehouses and other business or public-use properties. In these settings, the work often has to fit around staff, customers, tenants or operational hours. The appearance matters, but so does minimising disruption and meeting practical site requirements.

On the surface, both involve preparation, painting and finishing. In practice, the demands are often very different.

The biggest differences between home and business projects

The main difference is scale, but scale is only part of the picture. A residential project is often more personal. Homeowners are thinking about how rooms feel, how colours change with natural light and whether trades will treat the property with care. Communication matters because people are living in the space and want to know what is happening each day.

A commercial project tends to be more operational. Business owners and property managers are looking at timelines, access windows, safety controls, durability and whether the site can keep functioning during the works. They may also need a painter who can coordinate with other trades, building managers or fit-out schedules.

That means the same painting skill set is not enough on its own. The job also calls for the right systems, planning and site approach.

Surface preparation is rarely identical

In homes, preparation often involves patching dents, sanding trim, fixing minor plaster issues and protecting furniture, flooring and personal items. The goal is a clean, polished finish that holds up under everyday use.

In commercial settings, preparation may be more varied. There can be larger wall areas, higher traffic damage, grease or grime build-up, older coatings, access equipment and stricter site conditions. A warehouse wall, retail tenancy and office reception all need different preparation methods if the finish is going to last.

This is where experience matters. Good painting is never just about applying paint. The result depends on how well the surface has been repaired, cleaned and primed before the first top coat goes on.

Product selection changes with the environment

A family home and a busy commercial site do not wear paint in the same way. In residential interiors, clients often want low-odour products, washable finishes and colours that suit the style of the home. Bedrooms, living areas, kitchens and exteriors all have different performance needs.

Commercial properties usually need coatings chosen for durability first. High-traffic walls, shared amenities, shopfronts and workspaces may call for harder-wearing finishes that can handle repeated cleaning and general wear. In some settings, low-sheen may be preferred for a refined look, while in others a more practical finish makes better sense.

There is no single best product for every project. The right choice depends on how the space is used, how often it is cleaned and what sort of appearance the property needs to present.

Scheduling is one of the biggest practical differences

In most homes, painters can work during standard daytime hours as long as the occupants know what to expect. There may be some room-by-room planning to keep the household functioning, especially during interior work, but the site is usually more straightforward to access.

Commercial painting often works to tighter constraints. Some jobs need to happen after hours, on weekends or in stages so the business can keep operating. An office may need minimal interruption during work hours. A retail shop may only allow access outside trading times. A strata property may need notice periods and coordination with residents.

This can affect cost, timeframe and labour planning. It is one of the clearest examples of why residential versus commercial painting should not be treated as interchangeable when comparing quotes.

Safety, compliance and access can add complexity

Home projects still require safe, careful work practices, especially for exterior painting or multi-level homes. But commercial sites often involve another layer of complexity. There may be formal site inductions, access rules, height equipment, restricted areas or other contractors working nearby.

That does not mean commercial work is always more difficult. Some office interiors are quite straightforward. But it does mean commercial painters need to be comfortable operating within site procedures and keeping the project organised from start to finish.

For property owners, this is worth checking early. A painter may be excellent in homes but not set up for larger or more regulated sites. The reverse can also be true. A team used to broad commercial work may not always bring the same level of detail and care expected inside an occupied home.

Expectations around finish are different, but quality still matters

Residential clients are usually highly focused on detail. They notice cut-in lines, surface smoothness, patched areas, sheen consistency and how colours sit across connected spaces. That is fair enough. In a home, you live with the result every day.

Commercial clients also expect a professional finish, but they may prioritise performance and presentation in a different way. A reception area, showroom or medical suite may require a very polished appearance. A back-of-house area may be more focused on durability and clean coverage than decorative detail.

The point is not that one matters more than the other. It is that quality looks slightly different depending on the setting and purpose of the space.

Cost differences are not always as simple as size

People often assume commercial painting will always cost more because the buildings are bigger. Sometimes that is true, but not always. A compact commercial job with difficult access, staged work and after-hours scheduling can be more complex than a larger residential repaint.

Likewise, a detailed home interior with premium finishes, extensive preparation and careful protection of furnishings may take more labour than expected. Cost usually comes down to the combination of surface condition, access, product selection, timeframe and the amount of coordination required.

That is why clear quoting matters. A proper quote should reflect the actual needs of the project, not just the square metres on paper.

How to choose the right painter for the job

The best painter for your project is not simply the cheapest or the one who can start first. You want someone whose experience matches the type of property, whose preparation standards are clear and whose communication gives you confidence from the start.

For a home, look for a team that respects the space, explains the process properly and can offer practical guidance on finishes and colour choices. For a commercial property, look for a contractor who understands scheduling, site management and how to keep the work moving with minimal disruption.

If your project includes repairs, plastering or advice on presentation, it also helps to work with a team that can manage more than just paint application. That tends to make the process smoother and the final result more consistent.

When the line between residential and commercial starts to blur

Some projects sit in the middle. Strata complexes, home offices, mixed-use properties and renovated investment properties do not always fit neatly into one category. In these cases, the right approach depends on how the space is used, who needs access and what standard of finish is expected.

A good contractor will not force the project into a standard template. They will assess the site, ask the right questions and tailor the work plan to suit the property. That practical approach is often what keeps a straightforward job from becoming a stressful one.

For property owners on the Gold Coast and in Tweed, that local understanding can be especially helpful when exterior conditions, access and project timing all play a part.

Choosing between residential and commercial painting is really about choosing the right method for the building in front of you. When the planning, preparation and finish all match the space, the result lasts longer and feels right from day one.

Categories
Uncategorized

Best Paint Colours for Small Rooms

A small room can feel cramped for reasons that have nothing to do with floor area. Low natural light, heavy colour choices, patchy plaster, and the wrong finish can all make a compact space feel tighter than it is. That is why choosing the best paint colours for small rooms is less about following a trend and more about understanding how light, undertone and surface quality work together.

For most homes, the goal is not to make a small room look stark or washed out. It is to make it feel open, balanced and comfortable to spend time in. The best result usually comes from colours that reflect light well, sit calmly on the walls, and suit the room’s orientation, flooring and furnishings.

What actually makes a small room feel bigger?

Paint cannot change the room’s size, but it can change the way the eye reads the space. Lighter colours tend to bounce more light around the room, which softens shadow lines and helps walls feel less close in. Mid-tones can also work well when they are warm or muted enough to avoid creating visual heaviness.

Contrast plays a big part too. If the walls, trims and ceiling are all sharply different, the edges of the room stand out more. In some spaces that is a good design choice, but in small rooms it can emphasise every boundary. Keeping the palette close in tone often creates a gentler, more spacious feel.

Surface condition matters as much as colour. Uneven walls, dents and poor patching show up more under certain paints, especially when light hits them side-on. A well-prepared surface gives soft colours a cleaner, more expansive look.

Best paint colours for small rooms by colour family

There is no single best shade for every home, but some colour families are consistently reliable in smaller spaces.

Soft whites

Soft whites are a common choice for good reason. They reflect light, feel fresh and suit almost any interior style. The key is choosing a white with the right undertone. A bright, cool white can feel crisp in a well-lit room, but in a darker space it may come across as flat or clinical. A softer white with a warm or neutral base usually feels more comfortable and forgiving.

This is often the safest option for hallways, smaller bedrooms, laundries and compact living areas where you want the room to feel clean and open without being harsh.

Warm neutrals

Warm neutrals such as light greige, soft beige and muted stone colours can be excellent in small rooms. They add more depth than white, but still keep the room airy. They also tend to work well with timber flooring, natural fibres and warmer lighting.

If a room gets limited daylight, warm neutrals can stop it from feeling cold. That said, too much brown or yellow in the undertone can make the space look dated, so balance is important.

Pale grey-greens and sage tones

For homeowners who want a bit more personality, pale grey-greens and soft sage shades can work beautifully. These colours feel calm and easy on the eye, and they can make a room feel settled rather than boxed in. In bedrooms, studies and powder rooms, they often create a more considered finish than plain white.

The trade-off is that green-based shades are more sensitive to lighting changes. What looks soft and subtle during the day can appear dull in the evening if the room has poor artificial lighting.

Light blue-greys

Light blue-greys can make small rooms feel fresh and relaxed, especially in coastal-style homes or bathrooms. Used carefully, they bring a sense of airiness without overpowering the room. In the Gold Coast climate, these cooler tones can feel particularly comfortable in homes that get strong sun for part of the day.

The risk is choosing a shade that turns too cold. In south-facing rooms or darker corners, that can leave the space feeling less inviting.

When darker colours can still work

Not every small room needs to be painted light. In some cases, a deeper shade can make a room feel more intentional and less awkward. This tends to work best in powder rooms, media rooms, guest bedrooms or studies where a cosy feel is part of the brief.

The trick is to commit to the look rather than fighting it. A charcoal-green, deep blue-grey or warm moody neutral can make the walls visually recede when paired with the right lighting and trim treatment. If the room has strong architectural features, darker colours can also add character.

Still, darker paint is less forgiving. It shows plaster imperfections more readily, can absorb light quickly, and needs careful preparation to achieve an even finish. If the aim is to make a room feel larger rather than dramatic, lighter colours are usually the better choice.

The role of natural light and room direction

A colour card never tells the full story. The same paint can look completely different from one room to the next.

North-facing rooms usually handle cooler whites and greys better because they receive steadier natural light. South-facing rooms often benefit from warmer tones that stop the space feeling dull. East-facing rooms can look bright and fresh in the morning, then flatter and cooler later on. West-facing rooms tend to pick up warmer afternoon light, which can intensify creamy or beige undertones.

That is why sample testing matters. Paint a decent-sized section on more than one wall and look at it across the day. A colour that looks right at 10 am might not feel right by evening under warm interior lighting.

Don’t overlook ceiling, trim and finish

Choosing the best paint colours for small rooms is not just about the walls. The ceiling colour, trim colour and paint finish all affect how spacious the room feels.

A lighter ceiling generally helps lift the room. In most homes, keeping the ceiling white or close to white makes sense, particularly where ceiling height is limited. Painting the ceiling and walls in similar tones can also soften the room’s edges.

Trim is more flexible than many people think. Crisp white trim can look neat and classic, but high contrast can make a small room feel more segmented. Using a trim colour closer to the wall colour often creates a smoother, less interrupted look.

Finish matters for practical reasons as well as appearance. Flat or low-sheen paints usually minimise surface imperfections on walls, while semi-gloss or gloss finishes reflect more light but show more flaws. In a small room with less-than-perfect walls, a softer finish is often the smarter choice.

Common mistakes in small rooms

One of the most common mistakes is assuming pure white is always best. It can work, but it is not automatic. In the wrong setting, it can make the room feel cold and unfinished.

Another mistake is choosing paint before considering flooring, cabinetry, tiles and furniture. Small rooms do not have much space to absorb clashing undertones. If the walls lean pink and the flooring leans yellow or grey, the mismatch is usually obvious.

People also underestimate the impact of poor preparation. Cracks, sanding marks and uneven patching can ruin the effect of even the best colour choice. In compact rooms, where walls are close and often viewed from multiple angles, finish quality matters even more.

How to choose the right colour with confidence

Start with the room’s purpose. A small bedroom should feel restful. A home office may need a bit more definition. A bathroom often benefits from cleaner, fresher tones. Once you know how you want the room to feel, narrow your options to two or three colour families.

Next, assess the light honestly. Do not rely on how the room looks on a bright day alone. Consider evening use, lamp light and shadowed corners. Then test your samples on the walls, not just on a loose card.

Finally, think beyond colour charts. The right paint colour can only do its job if the surfaces are sound and the finish is applied properly. That is often where professional advice helps most – not just in choosing a nice shade, but in making sure the final result feels polished and consistent.

For homeowners planning an update, a good painter should be able to guide colour selection, explain what will suit the room, and prepare the surfaces properly before the first coat goes on. That combination makes a real difference in smaller spaces, where every detail is easier to notice.

A small room does not need tricks or trendy colours to work well. It needs a paint choice that suits the light, respects the scale of the room, and is finished with care. Get that right, and even the most compact space can feel settled, brighter and far more usable.